All webmasters should be using Google Search Console (GSC). This free tool monitors the health and performance of your website in Google’s search engine rankings.
The information provided by Search Console makes SEO easier. You don’t have to manually search to figure out your placement in the SERPs to identify opportunities to make improvements to specific pages on your site. This data is given to you in an easy to understand way, so you can focus on improving pages that are very close to a top 10 ranking.
This training course will teach you how to set up this service on your website and how to use it to optimize for better rankings.
- What is Google Search Console?
- Google Webmaster Tools
- Setting Up Google Search Console
- Speed up Page Indexing
- Add a Sitemap
- Link Google Analytics Account
- Search Console Insights
- Google Search Performance
- Indexed Pages Overview
- Experience Overview
- Page Experience
- Core Web Vitals
- Mobile Usability
- Enhancements Overview
- Transfer Search Rankings to New Domain
- Internal & External Links
- Search Console Tools
- Conclusion & Next Steps
What is Google Search Console?
Google has made it easy for webmasters to track listings on their search engine with their free tool, Google Search Console.
This service lets you see how Google views your site including which pages are indexed and performance from search listings. Any website that wants to get targeted traffic from search engines will need to pay attention to this information to get the best results.
Google Webmaster Tools
Before Search Console existed, there was a previous service called Google Webmaster Tools. It’s likely you’ll see this phrase mentioned on other websites, especially those containing outdated info.
Don’t get confused if you can’t find this webmaster console – it doesn’t exist anymore. Google Webmasters Central is now Search Console.
Setting Up Google Search Console
You’ll want to set up Search Console as early as possible for a new domain name. It will take a few days for initial data to be displayed after you add a new website, and it can take 90 days or more until you see complete data and have full access to all tools.
To get started with setting up your account, you need to add a property. The link for it is found in the drop-down box at the top-left of the site (when you already have properties setup).
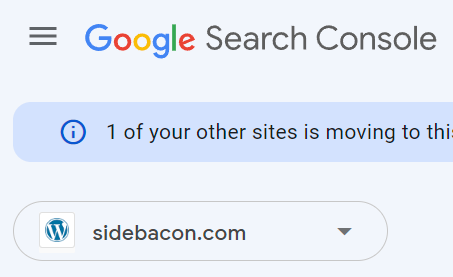
Click the Add Property link to begin the installation process:

You’ll be offered a choice between setting up a domain property or a URL prefix. If you own the domain name, you should use the domain option. The URL option is intended for use when you’re only operating on a sub-domain or a directory of a site that you don’t own (some third-party blogging sites, for example, will allow this). I’m going to walk you through the domain verification process in this guide. Enter your domain name into the box and click the Continue button to proceed.

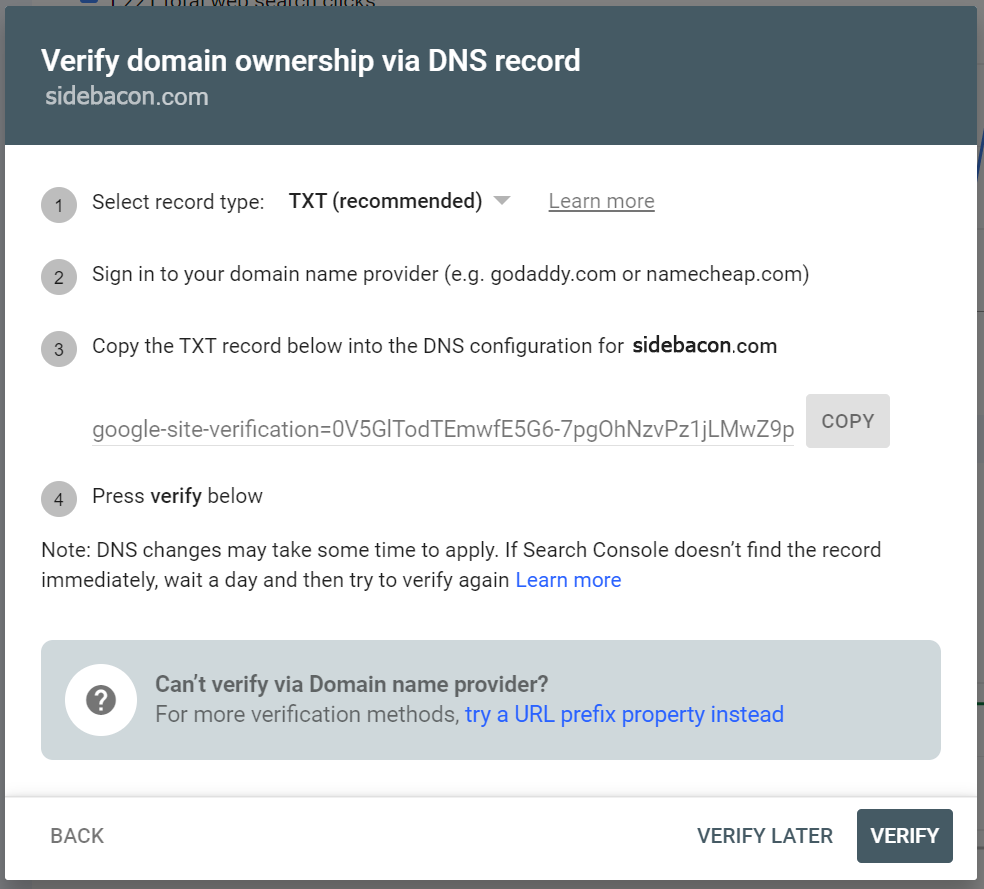
Once you’ve provided your domain name, you’ll need to update DNS records for your domain to verify it. This step can vary depending on the configuration of your site – it depends on where your DNS records are managed. Sometimes this will be through your domain registrar, but it could also be through your Cloudflare account or your web hosting account. Step #3 in the picture below is important part. Click the COPY button for the DNS record here.
If you’re using Cloudflare, your DNS records will be managed there. Without Cloudflare, your DNS records could be managed by your registrar or your hosting account. I’m going to walk you through the process for setting it up using cPanel, something that is common in hosting accounts. The process is very similar no matter where your DNS records are managed (it just may look different from what you see below).
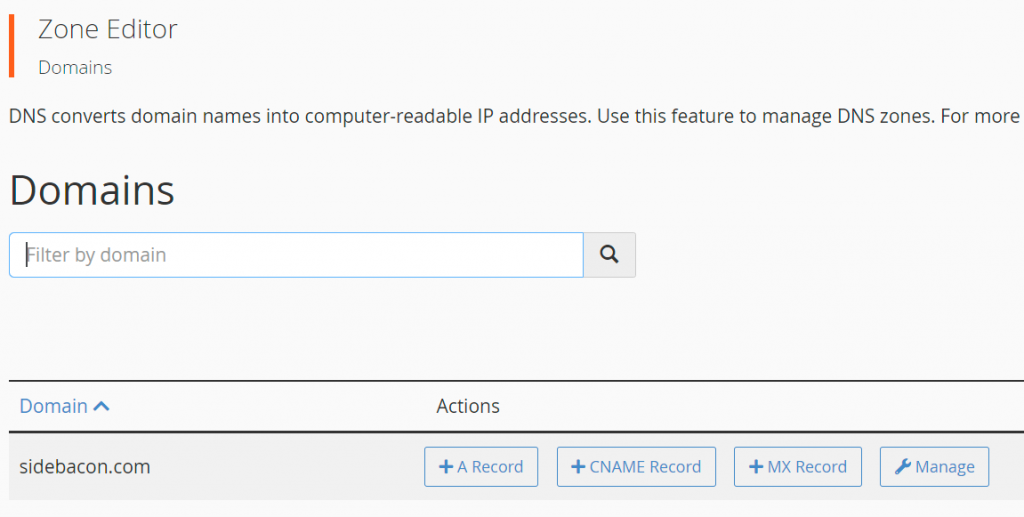
In cPanel, you want to look for the Zone Editor page. Find your domain on this page and click the Manage button.
Now look for the + Add Record button on the right side of the page and click it to start a new DNS record.

You need to provide info for three of the values seen in the picture below – Name, Type and Record. In the Name field, enter your domain name (a period should get added to the end of the domain automatically, as seen below). For the Type drop-down box, select TXT. In the Record field, paste the verification string that Search Console provided. Click Save Record when you’re finished.

Now go back to GSC and click the Verify button. Sometimes you’ll need to wait a few minutes for your changes to get picked up. If it fails to verify after 15 minutes or so, you’ve likely updated your DNS records in the wrong place (if the record was input correctly). When in doubt, you can update DNS records anywhere that you have available to you – domain registrar account, web hosting account and/or Cloudflare. Only one of them is going to work, so it won’t matter if you input them in all of these places to make verification easier if you don’t know where your records are managed.
Speed up Page Indexing
When you have a well-established website with quality content that makes regular updates, Google is usually pretty good about quickly crawling and indexing new pages that you publish. There is no way to control crawl rates, but there is something you can do to speed up indexing of new pages, especially with a new site.
At the top of Search Console to the right of the logo, you’ll see a search box that says “Inspect any URL..“. I’ll usually use this tool immediately after I publish a new post on a new website. Once a site is 60-90 days old, it may not be necessary to do this anymore, but it can drastically boost the index speed until that time. Enter the full URL of a page you want indexed into this search box.

The results will tell you whether the page has been indexed or crawled already. Click on the Request Indexing link on the right to get Google to index the page.
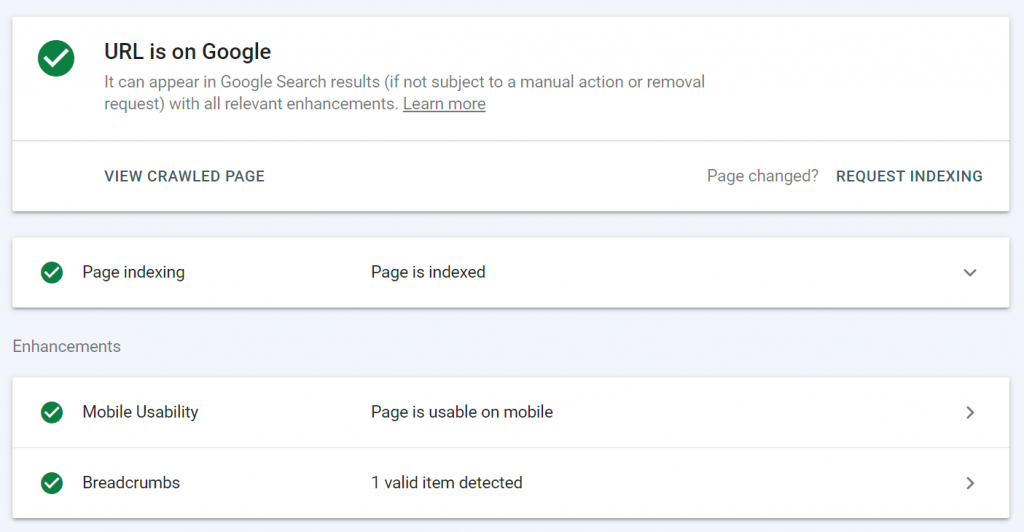
As long as there isn’t an error that prevents Google from indexing or a content quality issue, this should result in the page getting indexed (often within an hour or two).
I also find this URL inspection tool helpful for important content updates. Google automatically chooses the rate to crawl your existing pages to look for content changes. When you publish an update to an existing page that you want indexed as quickly as possible, you can inspect the URL here and click the Request Indexing link again. It doesn’t matter that the page is already indexed when you do this step. It will get crawled again and updates will get logged with this strategy.
Add a Sitemap
This step requires you to submit an XML Sitemap. It’s easy to create one if your site is using WordPress. I use the Allinone SEO WordPress plugin that generates the XML sitemap that I’ve used for this example. Install and activate that plugin or another in WordPress to automatically create your Sitemap. This strategy also keeps the sitemap updated when you make changes to pages, so Google gets notified when you do anything to your website this way.
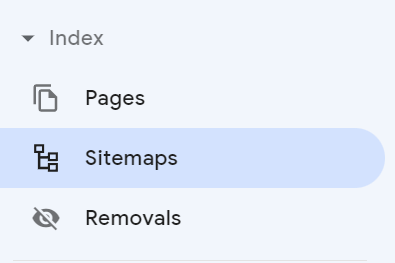
You don’t have to manually request indexing for new pages or updated content forever. I simply find it useful for a new site and sometimes a big content update on an existing page. You should really provide a Sitemap to GSC so it can automatically detect when you publish new pages or update content. Look for the Sitemaps menu link on the left.
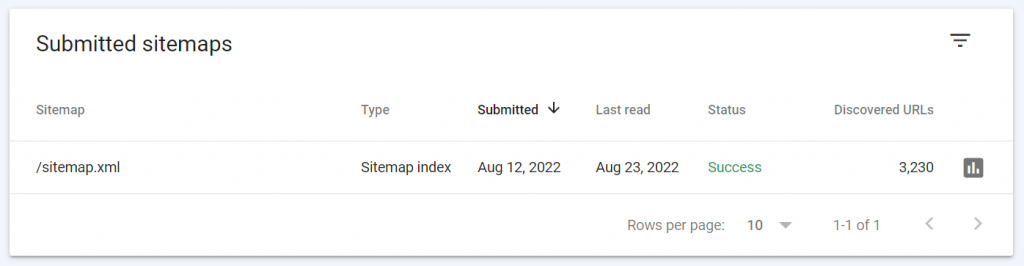
Enter the full URL to your XML Sitemap file and click the Submit button to save it.

After you’ve provided your Sitemap URL, you can return to this page in the future to make sure it’s working correctly. The Discovered URLs column should increase automatically over time – these are the pages Google has discovered for your site using the Sitemap. You can click it to see more information about which URLs have been indexed.
This is a crucial step for all webmasters, so don’t skip adding your sitemap. It helps new pages get discovered quickly and also ensures that updated content gets indexed again. Without it, Google will have to depend on manually crawling links on your site to find pages and that causes pages to get missed or delayed for indexing.
Link Google Analytics Account
This next step is technically optional but highly recommended. By itself, Search Console will not actually show you all of the data that you’ll see in the next section of this tutorial guide (or Search Console Insights data). You need to use Google Analytics on your website and link Search Console with Analytics. I’m going to show you where to go in GSC to link these accounts. First click on Settings in the menu on the left.
The third setting here is for Associations. This is where you link Analytics. Click this setting to open a new window.
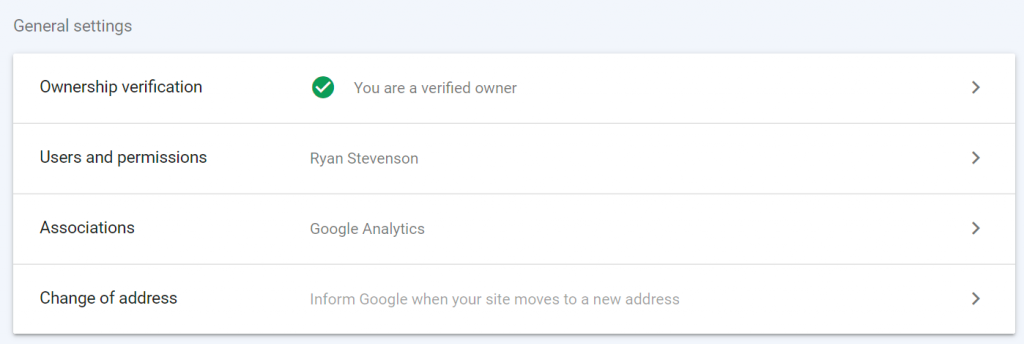
On this page, associate Search Console to Google Analytics. You should be using the new GA4 but UA (Universal Analytics) accounts are still supported for now. If you’ve just set up a new Analytics account, you likely have a GA4 account. When you accounts are correctly linked you should see a page similar to the one below in GSC for the Associations setting.
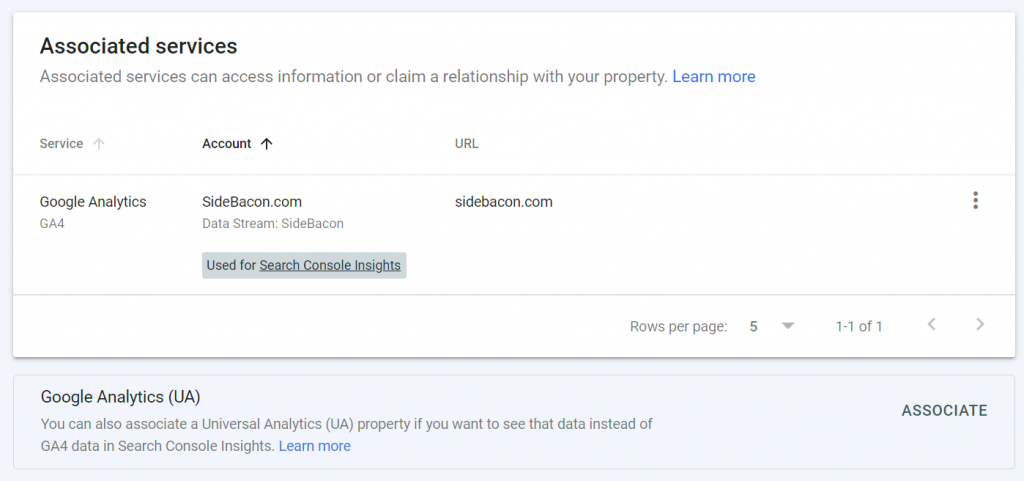
Once you have these accounts linked, it will take at least a few days until you start to see data in GSC. It could take even longer if you don’t have any search rankings yet. Be patient if you have a new website but check back once a week to see your progress.
Search Console Insights
At the top of the main page in GSC you will see a skinny bar like the one below (when you’ve linked Analytics). Click on the Search Console Insights link on the right to see a variety of useful information about your website traffic.

All of the statistics shown here can be found in Analytics and Search Console, but Insights displays it in a unique and useful way.
Just some of the stats you’ll quickly find using Insights..
- All-Time Website Page View Count
- Page View Count & Engagement Time for Last 28 Days
- Performance of New Content Published in Past 28 Days
- Most Popular Content Performance for Past 28 Days
- How People Find Your Website
- How People Find Your Site on Google
- Backlinks From Other Websites
Google Search Performance
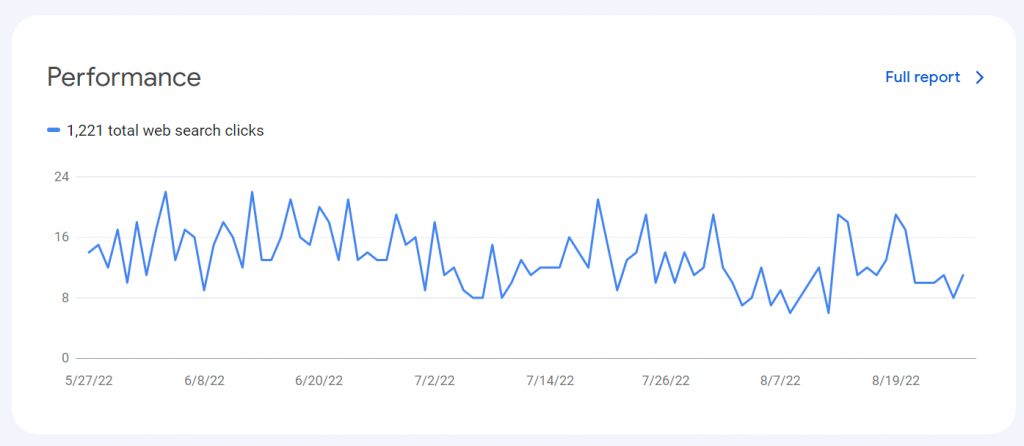
Back on Google Search Console, you’ll see a Performance graph at the top of the main page. This chart quickly shows you how many clicks your site has received from Google search listings in the last 90 days. You can click on the Full Report link in the top-right of this graph or the Performance link in the main menu on the left to take a closer look at your performance on Google. There are number of reasons why you should look at the full report on a regular basis. You can discover opportunities here to easily get more traffic. This initial graph may not actually show you all of the clicks sent by Google either.
Google will usually update this data once a day to provide new traffic info. However, there doesn’t seem to be a set time of the day when it’s updated. Sometimes multiple days will pass without an update, so don’t get worried if your info is delayed at times. It’s completely normal.
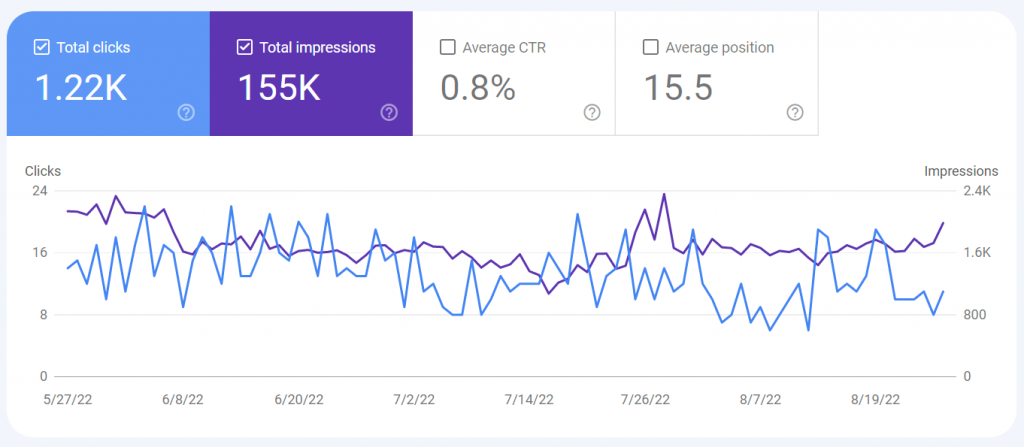
The default view will show you the total number of impressions and clicks from your web search listings over the past 90 days. There are two other metrics that can be viewed here – Average CTR and Average position. Click on these additional boxes to select them and display their data on the chart. I personally like to use the Average position stat to find easy traffic opportunities.
The most useful info here is found below the graph. Be sure to look at the data in each of the tabs: Queries, Pages, Countries, Devices, Search Appearance & Dates. You can also click on lines of data in the table to see more info or drill-down the results more. For example, on the Pages tab, clicking on one of the pages in the list will change the graph to show impressions and clicks from only that page. You can then navigate to another tab, such as Queries, to see only the search rankings and keywords for that page.
I highly recommend using the Average position metric when you’re browsing this data (click the average position box at the top-right of the graph). I want to describe an excellent SEO strategy using this info.
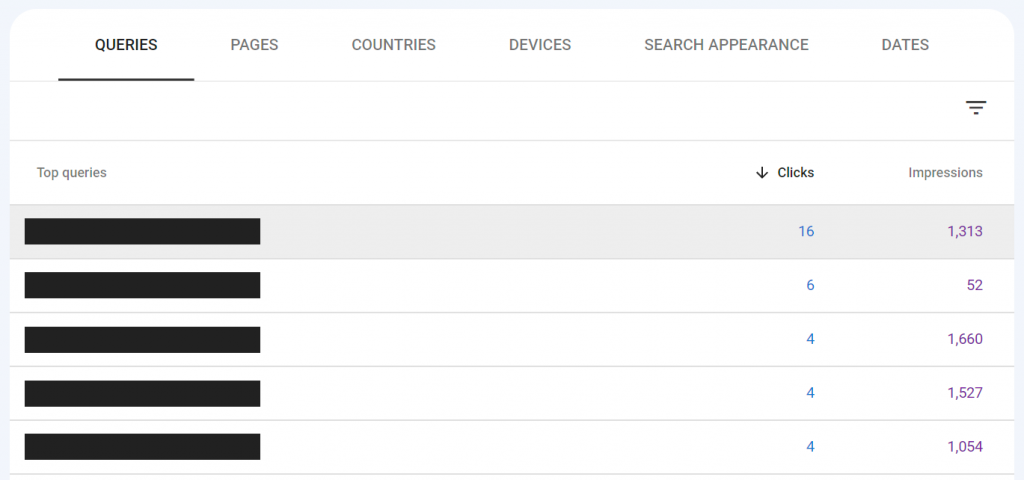
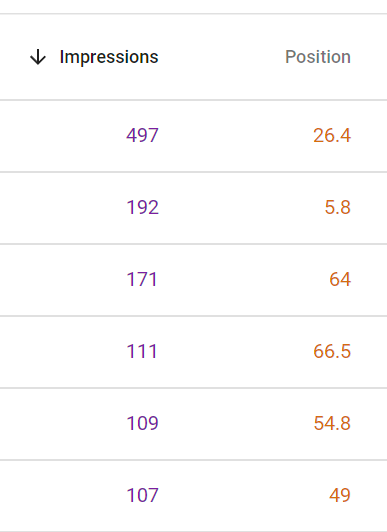
Using the Queries tab to see keyword phrases, sort the list by Impressions to see the keywords with the most impressions at the top. Now look at the Position column. I’ve shown an example of this below.
I’m looking for keywords that have received a lot of Impressions but have a Position greater than 10. The Position is your average search ranking for this term. Top 10 is the first page of results, which gets the most traffic and clicks. If you’re close to being on the first page and you’re already receiving a lot of impressions, it could be worth your efforts to add more content to the page and/or try to build some high-quality backlinks from relational websites.
Take a look at my example data in the picture below. Most of these keywords could get more exposure if the pages ranked a bit higher. The top one on the list has received a lot of impressions but it’s only ranked on page #3 in the SERPs – roughly in the middle of page 3. If I could boost that ranking a bit and get it to page 2, it would receive a lot more impressions. A top 10 or even a #1 ranking for this phrase would bring a lot of traffic. Adding more content could possibly boost that ranking with fairly minimal effort. You can use this strategy to carefully select pages on your site to update with the goal of improving your search position.
I want to point out one particular tab here: Search Appearance. Certain types of websites will have different kinds of pages on their site that could bring traffic from different areas of Google Search. The picture below shows one of my eCommerce websites. This site has normal pages showing up in Google Search results, but it also has Product pages that show up in Google Product Search. This tells me the performance of those Product results. I can click on Product results in this table to drill-down the results to only these searches – the Queries and Pages tabs will then give data specific to product listings.

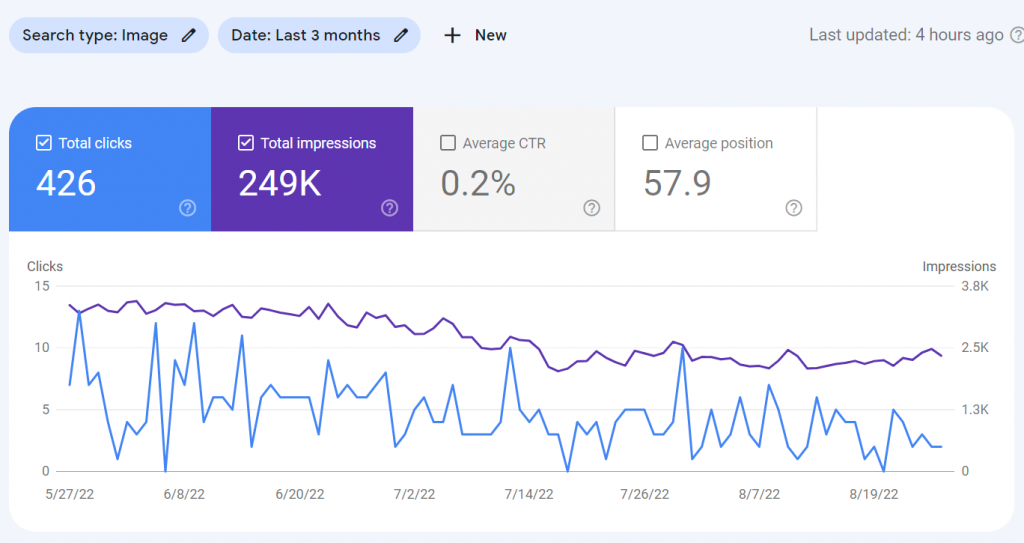
I mentioned earlier that the initial Performance graph on the main page of GSC might now show you all of your search clicks. That main graph shows clicks for Web searches, which is standard Google Search. However, there are separate Performance results for Image, Video & News Search. On the Performance page above the chart you’ll see options for Search type and Date. Click on Search type to select Web, Image, Video or News.
Some websites may only have rankings for Web searches, while others could rank for a combination of search types. This site has rankings for Google Image Search, which I can see from the Image search type data below. These extra 426 clicks we not counted in the 1,221 clicks shown on the main page, so this site actually received 1,647 clicks.
I recommend revisiting this data at least once a month to view your progress and to identify new traffic opportunities. It can be helpful to see what performs the best to identify tactics and content types that deserve more of your attention. When you can focus your efforts to create new content that brings more results, you’ll avoid wasting time and likely make more money too.
Indexed Pages Overview
Back to the main page of GSC, below the Performance graph you will find another one for Indexed Pages. Based on information from your Sitemap, this chart quickly tells you how many pages are indexed.

To find more details about which pages are indexed and which are not, you’ll need to look for the Index menu on the left. There are separate links here for Pages and Videos, although the Video link won’t show up unless you have indexed videos or some in your sitemap.
Click on the Pages menu link. Below the graph on this page you will see a list of reasons why pages on your site aren’t indexed. This can sometimes contain important information that needs to be corrected on your end to fix indexing issues.
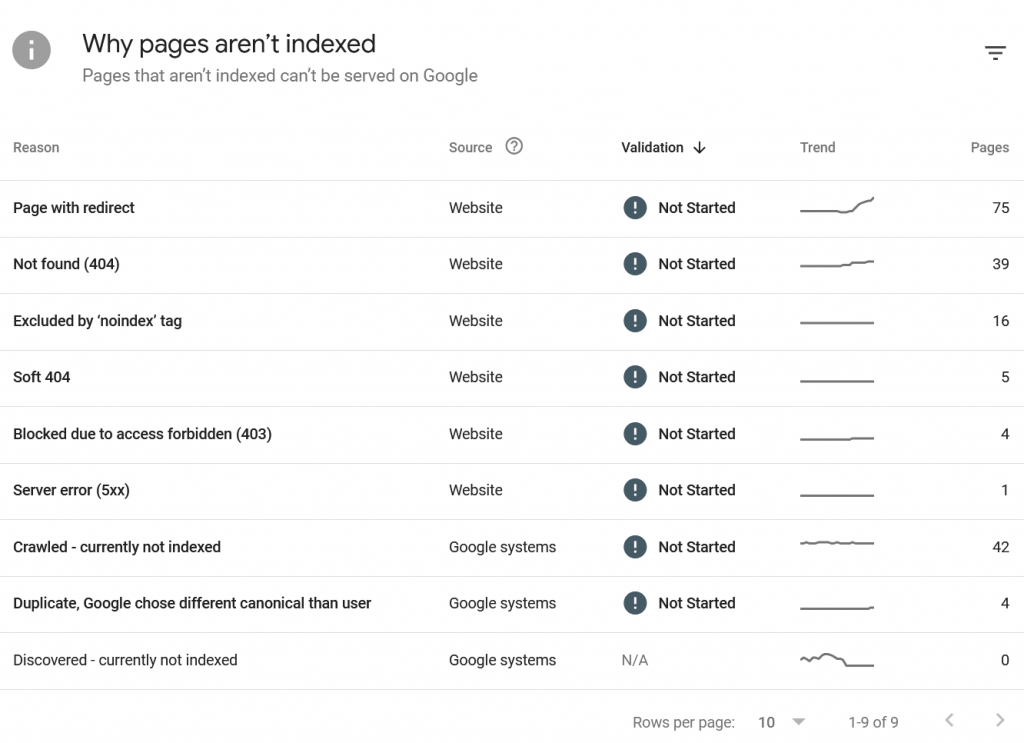
The example list of indexing problems I’ve shown above may look like a lot, but there really isn’t much on this particular list that needs to be fixed. This site is moving to another domain name, so the high count of redirects and even pages not found is expected from the changes I’ve been making to this site. Be sure to take a close look at your own list. You can click on an item in this list to see the specific pages that are flagged with that indexing problem.
Experience Overview
Next on the main page of GSC is the Experience overview. You won’t see these statistics for new websites. It can take 90 days or even longer before it shows up.
I’ll be discussing each of the items from this graph is more detail below.
Page Experience
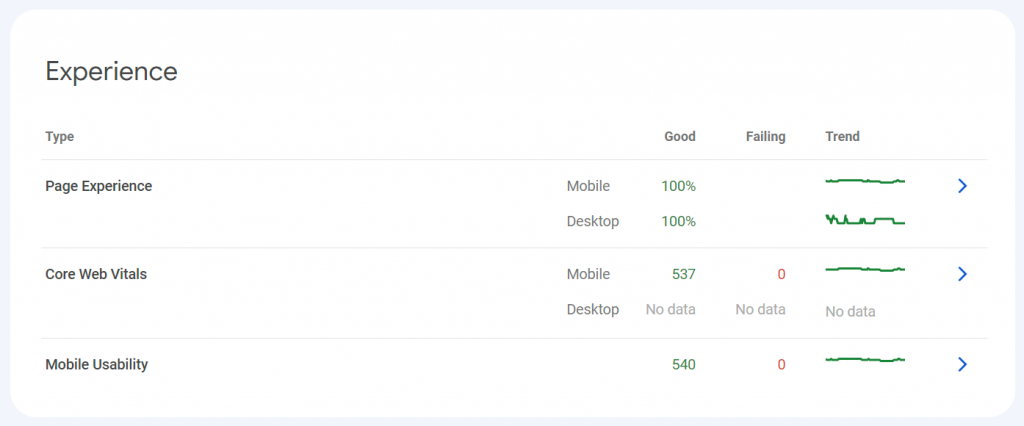
Page Experience data can be found using a link in the sidebar menu. This uses real-life data from Google Chrome users to determine how your site performs on different devices. You usually won’t need to check this information frequently, but you should take a look at it when it first becomes available to identify any potential problems that you need to fix on your site.
Here’s the graph for one of my sites. I can quickly tell that my site is configured perfectly for mobile devices, since 100% of my pages are registering as Good. My Page experience signals for mobile are also all marked as good. This is what you want to see on your site.
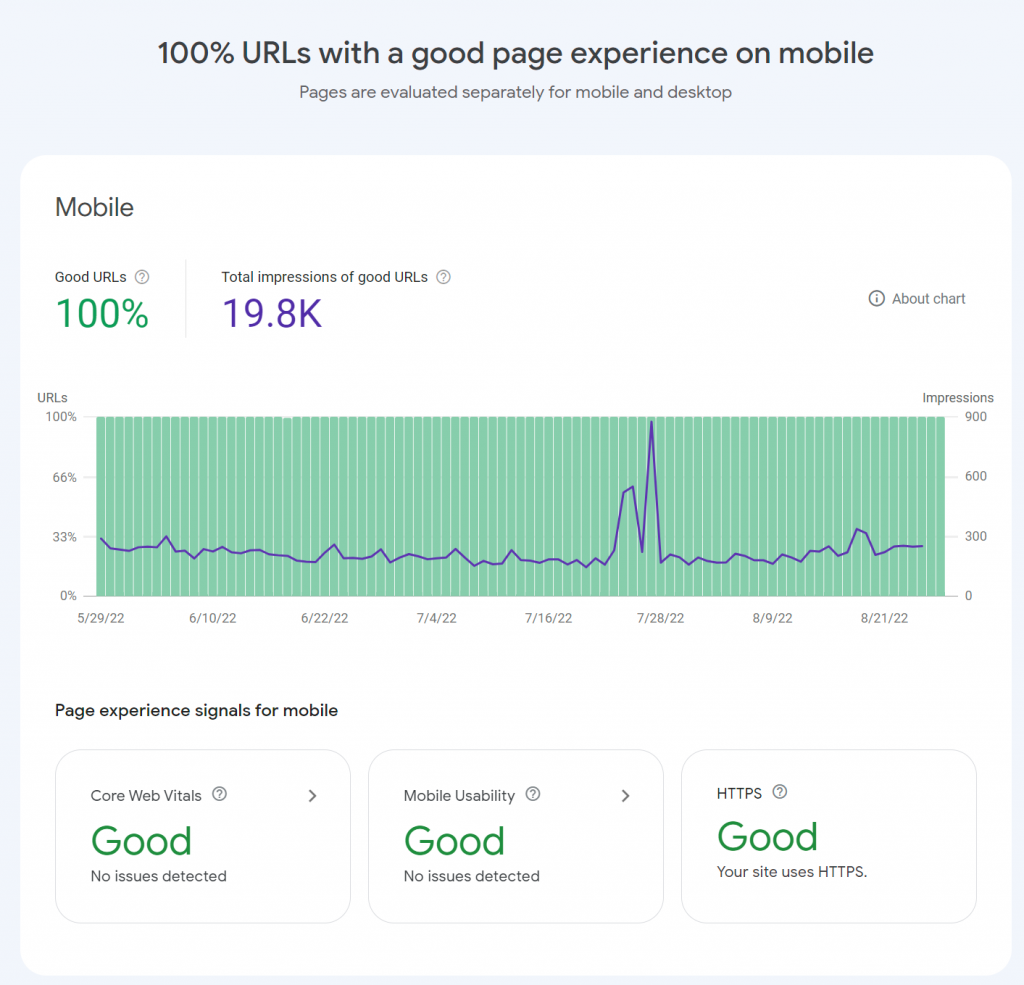
If you have any issues that show up here, click on the relevant box to find out more about the problem.
Core Web Vitals
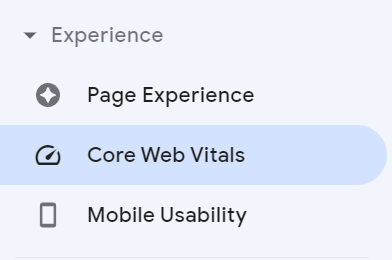
The Core Web Vitals data can be accessed from a sidebar link too.
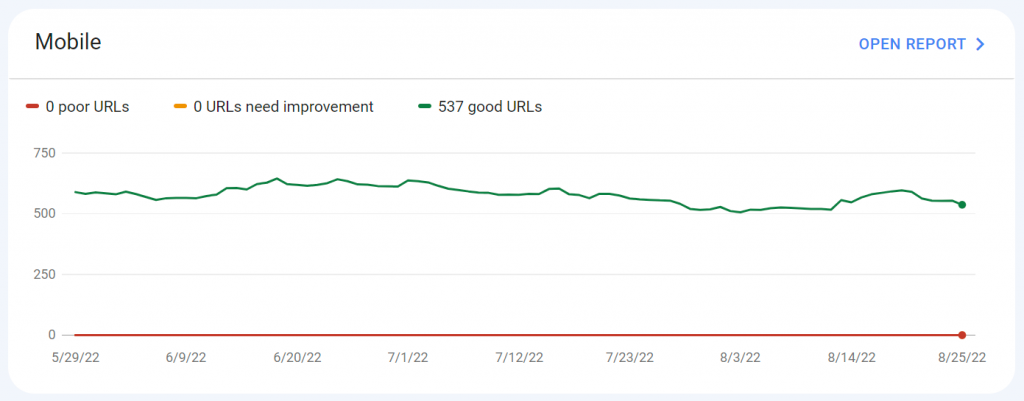
This information tells you about specific pages that are marked as good for user experience, such as page loading speed. As long as you don’t have URLs marked as Poor or Needs Improvement, your site is all set.
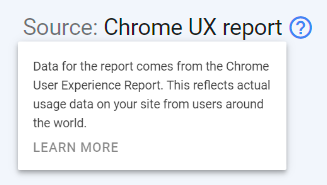
Note the source for this data (shown in the top-right corner). This information comes from the Chrome User Experience Report. You can actually browse your own website using the Chrome browser on both desktop and mobile devices to help with this data for a new site. You need to be sure to go into settings and enable this data to get sent to Chrome though.
Mobile Usability
The last Experience page is for Mobile Usability – look for the link on the left.
Don’t worry about pages that do not show up in this list. You want your graph to look like the one below with 0 pages registered as ‘Not usable‘ and ‘No issues‘.

If any pages are identified as not usable for mobile here, be sure to explore the reasons why. Google will usually tell you the problem through this page so you can fix it. It’s very important that your website is mobile responsive and accessible. This is a key ranking factor these days and a large percentage of traffic for most niches is mobile based. When your site isn’t mobile compatible, you’re missing out on traffic.
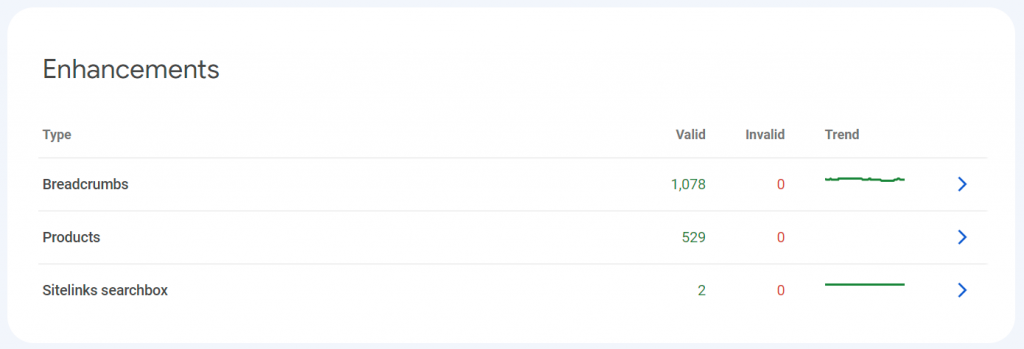
Enhancements Overview
The next section of information on the main page of GSC is for Enhancements. A variety of things can show up here including Breadcrumbs, Products, Featured Snippets, and more. These items require special HTML schema and markup on your website to utilize, so you usually need to target these Enhancements on purpose. They can be an excellent source of additional traffic. Use this page to monitor your progress and/or identify problems.
Transfer Search Rankings to New Domain
It’s possible to move a website to a new domain name and still retain search rankings. This could happen with a rebranding or even buying a business from someone else. You shouldn’t take this decision to move to a new domain lightly though. You’re almost guaranteed to see some disruption to search rankings though.
You should set up a 301 redirect for your old domain to redirect all URLs to the same URL on your new domain. Once the new site is setup and redirects are in place, you can let Google Search Console know about this move. Go to the Settings link in the sidebar menu.
Now click on Change of address. Proceed through the steps requested to initiate the transfer.
301 redirects should stay in place for at least 90 days. You’ll see notices for both domains in GSC that indicate the move is still in progress.

Internal & External Links
The Links page found in the sidebar menu tells you about internal and inbound links for your site.
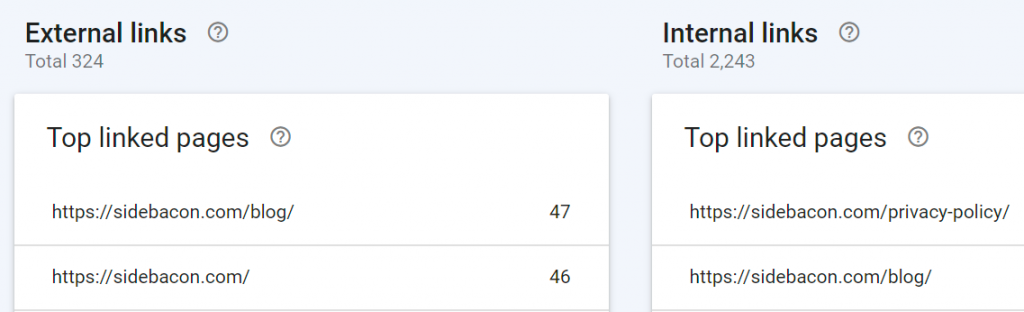
The first two tables at the top of the Links page tell you the top pages on your site that have internal links from other pages on your site and from external websites. It can be useful to know this info to see which pages of your site may be viewed as the most important to Google.
Additional data on this page tells you the most commonly used anchor text for links. Anchor text is an on-site and off-site SEO ranking factor, so this is important to see how Google views your site.

You’ll also be able to see which websites have linked to your site here. The initial table shows the sites with the most backlinks, but you can expand this list to see all of your inbound links.

Search Console Tools
There are still some legacy tools available in Search Console, although this may finally be disappearing soon. These are tools leftover from the old Google Webmaster Tools that are still in use currently but are being phased out. Look for the Legacy tools and reports menu in the sidebar – there are two pages here you can look at.
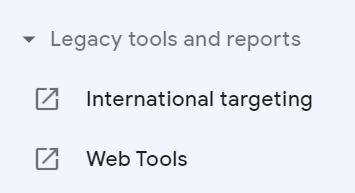
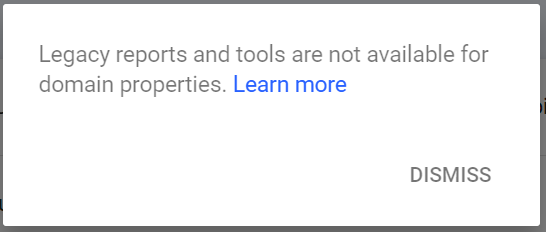
If you set up a domain property and not a URL prefix property in your GSC account, you won’t be able to access either of these pages. However, it’s really not a big deal, as you’ll see shortly.
One of the most commonly used features here was International Targeting. You could specify a language and country that you’re targeting on your website. Google really doesn’t need this info anymore, since they can usually figure it out based on your content. There is also HTML schema that can be used, for example to identify your website’s language. That is the preferred method these days.
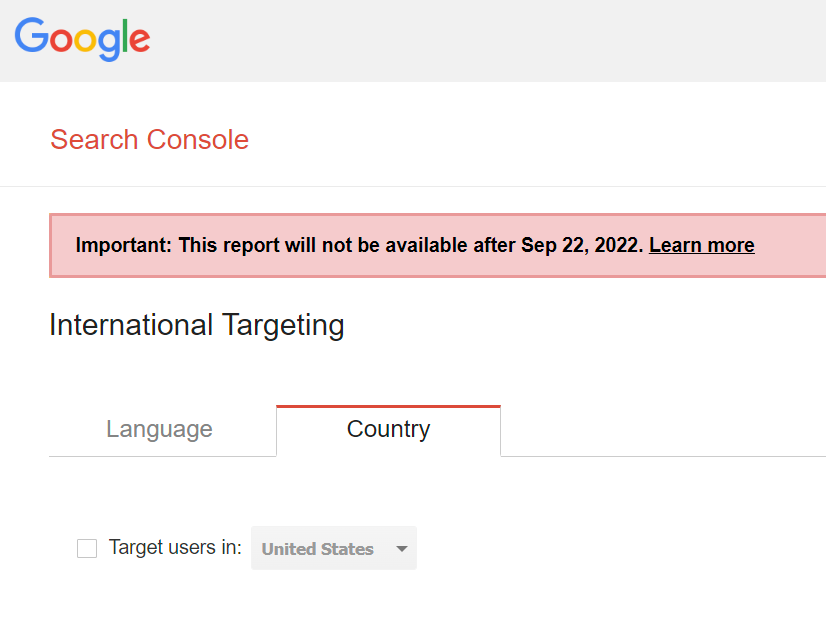
As you can see here, these legacy tools are planned to disappear in less than a month, on September 22, 2022. For this reason, I wouldn’t bother trying to use them now.
Conclusion & Next Steps
I hope you have found this training course for Google Search Console to be useful for you. You should be able to see how important it is for webmasters to use for search engine optimization (SEO).
I recommend revisiting GSC at least once a month to monitor your progress. It’s good to know what is working and what isn’t so you can focus your efforts in ways that matter the most. You should also monitor your search ranking positions to identify opportunities to make updates to pages to increase your exposure and traffic.
Using Search Console is really just the first step for SEOs. I’ve put together a number of other useful training courses that will teach you different strategies to use with your website and your content to rank for keywords. Take a look at these articles below to continue your coaching: