Anyone that runs a website can benefit from knowing how to code some basic HTML. Many WordPress users don’t know any HTML at all. However, this additional knowledge can give you the power to customize the design of your websites when WordPress and themes simply won’t allow you to make changes to the way your site looks.
This post is an in-depth training guide that will teach you the basics of understanding and using HTML on pages of your website. Best of all, it’s completely free. This type of lesson actually teaches you how do code some HTML, and you’ll often find other sites charging you for this information.
HTML Terminology & Links
Links are used on almost every website and are also fairly easy to understand, so they are a good place to begin learning HTML.
Before I dive into explaining HTML links, here is some basic HTML terminology that I will be using:
TAG
HTML is based on tags. A tag is surrounded by less than and greater than symbols. The name of the tag is actually an HTML command that does something specific.
ATTRIBUTE
An attribute is found inside of a tag and provides additional information/variables for the tag command. Each attribute should be separated from other attributes and/or the tag name by a space. The name of the attribute is followed by an equal sign and then the value of the attribute is surrounded by quotes. Single or double quotes are both fine to use, but you should make a habit of using one or the other (I typically do double quotes for HTML and single quotes for other coding, like PHP).
CLOSING TAG
Some (but not all) HTML tags require closing tags – the others are self-closing. A closing tag looks exactly like the opening tag, except that there is a forward slash in front of the tag name.
HTML Link Basics
Now I can show you a real HTML link example to demonstrate that terminology.
Here is a full HTML link, which I will explain in more detail below:

This line of HTML code begins with a less than symbol: <
The tag name for an HTML link is: A
You can see a lower-case a after the less than symbol – this is the tag name for the link. It is OK to use either lower-case or upper-case for your tag names and tag attributes.
After the tag name is a space and then a tag attribute, href.
This attribute name is followed by an equal sign: =
Next, you can see double quotes surrounding the website address: https://sidebacon.com/
That website address URL is where the visitor will be taken when they click the link.
Next is another space followed by another tag attribute: target.
Just like the href attribute, this attribute is followed by an equal sign with the value surrounded by double quotes.
The target attribute tells how to open the link URL in the visitor’s browser. If you do not specify the target attribute for an HTML link tag, _self is the default value used. I have used _blank as my value for this example, but here are all of the accepted values of the target attribute:
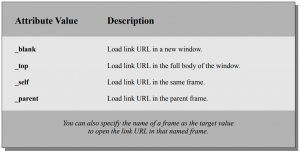
You can also specify the name of a frame as the target value to open the link URL in that named frame.
After the closing double quote for the target attribute value, there is a greater than symbol to end the opening link tag: >
Next, you will see some text: Side Bacon Blog
That text is the anchor text used for the link, which is the text that is turned into a clickable link when viewed on a website. I just used simple text for this example, but you can actually use complicated text and even additional HTML coding inside of the link if needed. As a practical example, you could also have an image HTML tag here.
Finally, to end the link, you need a closing tag. This closing tag specifies the ending of the link anchor text. It is nothing more than the tag name with a forward slash in front of it and then all of that surrounded by less than a greater than symbols:
HTML Image Tags
Another commonly used HTML tag places images on your website.
If you’re using a content management system, like WordPress, you can easily upload images to your website and automatically insert HTML tags for them into your content. Despite that fact, it is still good to know how this tag works so you can make your own custom changes to it or even use it outside of WordPress.
The HTML code below generates an image:

IMG is the HTML tag name to display an image.
SRC is a tag attribute that designates the website URL of the image file to display, with that URL enclosed in quotes. This tag attribute is required to display an image.
BORDER is another tag attribute. The value is a number of pixels for the width of the border surrounding the image. 0 is used as a value to disable the image border, although this border can still beset and/or altered using CSS (will be covered in a future CSS article). This is an optional tag attribute.
WIDTH and HEIGHT are also optional tag attributes here. If you notice the URL of the image that is specified in the example code, you might notice that the image is labeled as being 450 x 230 (this is just a label that I have assigned to the URL to help me identify the size easily). If I left off the WIDTH and HEIGHT attributes, the image would be displayed at full size, but these attributes alter the display size. I picked 450 and 230 for the values of these attributes, which will enlarge the image slightly since the original dimensions are 300 x 153. You can also make images smaller or larger than their original size in this manner, but too much of an increase will result in low resolution graphics that will likely look poor on your live site.
Notice that I maintained the same ratio from the original width/height to the new width/height. This is important if you want to avoid distorting the image when it is resized. As an example, if you had an image that was 400 pixels wide by 200 pixels tall and wanted to display it on your site at half the normal size, you would want to use 200 for the width and 100 for the height to maintain the same ratio.
The IMG tag is a self-closing tag. Note the extra space at the end of the HTML for the example image tag. After that extra space, there is a forward slash and then the closing greater than symbol for the end of the tag: />
HTML Lists
One of my favorite aspects of HTML are lists because of their versatility. Although lists can become complicated, including CSS coding to change the way they look, basic HTML lists are actually quite simple to use. In another article I will cover CSS coding with lists, so this lesson will help to get you comfortable with the HTML that builds lists first.
The first thing that you need to know about HTML lists is that there are two commonly used types: ordered and unordered.
Ordered Lists
An ordered list will use ascending numbers (by default) with each item in the list. CSS can be used to change the numbering with these lists to be other things like roman numerals or letters. Ordered lists are started using the OL tag.
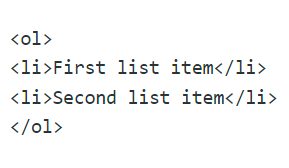
An ordered list example:
- First list item
- Second list item
Code to create that list:
Unordered Lists
An unordered list will use bullet points (filled circles) for each item in the list. CSS can also be used with these lists to change this to other symbols, background images, or even nothing at all. Unordered lists are started using the UL tag.
An Unordered list example:
- First list item
- Second list item
HTML code to create that list is below – note how it is exactly the same as the previous code except the opening/closing tags UL are used instead of OL.

List Items
Looking at the two example HTML code snippets above, you can see that the two items in each list are surrounded by LI tags (an opening and a closing tag). The item tags are then surrounded by the list tags to create a complete HTML list.
Nested Lists
Lists can also be nested within themselves to create a hierarchy/outline structure with ease. To create nested lists, just put the HTML code from one list inside of LI tags from another list. You can mix and match the two list types in nested lists.
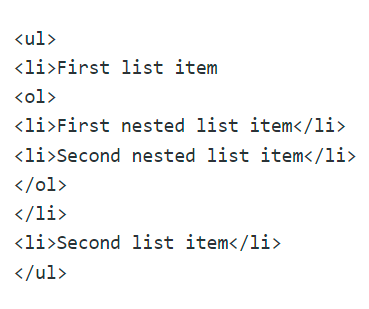
An example nested list:
- First list item
- First nested list item
- Second nested list item
- Second list item
The HTML code to create this nested list:
Text Styling
There are a number of ways that you can style text using HTML, but the preferred way to do so is actually with CSS. As a result, this HTML tutorial is not going to cover some of the outdated HTML tags that will control the design of text (like the font tag to change the text size, color, etc). All of this will be covered in the next article on CSS.
Ultimately, HTML wasn’t really intended to be used for design, which is one of the main reasons why I don’t want to teach too many of the design elements of it that do exist.
There are a few simple HTML tags that can easily be used to make some basic design changes to your text that are still worth using, even though these things can still be accomplished using CSS.
Bold
To make text bold, simply surround it with an opening and closing B tag.
The sample below provides example HTML code and the result of that code:
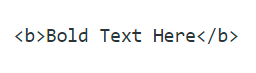
creates this: Bold Text Here
The STRONG tag is actually considered to be a semantic version of the B tag, which is really just intended to make text bold. STRONG actually indicates that there is some kind of significance for the text enclosed in the tags, making it a preferred method in many cases for SEO purposes. By default, the STRONG tag will bold the text that it surrounds, but CSS can alter this default behavior.
Italics
To make text italic, simply surround it with an opening and closing I tag. This works just like the B tag for making text bold. The I tag is also just used for display purposes, while it’s counterpart EM is used for semantic meaning and can be altered with CSS. By default EMwill also produce italic text, but that can also be changed using CSS.
The sample below provides example HTML and the result of that code:
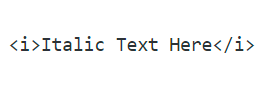
creates this: Italic Text Here
Underline
To underline text, simply surround it with an opening and closing U tag. This tag does not have a counterpart like the previous two tags.
The sample below provides an example of the usage:
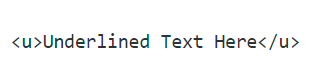
creates this: Underlined Text Here
Strike Through
One more useful HTML design tag for text is the S tag, which produces a line through the text.
An example of this tag is shown below:
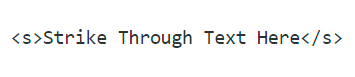
creates this: Strike Through Text Here
Inline & Block Elements
Everyone using HTML needs to understand the differences between inline and block elements.
Block Elements
A block-level element begins it’s content on a new line and also forces content after the element to begin on another new line.
Some examples of commonly used block elements:
DIV
P
H1, H2, H3, etc..
P is a paragraph tag. If you write two sentences and enclose them in P tags, they will be separated by a blank line.
If you use WordPress and the Visual editor to write your page content, each new paragraph of content there is actually enclosed with this HTML tag in some themes. WordPress does this automatically when it displays the page in some themes. For this reason, WordPress can actually mess up HTML, CSS and PHP code that is entered over multiple lines. This can be fixed by simply removing space and blank lines between HTML tags, as shown in the example code below for the paragraph tag.
This HTML code…

Displays as…
My first sentence.
My second sentence.
DIV is a division tag and is commonly used along with CSS (can be used to completely control the layout of a site). Without any CSS at all, a DIV tag will still create a new line but without space between the lines.
I’ll be doing a separate lesson on CSS, where I will be going into more detail about using this tag with CSS for design purposes.
This HTML code…

Displays as…
H1, H2, H3, H4, H5 & H6 are all header tags. The number indicates the importance of each tag within your page content and is commonly looked at by search engines to help analyze the semantic meaning behind web pages. H1 is the most important heading on the page and H6 is the least important. It is not necessary to use all of the headings on a single page.
Without CSS, the header tags will have larger text when they are more important (H1 is really large text, down to H6 being small text). However, CSS can easily be used to change this and will be discussed more in another article.
I find it to be best to set the H1 tag as the title / main subject of each page on your website. I will then often set the H2 tag as the website title, and then use other header tags for other main points within the content of my pages. Some WordPress themes actually use the first two header tags in the opposite manner, so I try to look at this when picking a theme to use to ensure it is being done right. This makes it easier to target a unique subject on each page of a site. I do not ever use more than one of each H1 and H2 tags on the same page but will sometimes use more than one of the other tags on the same page.
Typically, text within header tags will be bold.
The sample HTML code below shows how these tags are used:
This HTML code…

Displays as…
My first header.
My second header.
Inline Elements
The opposite is an inline-level element, which does not force a line break.
SPAN is a commonly used inline element. By setting CSS on a SPAN HTML tag, you can completely change the look of the text within that tag compared with the surrounding text. CSS will be covered more extensively with elements like these in the next class, but a basic example has been used here to show an example usage of an inline element. The STYLE attribute that I have used for the SPAN tags can be used with almost any HTML tag to provide CSS code for that tag.
An example of this has been provided below:
This HTML code…

Displays as…
Many other HTML tags are also inline, such as most of the tags covered in this lesson so far like B, I, U, S, IMG, and A.
HTML Tables
Once upon a time, people used to control the layouts of their websites using HTML tables. Although this can still be done, you should actually use a combination of DIV and SPAN tags with CSS to accomplish this now.
Despite the outdated use for HTML tables, they still have a valid use in modern HTML, which was the original intended purpose for this tag: displaying tabular data.
A simple example of a table is a spreadsheet table that simply displays data in rows and columns. However, tables could also be complex HTML comparison tables for affiliate products or for administration systems. I use tables in the administration pages of many of my plugins to manage a list of saved ads, provide some information for each ad and then provide some action buttons to edit or delete each ad.
Even with the power of the DIV tag and CSS combined, there are still some things that you simply cannot do with it that can be done with tables. For example, if you have columns of information in a table, the table will automatically resize each column depending on the content in it and still keep all of the columns aligned. If you try to create a similar layout like this with the DIV tag and CSS, you will find that you simply must specify a predefined width for the columns if you want the columns to stay aligned (ie, DIVs aren’t very good about stretching horizontally to hold their content if you want them to be positioned in a very specific manner).
Some of the above information may not seem important initially, but it would have saved me many wasted hours of coding if I had known that information upfront, so I wanted to begin the tables tutorial with this information.
Now moving on to how to code an HTML table.
First, to start a table, use the TABLE HTML opening and closing tag. All of the information in the table will go between these tags.
Next, each row of information in the table is created with TR opening and closing tags. All of the information for each of the columns within that row will be contained between these tags.
Finally, each column of information in each row is created with either TH or TD tags.
TH is used for header cells in the table. By default, the information in each header cell will be in bold text and centered in the column, although this can be altered by CSS.
TD is used for normal cells in the table. By default, the information in each of these cells will be in regular weight text (not bold) and left aligned in the column, although this can also be altered by CSS.
Here is a basic HTML table example:
This HTML code…
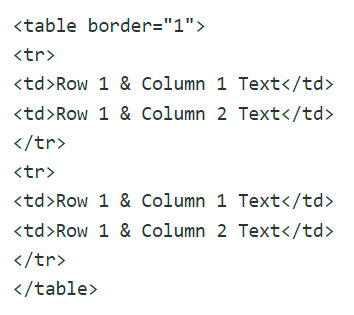
Creates a table like this…
| Row 1 & Column 1 Text | Row 1 & Column 2 Text |
| Row 1 & Column 1 Text | Row 1 & Column 2 Text |
TABLE, TR, TH and TD tags can also accept a number of tag attributes like WIDTH, HEIGHT, COLSPAN, and ROWSPAN.
WIDTH and HEIGHT attributes can have values that are specific numbers (in pixels) or percentages of the total width. If you specify a HEIGHT for any tag within a row, the entire row will be that height. The same applies with WIDTH and columns.
COLSPAN and ROWSPAN are used to define how many columns and/or rows a cell should take up in the table. Using these attributes, you can create more creative tables. Simply specify the value for one of these attributes as a number, which represents the number of rows/columns to occupy.
A new example is provided below incorporating these new attributes. This example also uses TH tags and TD tags:
This HTML code…
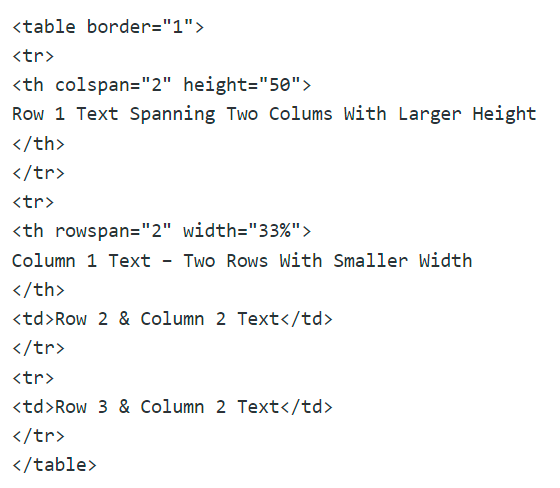
Creates a table like this…
| Row 1 Text Spanning Two Colums With Larger Height | |
|---|---|
| Column 1 Text – Two Rows With Smaller Width | Row 2 & Column 2 Text |
| Row 3 & Column 2 Text | |
What’s Next?
Now that you’ve learned some basic HTML, it’s time to move on to CSS!
Learn from our free, in-depth CSS training course here.