This step-by-step training course is going to walk you through all of the steps for a complete beginner to learn how to build a WordPress website.
WordPress, also called “WP”, is the most popular and best content management system. Best of all, it’s free open-source software.
Since there are so many options in this CMS, it can confusing to create your first site. Once you learn to use it, you’ll find that it’s quite easy. After a website is setup, you’ll mostly spend your time on 1 or 2 different pages in the WordPress admin to add new content.
This is a very long and in-depth guide. You’ll likely need to bookmark this page to return as you work. The initial setup of a new WP website can be done in an hour or less once you’re familiar with the process, but you’ll usually continue to build new pages even after it’s live. Frequently updated websites almost always perform better than stagnant sites with few updates.
The Table of Contents for this training is below. Clicking on any link in this list will take you to that part of the guide. I recommend reading everything in the order listed, but this menu should be useful if you need to come back over multiple days to finish this coaching.
Getting Started for Beginners
Before I actually start to teach you how to build your first WordPress site, there are a few topics I want to cover to ensure that anyone can succeed with this course. Beginners need to understand a few important concepts to be able to create this type of website.
What is WordPress?
WordPress is an open-source content management system that is used to build websites. It allows people that do not have any kind of technical, programming or coding knowledge to make a site, so it drastically reduces the barrier to entry. WP handles all of the coding for you in the background so you can focus creating the text, images and/or videos to publish on your pages. You can also add a theme to easily control the design and plugins for new features.
I started building websites in 1994-95. I was 12 years old. WordPress didn’t exist. There were some really bad page builder programs, but they were often more trouble than they were worth. I had to learn HTML and CSS to be able to hand-code everything to make my first site. Luckily I already had some programming knowledge (I learned BASIC when I was 10 with an old book my dad has in his office from college), so it wasn’t very difficult for me to figure out, but most people don’t want to learn advanced coding.
None of that matters anymore. You don’t need to be a child programming prodigy like I was to be able to make a website anymore. Just use WordPress. If you can write an article and use a mouse, you can build a website. This guide is going to teach you exactly how to do it.
How to Build a WordPress Site?
This in-depth training course is going to walk you through all of the steps to build a WordPress website. I could’ve made this guide fairly short to just show the basic steps, but that won’t really help you because it leaves a lot to figure out on your own. I’ve been building sites this way since shortly after WP was created. In that time I have learned that you need to set up, configure and build pages in a particular way to succeed.
I did NOT create a simple tutorial. This guide could really be considered “How to Build a WordPress Website That Actually Gets Visitors“. There’s no point in wasting time and energy to make a site if nobody ever finds it. The strategy that I teach here is designed for SEO and marketing purposes. By following this guide, you’ll set up your site in a way that is optimized for search engine rankings and marketing on social media networks.
You’ll also find some advanced topics in Chapter #6 that will help you make a more effective and user-friendly website. While these are technically optional, I highly recommend using these strategies to get the best results.
Domain Name & WordPress Hosting
I need to talk about domain names and website hosting for a WordPress site because these two things are required. There are a lot of companies you can choose for these services and some of them should really be avoided at all costs. Price isn’t everything. Bargain shopping for these services will result in a slow website and slower sites perform much worse in search engine rankings. I’m going to recommend companies to use for these services below. Links in this section are affiliate links, so I will receive a commission if you sign up through these links. However, I’m not blindly directing you to buy these services to earn a commission. I’d still recommend using these options even if you want to visit their sites directly and sign up without using my links simply because they are the best choices for you and your online business.
WordPress is free, but to be able to use it you will need to buy two things:
- A Domain Name: $7 – $15 per year
- A Web Hosting Account: $10 – $100+ per month
I strongly urge you to use a .COM domain name. There are many choices but I’ve always found .com to work best. It can be more difficult these days to find an available .COM domain that isn’t being resold, but it gets easier if you hunt for a branded domain. Use my website as an example. SIDEHUSTLE.com or SIDEHUSTLES.com were not going to be available. I made up my own brand relating to the niche and went with SIDEBACON.com. You should try to do something similar. Make a short brand name too – shorter domain names perform better.
NameCheap is one of the cheapest places to register a new domain name. Currently, first-time purchases can get a .COM domain for $6.98 for the first year. Renewals are closer to $15 per year, but that’s about average for the industry. It won’t really matter where you register your domain name though, so you can focus solely on price for this purchase. However, be careful to avoid signing up for a hosting account along with the purchase (many sites will try to upsell that service).
Go here to search for an available .COM domain and register it with NameCheap:
Your #1 concern with starting a new WordPress site should be your choice for hosting services. This can seriously make or break your chances at success. I won’t go into the statistics about website and page loading speed here, but you can take a look at an article I’ve written about that subject for more details (the link in the first part of this sentence).
When you use WordPress, your choice of hosting is even more important than it is for other websites. A busy WP site can really put a strain on a web server. If you use a cheap account with a company such as HostGator or GoDaddy, your site speed will suffer horribly because of it. Those are the $10 per month accounts. The low price is attractive but it really isn’t worth the savings.
You need to use a web server that is configured for this purpose. My #1 pick for the fastest WordPress hosting is WPXHosting. I’ve done my research. If you hunt down a lot of the most popular blogs, you’ll find that most of them are using WPX (I’ve checked). There’s a reason why. They deliver the fastest speeds for this CMS.
Monthly options with WPX range from $25 – $100 per month. When you’re making your first site, the cheapest option is plenty. The main thing you’ll have to worry about with the $25 plan is disk space. 10GB is decent, but if you upload a ton of high-quality images and especially videos then you can eat that up pretty quick. It’s more than enough to reach the point where you’re making money, so upgrading to higher priced plans isn’t a big deal once the site is earning for you.
Go here to sign up for a WordPress hosting account with WPX Hosting:
Once you have a domain name and a hosting account, look in your hosting account for your NAMESERVERS (DNS) – there should be two of them. You’ll need to enter those two DNS records for your domain name. Login to your domain registrar account and look for an option to update the DNS or Nameservers. Once those DNS records are added to the domain, you should be able to visit your domain name in a browser and reach your hosting account. There likely won’t be anything there yet, but this is the first step to build your website.
How to Install WordPress?
Depending on your web host, this step may look different from what you see below. However, most hosts do offer an easy method like this to quickly install WordPress. Login to your hosting account to get started. For some hosts, this will be cPanel, but not all hosts use that. The pictures below are from a cPanel account, so your could look different if you’re not using cPanel (you should still have a similar WP installation option though).
In my cPanel, I have a link called “WordPress Toolkit”. Search for this or a similar page in your account.
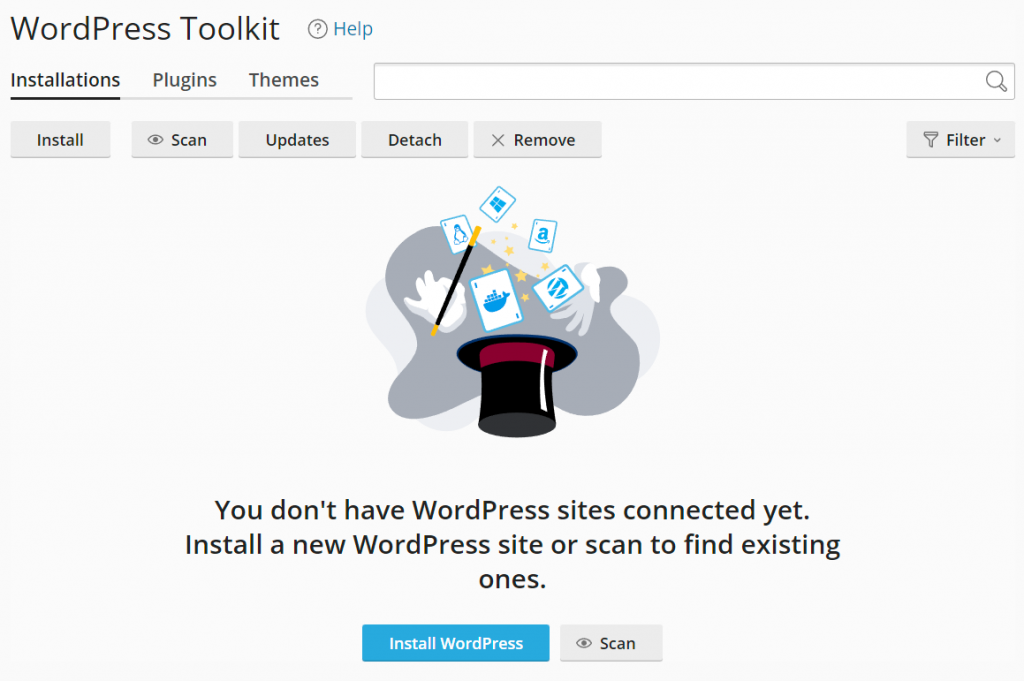
Here’s the initial page that you’ll see in the toolkit, especially when you don’t have any sites on the account. Click the Install WordPress button at the bottom to get started.
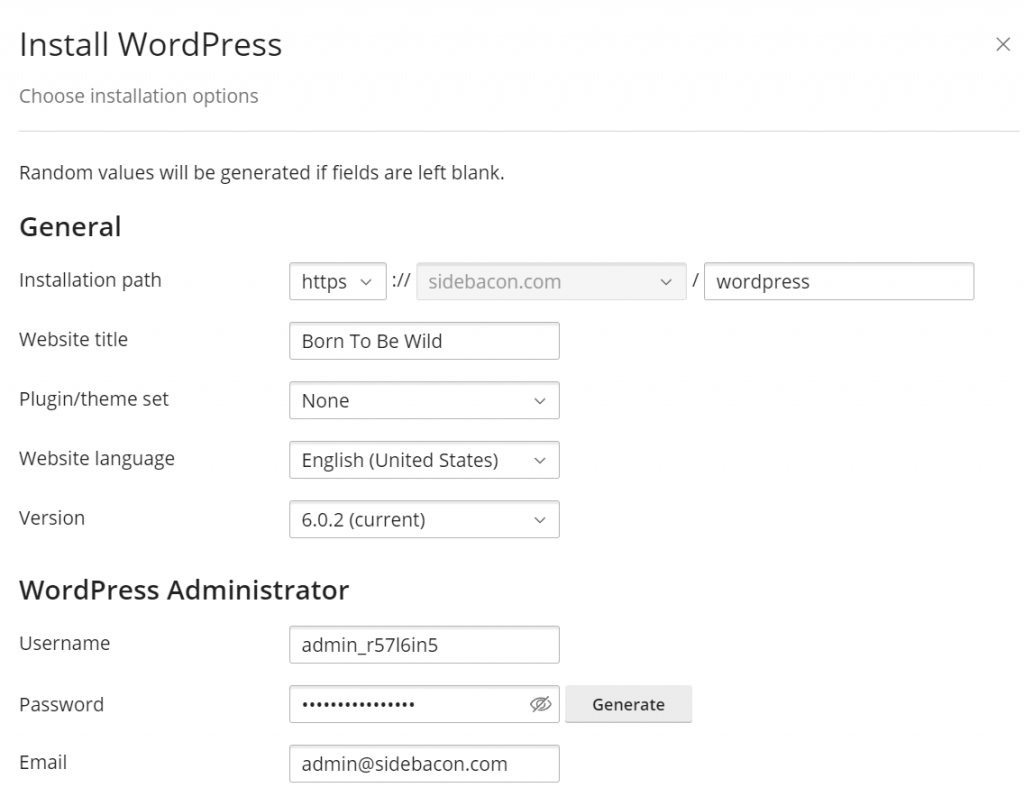
You’ll then see a list of options for installing. Almost all of this can be easily changed later, except for one key part: Installation path. The picture below shows the default options. Notice the text box in the Installation path section that says “wordpress”. Using those default settings, you would install WordPress into a directory on your site. Most people want it installed at the base domain name though – you need to delete “wordpress” from the text box to achieve that. The Website title is the name of your site. If you’re not sure what to call it yet, don’t worry about it now. I’ll show you later in this guide how to change the site title from within WordPress settings.
Be sure to make a note of the Username and Password being used in the WordPress Administrator section here – this is your login information to access the website and make updates to it. You need this password to be very long and complicated. Hackers like to run scripts to break into WP sites by guessing the password with millions of attempts. By having a long and complex password, you’ll make it almost impossible for them to break in this way. I’ll go for passwords that are 24-32 characters long and contain uppercase letters, lowercase letters, numbers and other special characters.
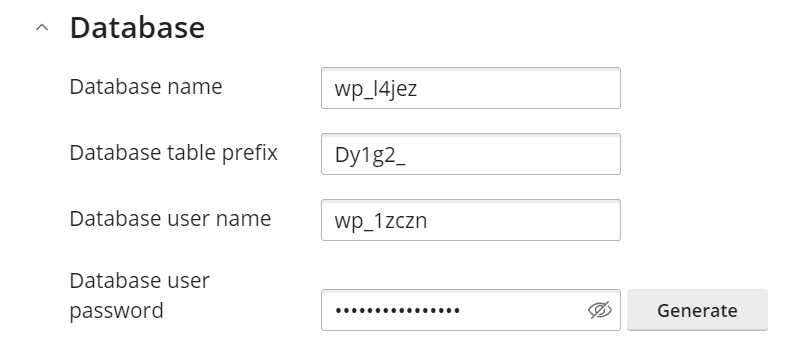
In most cases you shouldn’t need to do anything to the Database settings, but I still recommend taking a peek at the defaults. You want to see something similar to my picture below – the names and prefixes used should be different and contain random characters. This makes it more difficult for hackers to break into your site (I cover security in this guide as well).
Some of these installation settings control automatic updates for the core software, plugins, and themes. It’s good to allow updates because of potential security issues, but automatically updating a site can sometimes break it. I will often adjust my auto-update settings so that only minor security updates are applied to the core automatically. Everything else is upgraded manually. This allows me to backup the site before updating it, so I can roll back the update if there are any issues.
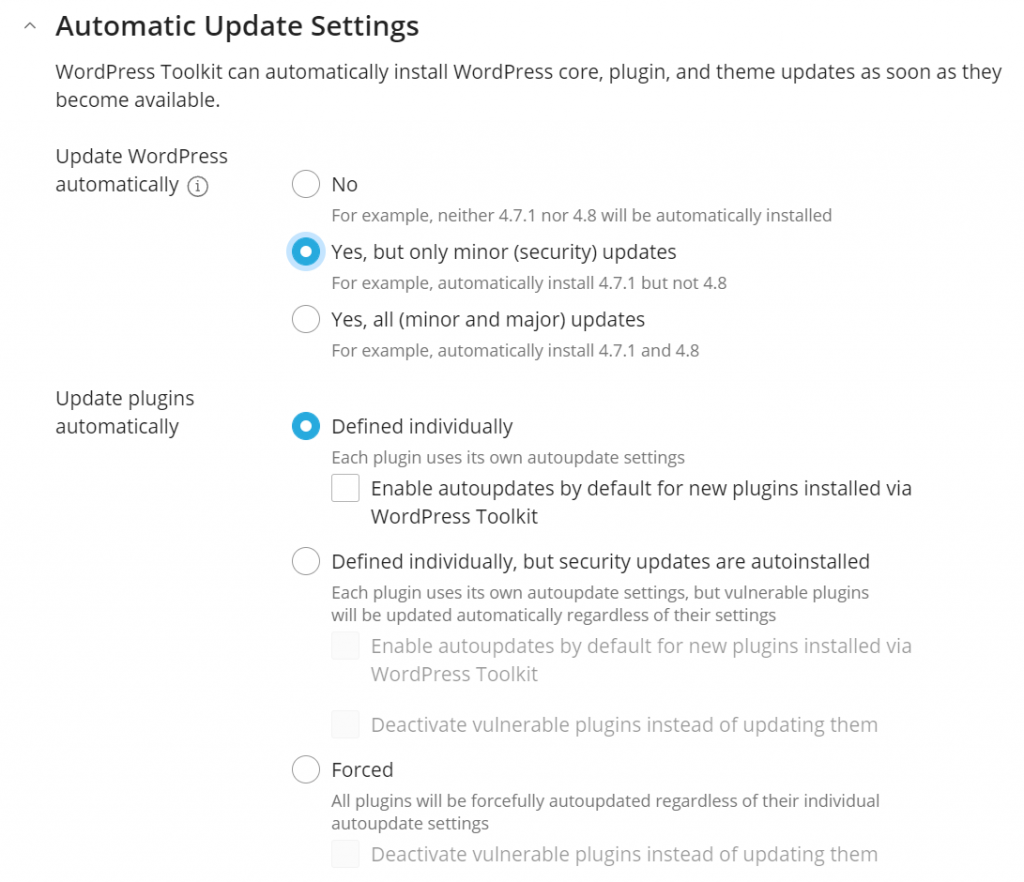
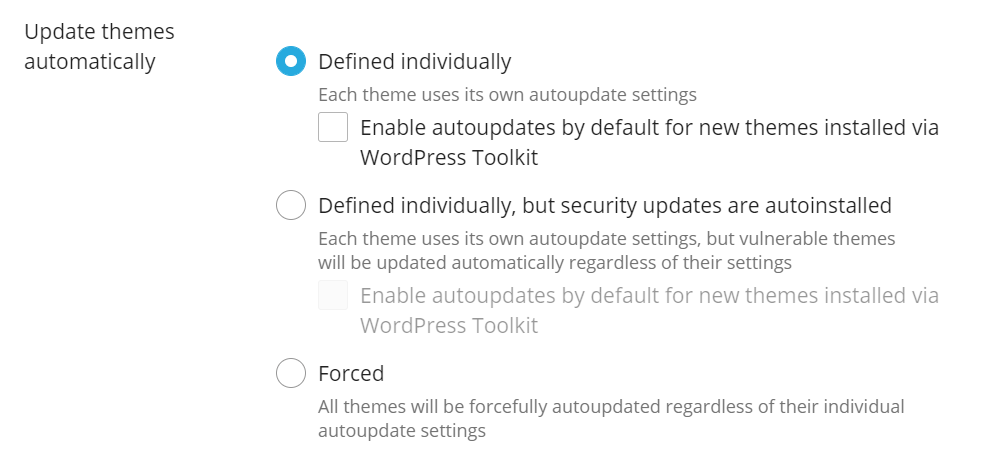
I’ll do the same for themes – make it so I have to manually update. You should only have one theme on your site anyways, so it isn’t tough trying to keep up with these updates. A bad change can make your entire site go down or look really bad, so I consider the trade-off to be worth it.
Once you have finished with the settings, click the Install button at the bottom.
The rest of the installation procedure will be done for you. When it’s finished, you’ll be shown a message along with a link to access the WP Admin area where you’ll build the site.
Types of Websites
One of the reasons why I love WordPress is because it’s so versatile. You can build a lot of different types of site using it and a combination of plugins. Here’s just a small list of the possible kinds you can create with it…
- Blog
- Video Blog
- eCommerce
- Membership / Subscription
- Landing Pages
- Email Leads
- Affiliate Marketing
- One-Page Website
- Business Site w/Static Pages
- & Many More
The core CMS software is more geared towards creating a blog. However, by adding different plugins you can add and even change the core features. For example, a plugin called WooCommerce makes it really easy to build an eCommerce site, while BuddyPress is great for membership sites.
You will need to figure out what kind of site you want to build, so you can seek out the necessary plugins to use. If this is the first site you’ve ever built, I’d recommend sticking to blogs, static business sites, affiliate marketing and lead generation options. It’s much more complicated to make a successful membership site, so I really only recommend those for marketers with a lot of experience.
Should You Use a WordPress Page Builder?
Beginners or anyone without HTML / CSS knowledge are often drawn towards using WP page builder plugins, such as Elementor. They let you design professional websites using a drag-and-drop builder that doesn’t require coding knowledge of any kind.
The #1 downside to using these page builders is code bloat. When you use these to design and create your WordPress site, you end up with a massive amount of HTML and CSS code on your pages that isn’t really necessary. It’s necessary for those plugins to work, but it’s not necessary to produce the exact same design with minimal code that is fastest for your site traffic. Take a look below at a comparison of a custom HTML coded page compared with a page builder – the code bloat is rather obvious.
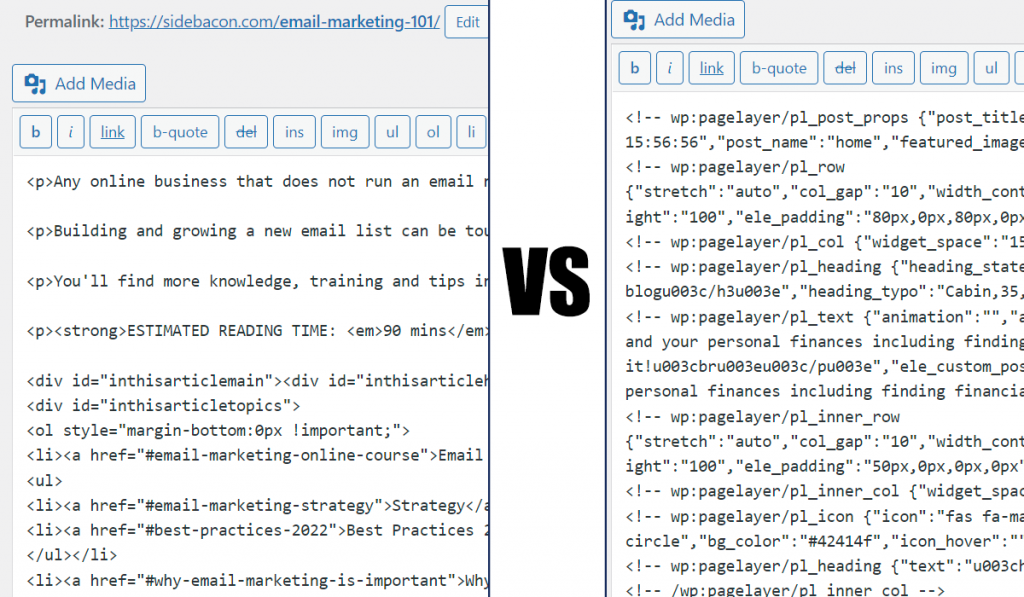
If it is necessary, you can use the Elementor page builder, but you should be aware that it will make your site run slower. Slower sites have worse search rankings and are less user-friendly (which results in lower revenue). However, I strongly recommend learning how to use the WP Text editor to design and build your pages instead.
To avoid page builders and still have a nice website, you’ll need to learn some basic CSS and HTML code. You don’t have to learn everything – just a few key parts that are most commonly used within the content of a webpage. I’ve created free tutorials for this exact purpose – you can find these training courses below:
WordPress.org vs WordPress.com
I should also clarify that what I am teaching in this guide is usage of open-source software available for download directly at WordPress.org.
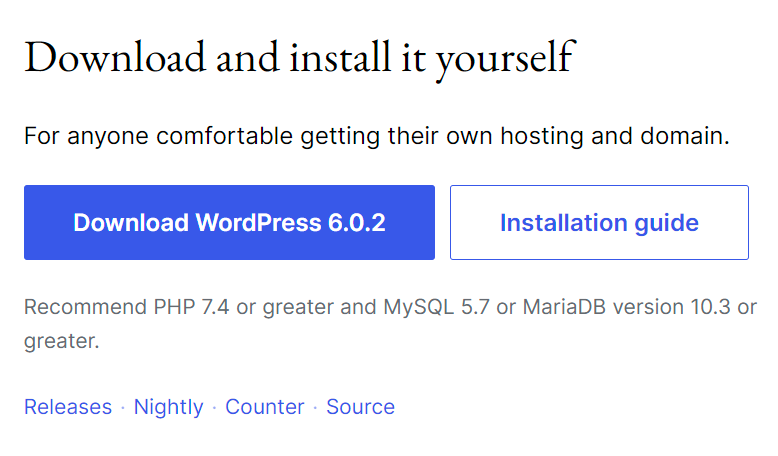
You DO NOT need to download the software or even visit their site though. You should be able to install directly through your hosting account. However, this download feature gives a way to do a manual installation if your host doesn’t support the automated features.
At WordPress.com, you’ll find something different. I DO NOT recommend WordPress.com. This is a free website builder that doesn’t require you to have your own domain name or hosting account. Sounds great right? Not so much in reality. It’s a dumbed down version of the open source software and it is greatly restricted in how it can be used. You can’t upload your own plugins, for example. You have to use one from a list of their pre-installed plugins and themes instead. Your site then runs in a directory of WordPress.com, so you don’t get your own website this way.
If you’re serious about building a real online business, you need to use WordPress.org and not WordPress.com. Spend the small amount of money for your own domain and hosting account to create your own website that you 100% control.
Initial Setup
This chapter is going to walk you through the initial setup steps that I recommend right after the software is installed. It’s fairly basic settings that you need to configure, but they’re important.
Access WP Admin
Right after the installation was complete, you should’ve been provided with a URL to access the Administrator area. If you installed to the base directory of your domain, you should be able to add “/wp-admin/” to the end of your domain to access this area. As an example using this site, it would be sidebacon.com/wp-admin/ – if you try that address for my site, you’ll get a 404 error page. I’ve hidden my admin page for security purposes. I’ll teach you how to do this later in the guide.
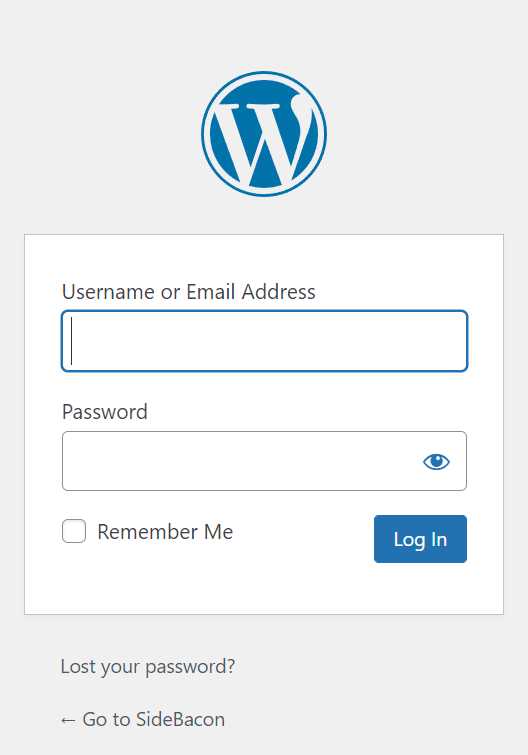
When you visit the WP-Admin page for your site, you’ll see a login page similar to the one below. Enter the Username and Password from the WordPress Administrator settings from the installation process (I told you to make a note of that login information earlier in this guide).
General Settings
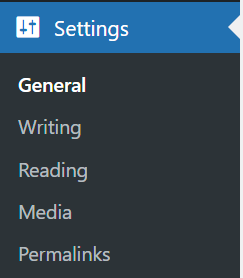
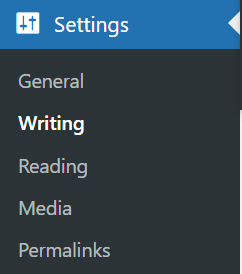
Once you’re logged in to the Admin area, you’ll see a sidebar menu of links on the left. If you only see icons and not words, try clicking on the menu to expand it. Look for the Settings menu link. Hovering over it should expand a sub-menu with more links. Click on the General link in that sub-menu. Clicking on the Settings link itself actually brings you to this same page, but it’s handy to know how to access the sub-menu for the other links.
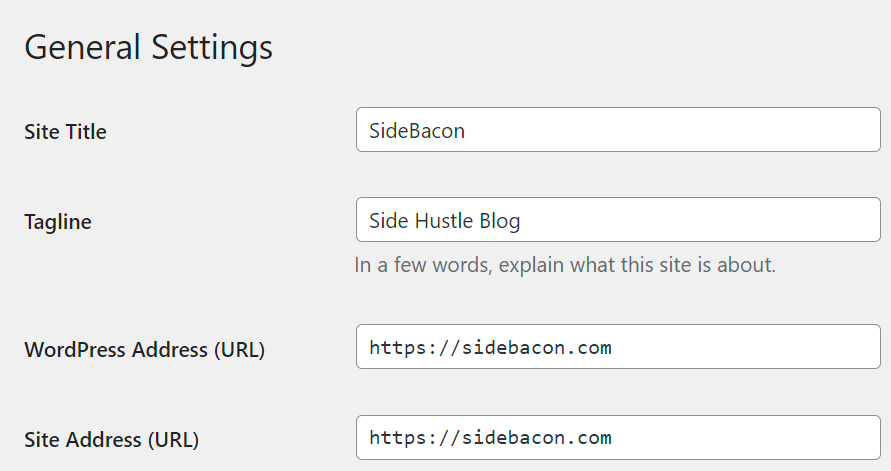
This page allows you to change the Site Title and Tagline. During the installation process I mentioned that you could change the site name later – this is where that setting is located. The Address URL settings here shouldn’t be changed unless you’re trying to switch a site to SSL (you could change http to https, for example).
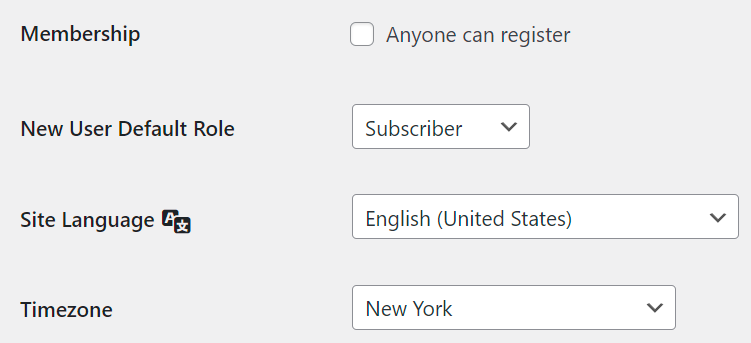
Unless you’re building a membership site or a forum, it’s usually best not to allow the public to create an account on your website – there’s no real purpose for it on a blog. The Membership checkbox lets you block those registrations (make sure it is not checked). If you do allow registrations, make sure you assign the proper New User Default Role. Subscriber is usually the right choice for this setting (you wouldn’t want people to freely sign up for your site and have the ability to post content or make changes to your site, for example).
Writing Settings
The next page in the Settings menu is Writing. This section contains a few useful options.
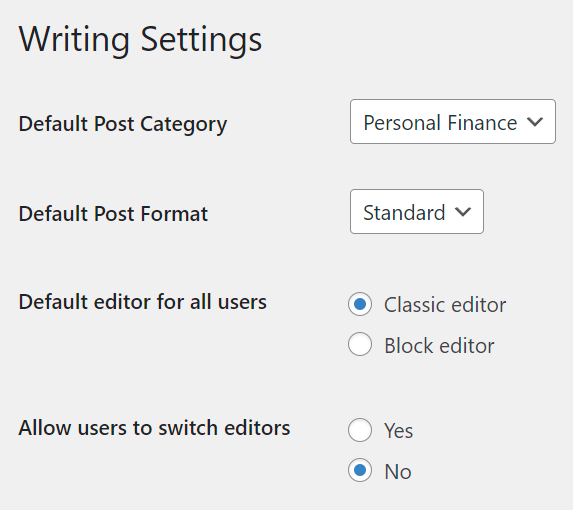
The first four options aren’t mandatory but they can be helpful to speed up your workflow so you have less options to change each time you create a new page of content. I find the two editor settings useful, since I only use the Classic editor and switching back and forth between the two can cause some HTML code to get erased.
Each time you publish a new page or post, your site will notify update services. This can help your new content get discovered faster, which can include quicker indexing on Google search. I’ve included my current list of WordPress Update Services for 2022 – 2023 below. Copy and paste this list into the Update Services box on your site.
http://rpc.pingomatic.com
https://rpc.twingly.com/
http://ping.feedburner.com
http://ping.blo.gs/
http://www.weblogues.com/RPC/
http://www.blogdigger.com/RPC2
http://pingoat.com/goat/RPC2
http://www.pingmyblog.com/

Most settings pages in WordPress will require you to click on the Save button at the bottom to make your changes live on your site. If you make changes and leave the page without saving, those changes will be lost.
Reading Settings
Click on the Reading link in the Settings menu. This page is important for a new website.
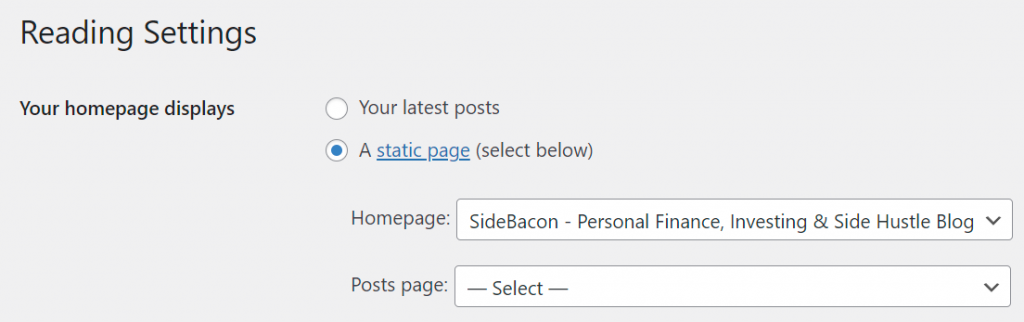
The first setting allows you to control which page is used as the home page for your website. For a new website, you probably have not created that page yet, so you may need to revisit this setting later. With ‘Your latest posts‘ selected, you don’t need to create a homepage, but you won’t have any control over the page using that option. I prefer to create my own page and designate it as the Homepage using this setting. The Posts page setting is optional – it causes a page to show the most recent posts, so this would be a central page for your blog posts. I don’t use the Posts page setting though. I’ve created a custom homepage and used a plugin to show the latest posts on that custom page.
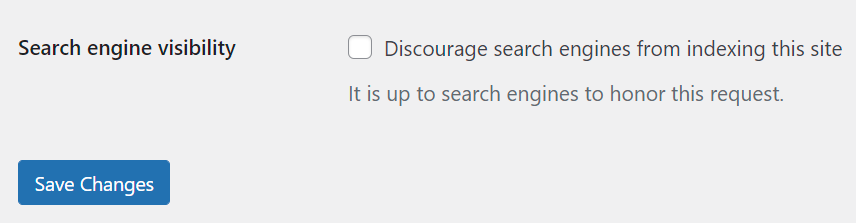
You may think that new sites under construction should be built before search engines are allowed to index them, but I always allow search engine indexing on brand new websites. Checking this Search engine visibility option would prevent that from happening. I prefer to allow Google to index my site as it is built and grows since I feel like it is more natural that way.
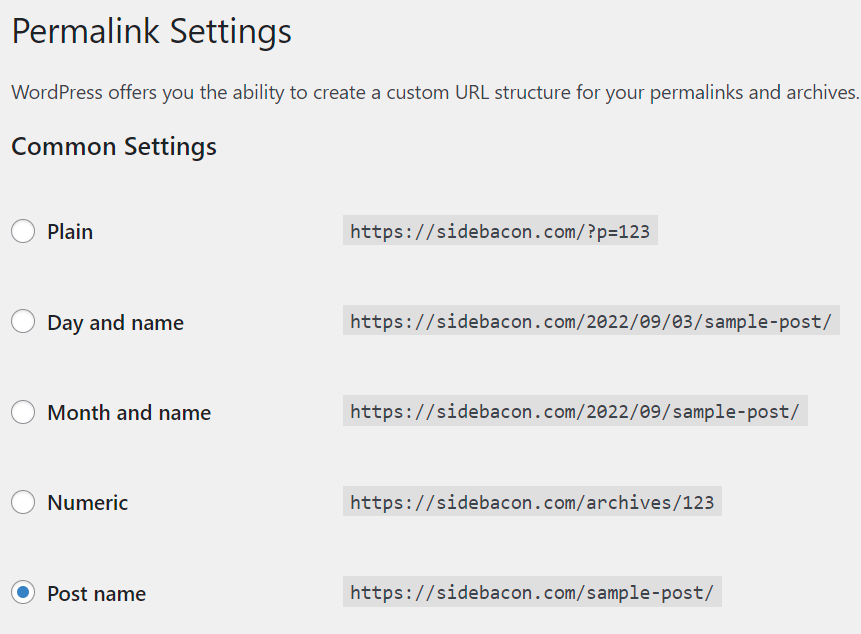
Permalink Settings
The last options page I want to discuss here is for Permalinks. I consider this a mandatory settings change for all new sites.
Select the bubble next to Post name. This changes the way URLs are automatically generated for new posts and pages that you publish. With this option selected, the title that you create for each page will be converted into the URL. It makes more meaningful page URLs for search engines.
I’ve covered all of the essential settings that I will change right after I’ve installed WordPress and before I actually begin to build the website. Now it’s time to move onto additional software for WP – a theme and then plugins.
WordPress Themes
Technically, this section of the training course could be skipped. After installation, you’ll already have a theme that is activated and in use on your site – likely the Twenty Twenty-Two theme currently. However, most people will want to search for and install a new theme. Step #3 is going to teach you all about themes and give you a crash-course on how to use them.
What is a WordPress Theme?
A theme will control the design and overall look of your website. Anyone can make a theme for WordPress, so you can actually search through thousands of them to use for your site. Most of them are free, but there are also commercial versions that cost money to use them. I’ve always used free options since there are so many choices – I can typically find one that will work for any purpose.
Even though you can install more than one of these, you’ll only be able to have one of them active. The active theme is the one that will determine how your website looks in a web browser. A default style will typically be set for each theme, but they give you additional options that let you customize different parts of your live site.
It’s tempting to pick a flashy, professional looking theme. However, you need to try to find the right balance between a professional look and speed. Light themes with minimal design and a small number of customization options will usually be the fastest, which makes them best for SEO.
Free vs Premium Themes
Developers will create free themes that can be found through the WP Admin page. Many of them will also have a premium version that is advertised through the free version. Some of the most sought-after or useful features will be hidden behind these paywalls to tempt you to upgrade.
In my experience, premium themes really aren’t worth it unless you have a very specific purpose that it solves perfectly. In most cases, I’ll stick to the free versions. Even if one theme hides a feature behind a paywall, you can likely find the same feature for free by simply switching to another option.
Best Free WordPress Themes
It’s hard to recommend a single theme that will work for every website, but I can narrow it down to two for you. These are two of the best free themes, in my opinion:
- Weaver Xtreme – I’ve been recommending this theme for over a decade, so it gets my top pick. An insane number of customization options makes it capable of making millions of different designs. It’s fast for desktop traffic and a bit slower for mobile devices.
- Twenty Twenty – I’m not a major fan of the actual theme as a user, but it’s blazing fast for mobile devices, so it can be a great choice for SEOs. The biggest drawback is the lack of customization options. Even an optional add-on plugin doesn’t improve this very much.
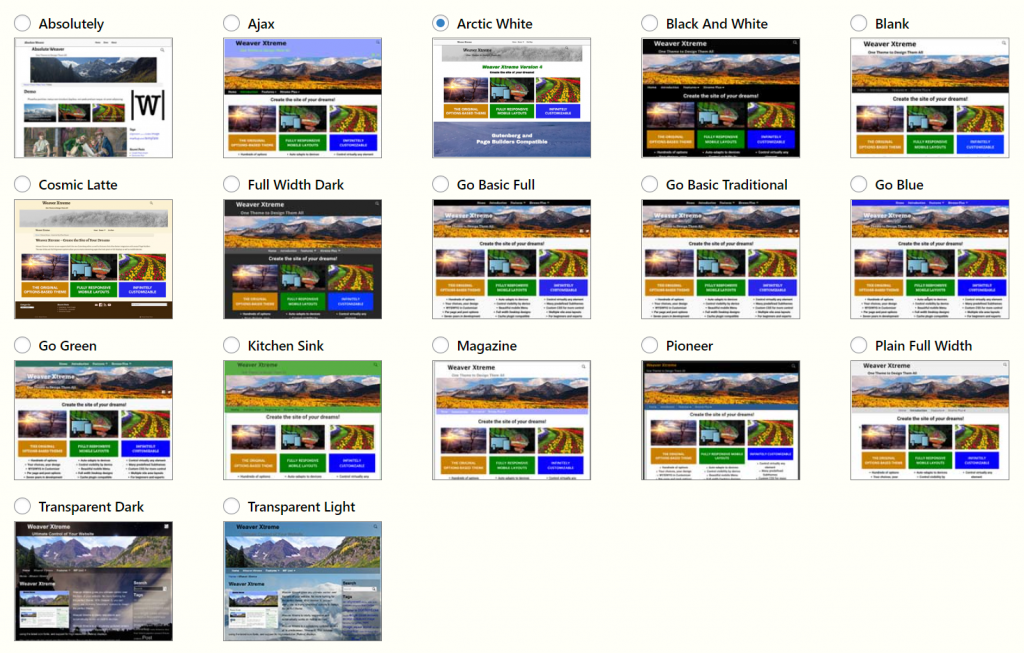
I want to show you a tiny piece of the options found in Weaver Xtreme. As of this writing, version 5 is the current edition of Weaver shown here.
Weaver Xtreme has an in-depth Admin system that allows for customization of almost every design aspect of your website. You don’t have to make these designs from scratch though. You’ll find a decent selection of Subthemes to choose from. When you first start using this plugin, take a look at these Subthemes first before you start customizing individual settings. Once you select a Subtheme to use, you can then start to customize it. Switching will wipe out a lot of the settings, so you don’t want to mess with these once you picked one and started customizing the design.
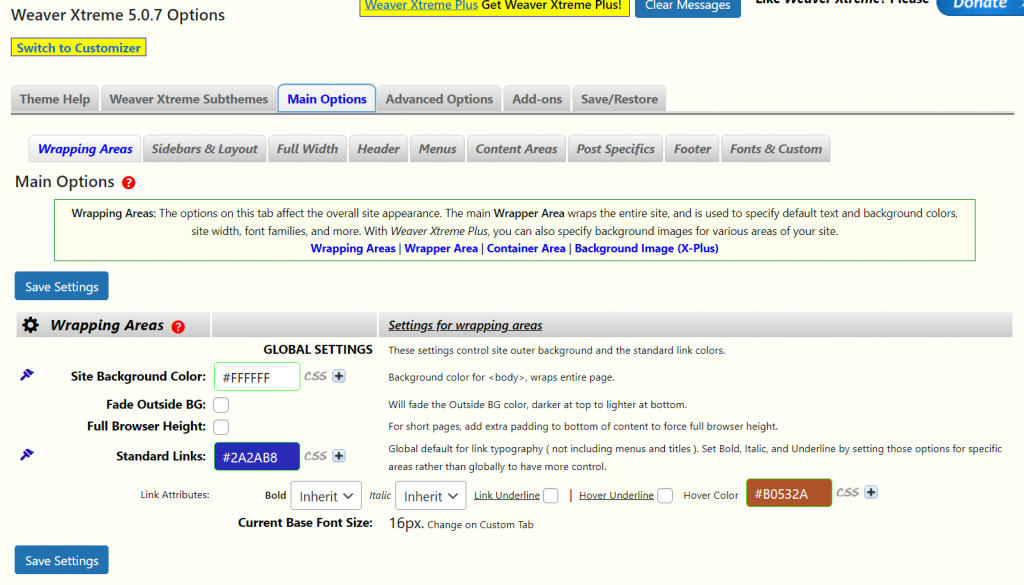
This is a very small piece of the amount of customization options you can find in this theme. You can see the menu options on the page below, and many of those pages have 50+ settings you can use (you only need to use the ones you want to customize). Most of these options are also available in the standard WordPress Customize page that lets you see changes as you make them.
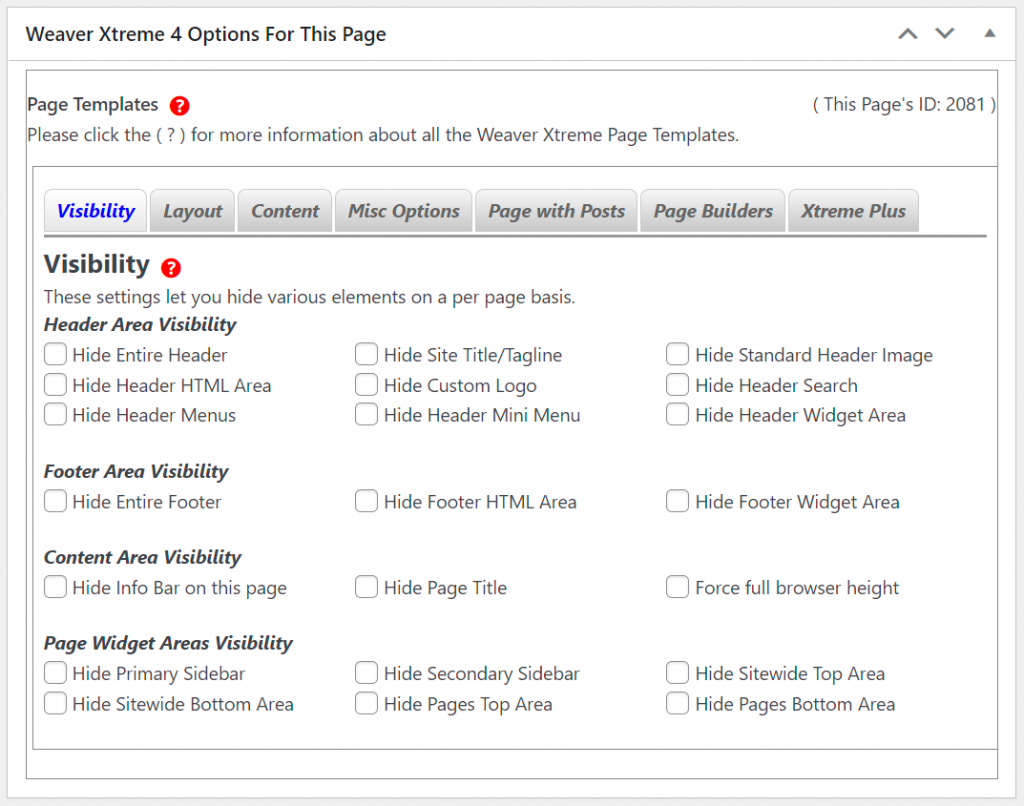
When you’re creating and editing individual pages on your site, Weaver has a variety of options you can use to customize them on a one-by-one basis. I love these features when I’m building a site because they let me make pages for special purposes. As an example, let’s say you have a blog where most pages will show the logo, menus, sidebar, and footer along with the content. You want to make an email newsletter list, so you want to create some landing pages with a signup form. However, you don’t want to distract from that signup form with the normal elements found on the rest of the page (the header, footer, sidebar, etc..).
Using the Weaver Per Page options, I can hide the header, footer, sidebar, info bar, page title and any other parts of the page that I don’t want to show up. It’s just this one page that I want to work that way too. Most themes will make you change the design of the entire site, so being able to alter the design on an individual page has been extremely useful for me.
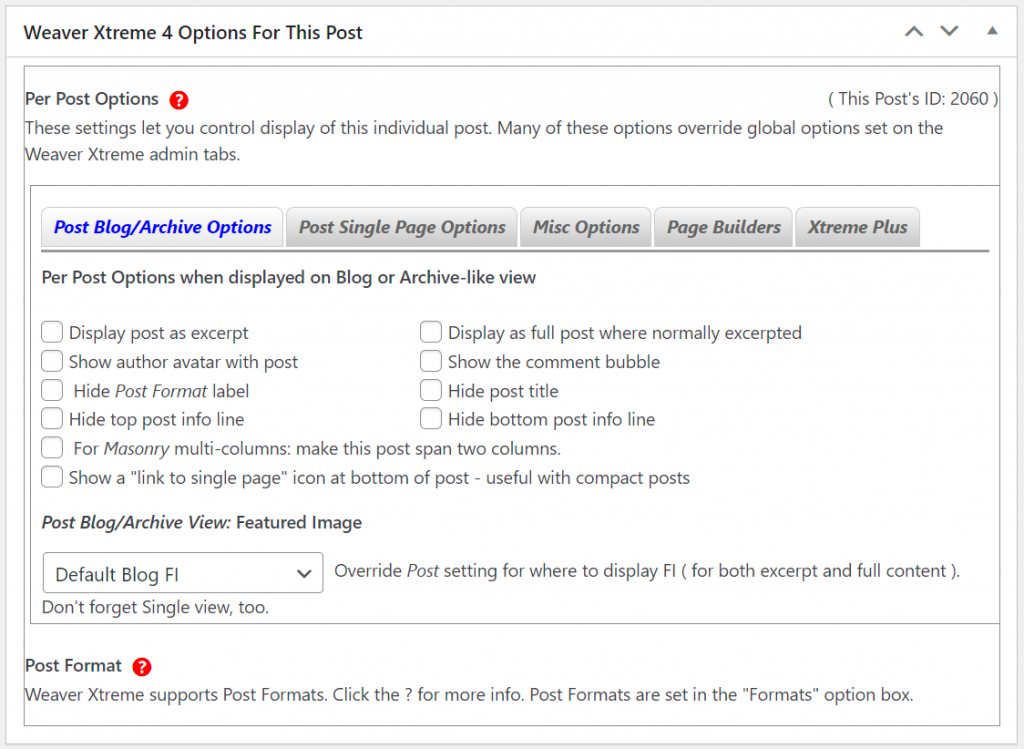
There are also similar settings available for posts. However, since pages versus posts operate a bit different, there are also different settings for customization.
I also mentioned the Twenty Twenty theme. This is a default WordPress theme that’s still currently being installed on new sites, but it may not be found by default within a couple of years. You can still search for it within the admin system though. Overall, I’m not crazy about using the theme or even the way it looks to a visitor, but I like it because it is blazing fast for use on cell phones, tablets and other devices with a smaller screen resolution. This can help with search engine rankings these days, since speed is a fairly major ranking factor for Google’s algorithm.
Install a Theme
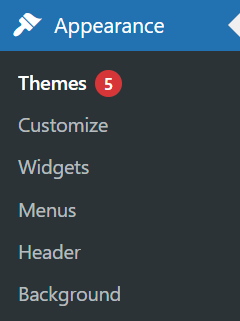
If you click on the Themes link in the Appearance menu, you can search for new themes to install and manage existing ones on your site.
To find and install a theme, first click on the Add New button at the top of the page.
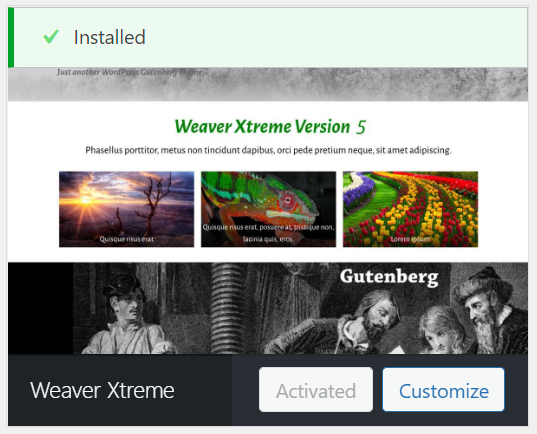
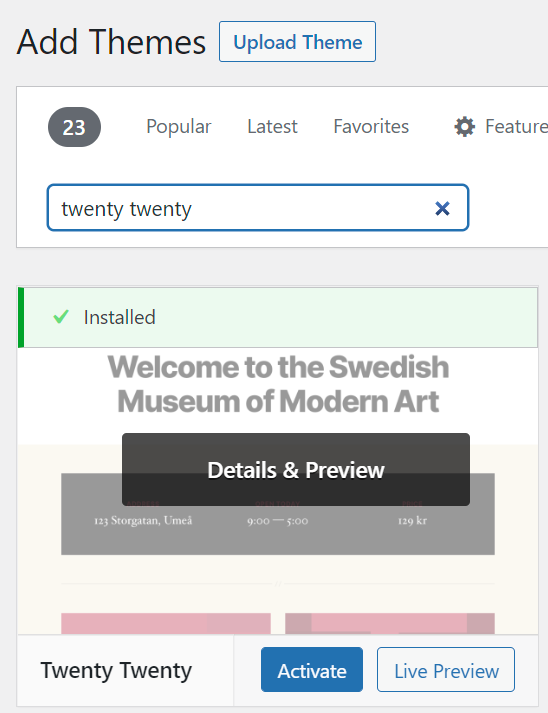
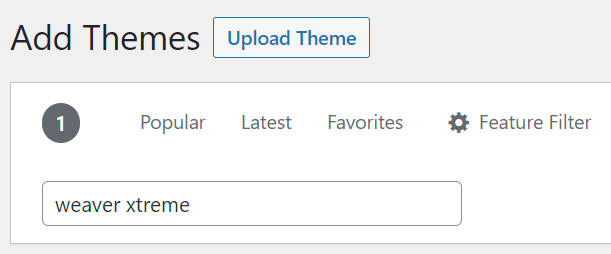
This will display a search bar. Type in the name of a theme or possibly a primary feature you’re trying to find. To use my recommended best theme, type in “weaver xtreme”.
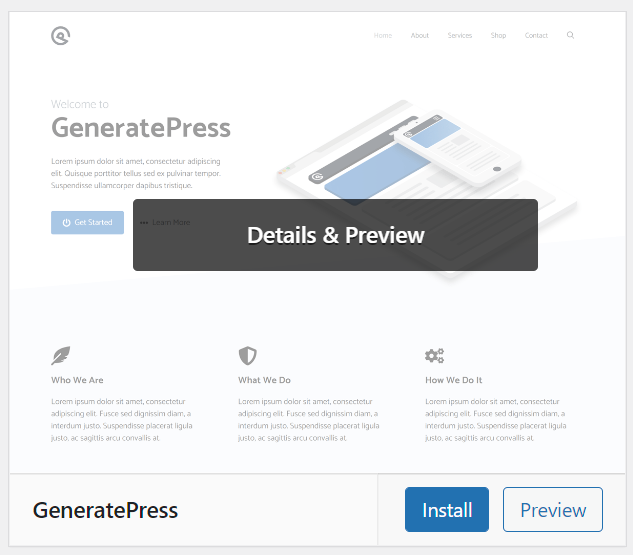
In the search results, click on the Install button for the theme you want to use on your site. You can also click on the Preview button to view a live preview of how your site would look using that theme with default settings.
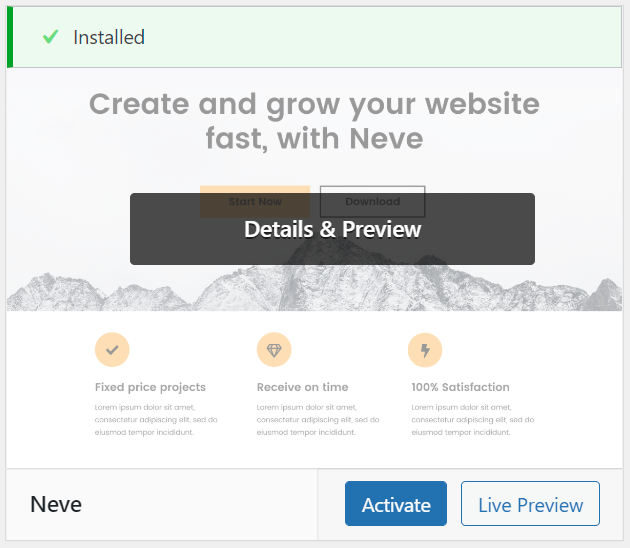
Once it’s installed, that Install button switches to an Activate button – you’ll need to click that as well to make your site use the theme.
Remember, you can only have one Active theme on your site at a time, so you’ll need to choose one that you like the better than others. Pay attention to both design, customization options and speed when trying to make a choice.
Customize
Once you have your theme installed, you can customize it in a variety of ways. However, the options available will change from one theme to the next. Look for the Customize link in the Appearance menu.

It will take a few seconds for the customizer page to load. Once it’s loaded, you’ll see a menu on the left and a live preview of the home page of your website on the right. You can navigate through your site in the preview so you can see how different types of pages look (pages vs posts, for example).
At the top-left of the Customizer page, the “X” closes it and brings you back to the WordPress admin. If you make any changes, the Publish button in the top-right of the menu will turn blue – you will need to click it to save changes to make them live on your website. If you navigate away from the Customizer page without publishing, you’ll lose changes to settings.
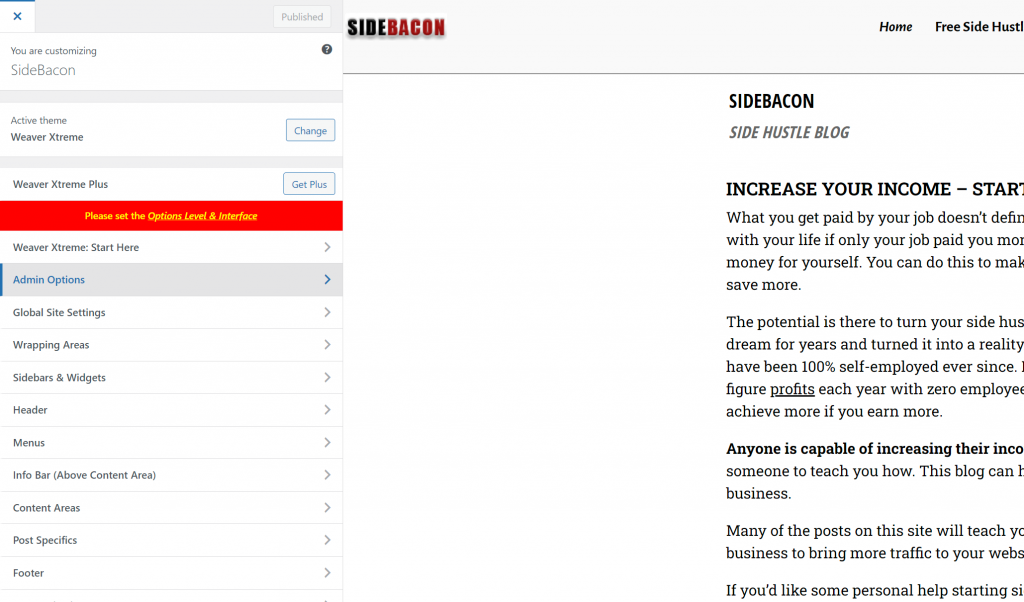
By clicking through the menu items on the left, you’ll see options to change different settings. Each theme will have different options available. In the Weaver Xtreme theme, look for the Admin Options menu link. There’s an important page here that changes how many customization options will be available on this screen.

In the Admin Options menu, click on “Set Options Level & Interface“.
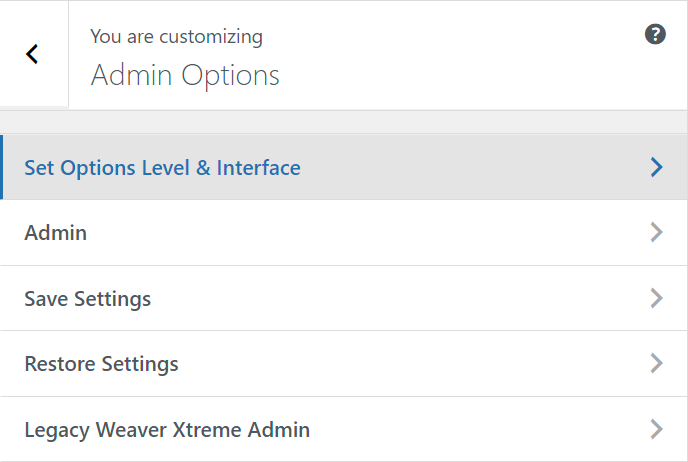
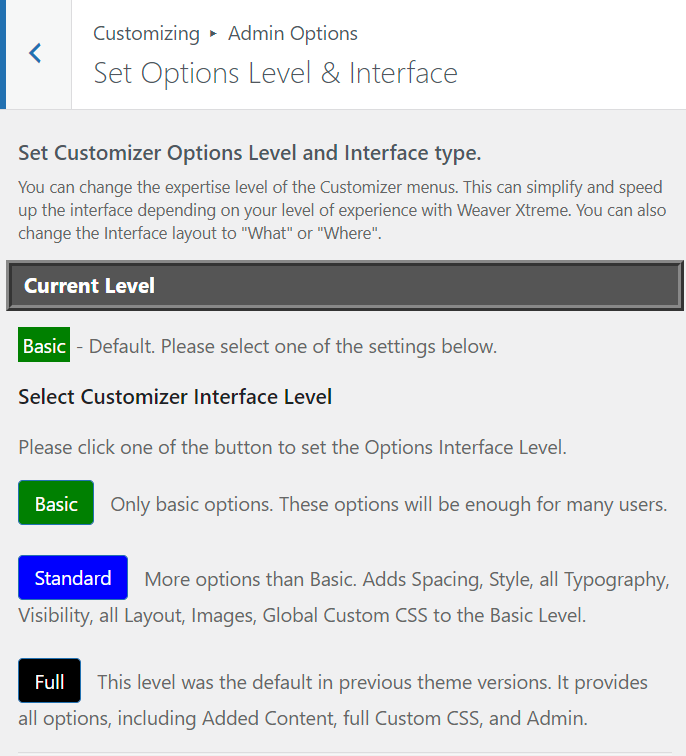
By default, the Basic customization level will be selected on this page. That’s likely a good setting for a first-time user, but more experienced users may want the Standard or Full customizer options. Clicking on the appropriate button on this page will change the number of options available elsewhere in the customizer.
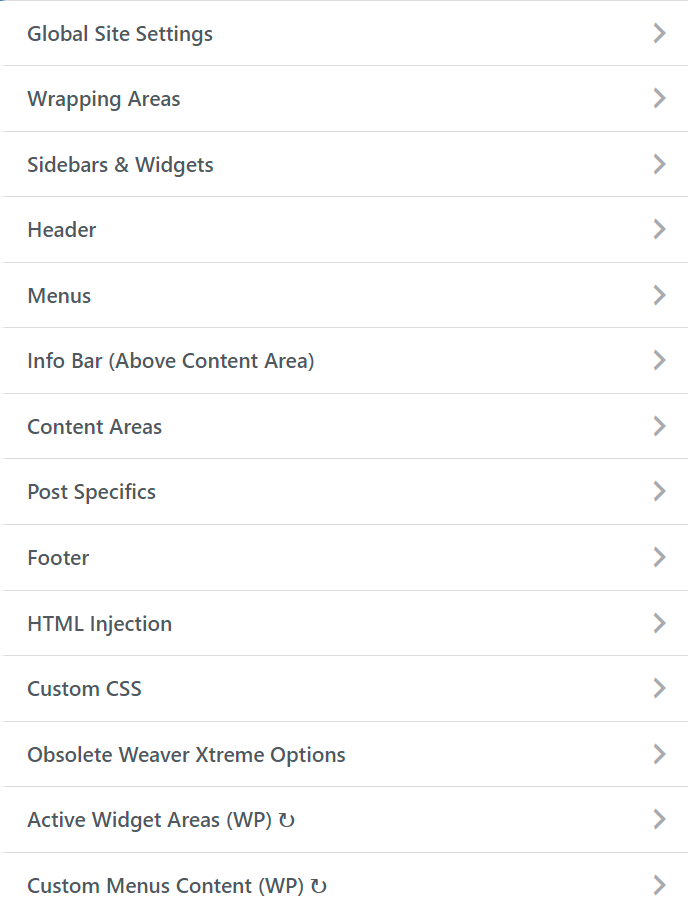
Below are even more options found on the main page of the customizer for the Weaver Xtreme theme. Clicking on any one of these will display even more settings. In general, look for the menu item that identifies a part of your site that you want to modify. For example, the “Header” controls the top of your website, so clicking on that item will let you change options for that area. I’m not going to walk you through all of the options here since they are different for each theme. I recommend clicking each menu item and simply browser through the options to see what you could possibly change on your site.
One final part of the customizer that I want to point out is found at the very bottom of the menu on the left. You’ll see a gray bar that says “Hide Controls“. To the right there are three icons. You can click on these icons to change the preview on the right as though you’re viewing your site with a cell phone, tablet or desktop. I find this really useful to ensure that my site is optimized for mobile devices.

Other Options
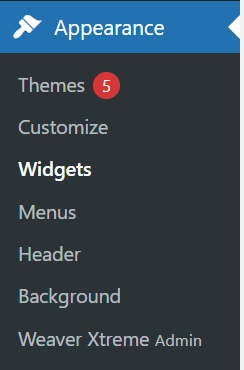
In the Appearance menu you will find a few other links that work with your theme. I’ll be talking about Widgets and Menus later in this guide. The Header and Background pages let you quickly change the images used on those parts of your site. The Weaver Xtreme theme also adds a special Admin link here, which is where you can find all of the customization options available for it.

Remember that each theme will work different in this way, so you could see different menu links for different themes. These examples are using Weaver Xtreme.
WordPress Plugins
The core software for WP is really designed for blog websites, but you can actually create almost any kind of site with it. What makes this CMS so great is that the core features can be changed or even expanded with additional free software called plugins.
What is a WordPress Plugin?
Most plugins add new features to a WP site. Others will modify existing features. You get to search through a list of thousands of free plugins to easily install. This allows you to mix-and-match the features that you need to build the type of website you want to create. Plugins simply give the WordPress CMS an extreme amount of versatility.
It’s important not to overuse plugins though. The more you add to your site, the more code there is to run when someone visits in a browser. More code results in a slower site, so you only want to add features that you need and avoid the rest.
Best WordPress Plugins
There’s a big distinction between the “best WordPress plugins” and the plugins that I recommend that you install on your site. You may want to pick and choose a couple of the best plugins to use, depending on the type of site you want to build, but you DO NOT want to use all of them. You really need to be focused on speed when you’re choosing which ones to use, so you want to use as few as possible to achieve your goals.
Here is my list of recommended plugins to install on almost all websites:
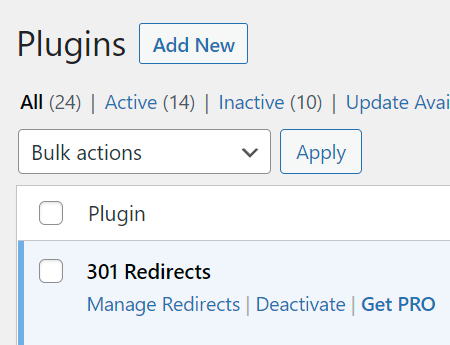
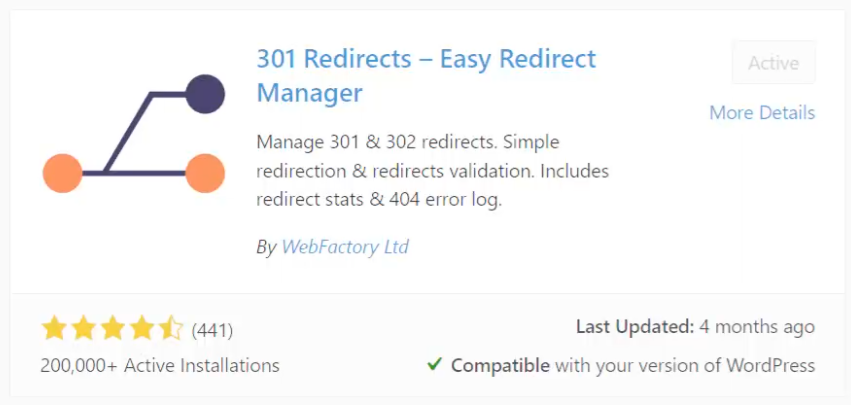
- 301 Redirects – Search engine friendly redirects. Redirect old URLs, old backlinks, and fix 404 errors. I create custom category pages using this plugin.
- All in One SEO – My recommended SEO plugin for the free features. Some Pro features can be found for free using other plugins, as needed.
- Classic Editor – Turns the Editor Window back to the classic edition before WordPress created the block editor. I find this to be the best way to edit and build content with the plain text editor.
- Disable Comments – New sites will get bombarded with comment spam if you use posts. This site just turns it all off. You could consider enabling again when you have a lot of regular traffic.
- Disable XML-RPC-API – Very important for security. Hackers use XML-RPC as a way to easily guess your admin password with millions of attempts with relatively few requests. Turning this off is the easiest way to stop the problem.
- Loginizer – Security for the admin login system. Most compromised WP sites are hacked through the login system. This plugin combined with disabling XML-RPC shuts down most hacking attempts to keep your site safe (still use a complicated password).
- OneSignal Push Notifications – Browser notification system. Readers can subscribe to notifications and then they get a notification on their device or browser when you publish new content. My site uses this tool.
- UpdraftPlus – WordPress backup plugin. Helpful for beginners to keep regular backups of their site in case of any problems. Most hacked sites can be restored with a clean backup.
- WP Post Page Clone – Duplicate a page or post quickly. On my site I have a blog post template with some default HTML I use for designs within page content. I copy this post when I need to publish a new post to avoid redoing that coding every time.
- WP Show Posts – Very useful to create custom category pages. It will create a list of posts on your site with options to filter the posts and control what information is shown to your site visitors.
- WPS Hide Login – Hides the normal location of the WP-Admin URL to make it even more difficult for hackers to break into your site.
I also want to mention a handful of the most popular and most useful plugins that will be useful for specific situations – add these to your site as needed:
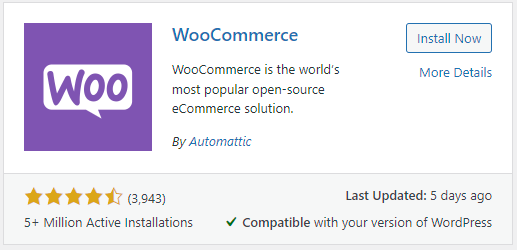
- WooCommerce – A must for e-commerce websites. Controls everything from product pages, shopping cart system, and payment processors.
- BuddyPress – Great for membership sites where visitors have to pay a monthly or annual fee to be able to access your content.
- Contact Form by WPForms – Contact form creator. Perfect for normal contact pages or can be used for special purposes.
- Wordfence Security – A good overall website security plugin. I don’t find it necessary with the other security precautions I take using other plugins though.
- All-in-One WP Migration – Great if you want to move your website.
- LightSpeed Cache or Hummingbird or WP Super Cache – Caching plugins. Try all three to see which one performs best for your site. May not be needed with WPX Hosting accounts.
- Cloudflare – Not necessary with WPX Hosting accounts, but it can help to speed up some slower sites. Also provides some security protection by hiding your server IP address.
- WP Mail SMTP by WPForms – If your website will send email of any kind, you need to use this to ensure your mail isn’t flagged as spam.
- Classic Widgets – This reverts the Widget system back to the standard editor instead of the new block editor. Helpful for those that hate the new blocks.
- Elementor Website Builder – Most popular page builder plugin. Great for beginners. However, your site will be faster if you can learn basic HTML & CSS and build with a plain text editor instead.
- Yoast SEO
– An alternative to All in One SEO. Yoast used to be the best, but they were sold to another company. They’ve since turned it into an advertising playground designed to sell you things.
Install a Plugin
In search for and install new plugins, click on the Add New link in the Plugins menu.
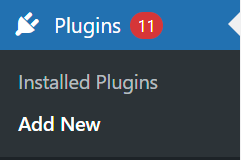
You can alternatively click on the Add New button found at the top of the Installed Plugins page.
First search for the name of a plugin. You can sometimes search for a feature that you want to add to WordPress to find plugins that might fit your needs. You can use plugin names from the lists above for these searches to quickly find them.

You’ll then see a list of plugins that fit the search, along with some details for each. In particular, take note of whether the plugin says it is compatible with your version of WordPress in the bottom-right corner of the info box. You’ll need to click on the Install Now button in the top-right to download it to your site. The More Details link under the install button can tell you more about the plugin if you aren’t sure it will work for your needs.
Once a plugin is installed, you need to click on the Activate button – this replaces the Install Now button. Only Active plugins will run on your live site.
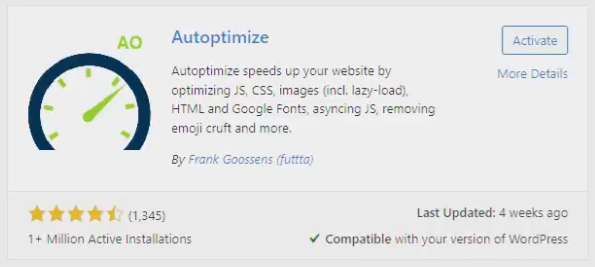
Figure out which plugins you want to use and install then activate them one at a time. This course is NOT going into extreme detail on how to use all of these plugins, so you will need to experiment and play around with settings for some of them. However, there are a few plugin related settings that I want to talk about in this guide because I consider them essential.
CloudFlare
If you’re using my recommend hosting company, WPXHosting, you won’t need CloudFlare. Since this can be a complicated process for many beginners, I highly recommend using WPX. For almost all other web hosts, I’d recommend using Cloudflare DNS.
The free version or the first membership level, which costs $20 per month, are the two recommended versions. With the upgraded version, you won’t have to worry about a caching plugin.
When you’re using Cloudflare, you have to switch the DNS for your domain name. They have decent tutorials that show how to do it, if you’re not familiar with that process. There’s a WordPress plugin for Cloudflare that you should install. Once it’s active, look for the Cloudflare link in the Settings menu.
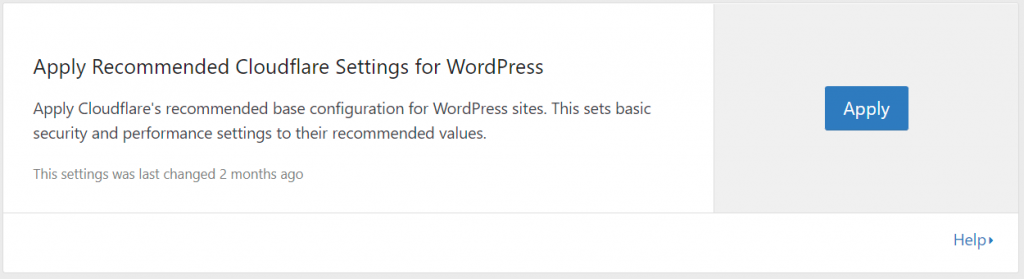
This settings page should be set up after you connect Cloudflare to your site. Use the confirmation settings on this page first and then you can fine-tune settings in Cloudflare as needed. You likely won’t need to come back to it very often after that, but there are a couple of handy tools here. If your site ever gets a DDOS attack, you can click on the button in the top-right to Enable “I’m Under Attack” Mode.

Make sure you click on the Apply button to get started. This will apply a number of recommend settings to Cloudflare for your site.
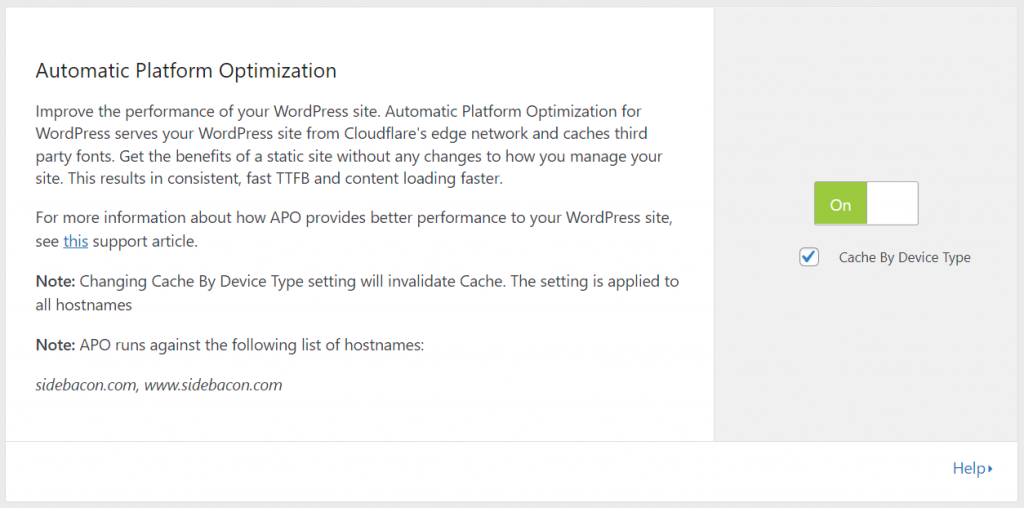
I highly recommend enabling Automatic Platform Optimization on your site AND checking the Cache By Device Type setting. This can greatly improve page loading times with some slower sites.
Cloudflare should be set to purge your cache when you update or publish new content, but you can also do this manually through the plugin using the Purge Cache button.
The rest of the settings for Cloudflare will be located in your account on their website, so be sure to browse through those options to configure your site.
SEO Plugin
Yoast SEO used to be the best SEO plugin but now I use AllInOne SEO. I’m still not crazy about this plugin either, since it has quite a few features hidden behind a paywall. However, I’ve been able to find a lot of those premium features through other free plugins, so I’ve never paid for an upgrade for any SEO plugin. With AIOSEO installed, click on the Search Appearance link.
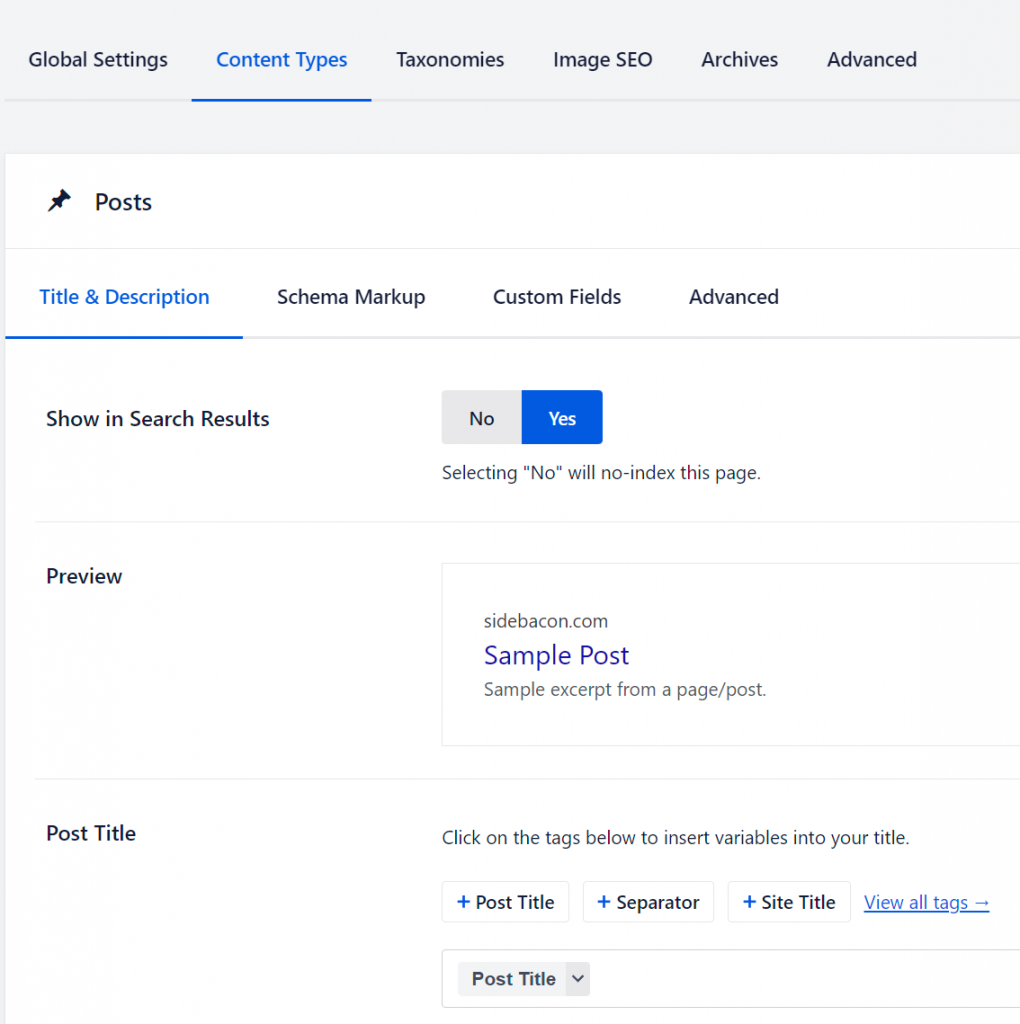
Then click on the Content Types tab. Later in this guide, when I’m teaching you how to create a WordPress Page, I’ll talk about deleting the Separator and Site Title tags from the Meta Page Title. If you don’t want to bother doing that on every Page and/or Post, you can remove them with these settings.
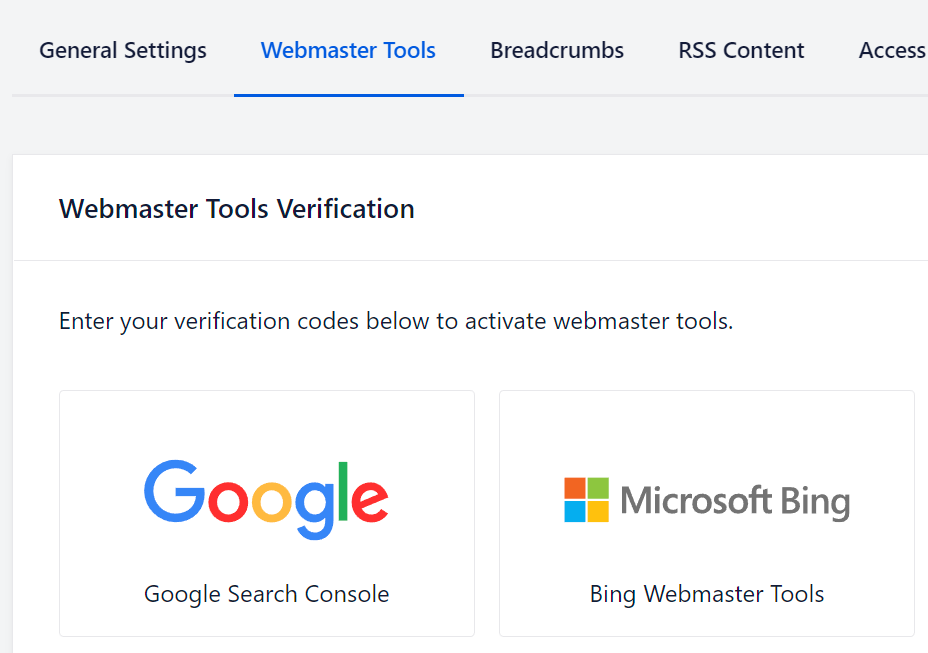
Click on the General Settings link, and then click on the Webmaster Tools tab. This page gives you an easy way to insert verification code provided by Google Search Console and Bing Webmaster Tools. Verifying your website with those search engines will allow you to manage your search listings there (highly recommended). I’ll talk about this more in the Google Search Console section soon.
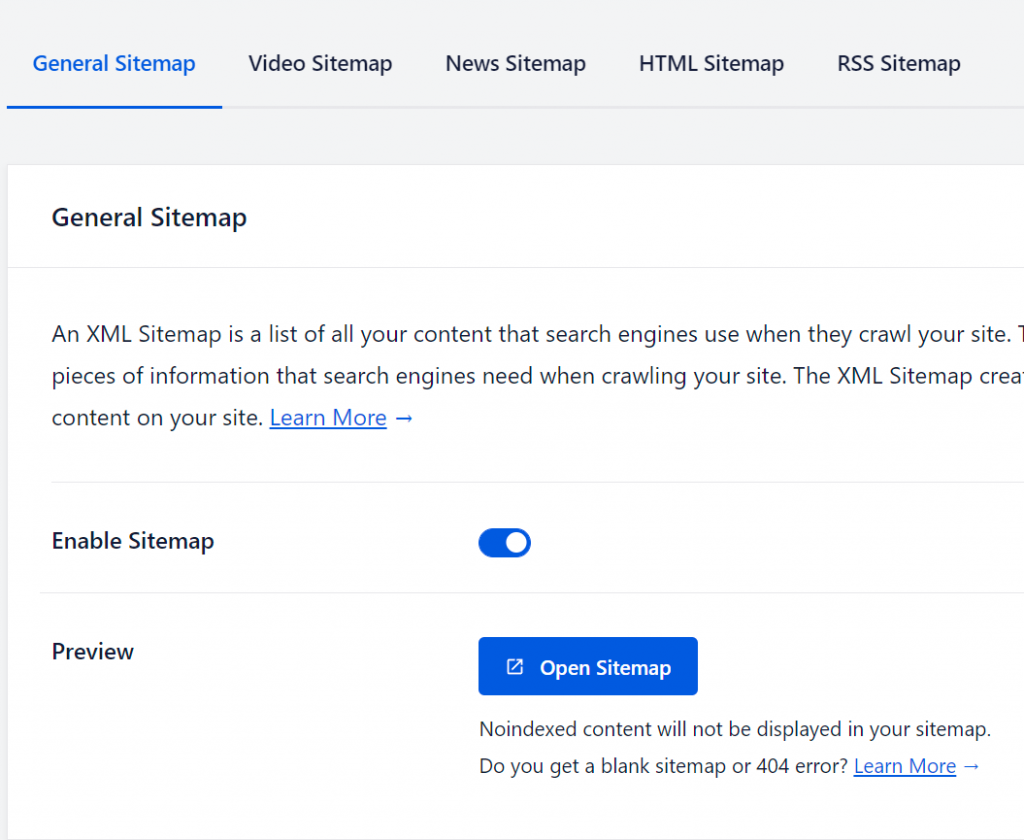
Now click on the Sitemaps link in the sidebar menu. Make sure the Enable Sitemap setting is blue. The Open Sitemap button will give you the URL for your sitemap that you can submit to Google, Bing and other search engines. Take a look at the other settings on this same page to be sure that all of your content will show up on the sitemap.
There are a ton of other settings in this plugin. I recommend browsing through all available pages and tabs to see what can be changed – the Social Networks page in particular can be very important. You’ll also see what I mean about running into a lot of blocked paywall features. Don’t be tempted to upgraded though – search for another plugin to add those features if you really want to use one of them.
Google Analytics
I highly recommend creating an account with Google Analytics and connecting it to your site. This free Google service will track your traffic and provide you with a lot of useful information you can use to make improvements, track results of sales, and more.
When you’re setting up an account and get asked to input verification code, go to All in One SEO -> General Settings -> Webmaster Tools. There is a place here for this code. Look for the Google Analytics box (seen below).

Google Search Console
I also recommend setting up Google Search Console. This will track your search engine performance on Google, and it connects with your Analytics account too. I’m not going to go into detail about this service here, even though it is extremely important to use. However, I have already created a training guide for Search Console, which you can find below.
My full training course for this service can be found here: How to Use Google Search Console
Bing Search also offers a similar service called Bing Webmaster Tools. I recommend using this service as well.
Security Plugins
Using Cloudflare DNS, Loginizer plugin, XML-RPC plugin, and WPS Hide Login plugin, I haven’t had any security issues. In fact, some of these may even be overkill security because the loginizer plugin hasn’t actually had any traffic to block with the brute force settings (hackers can’t reach my WP login screen or submit login requests with XML RPC, so they can’t even get banned by brute force protections).
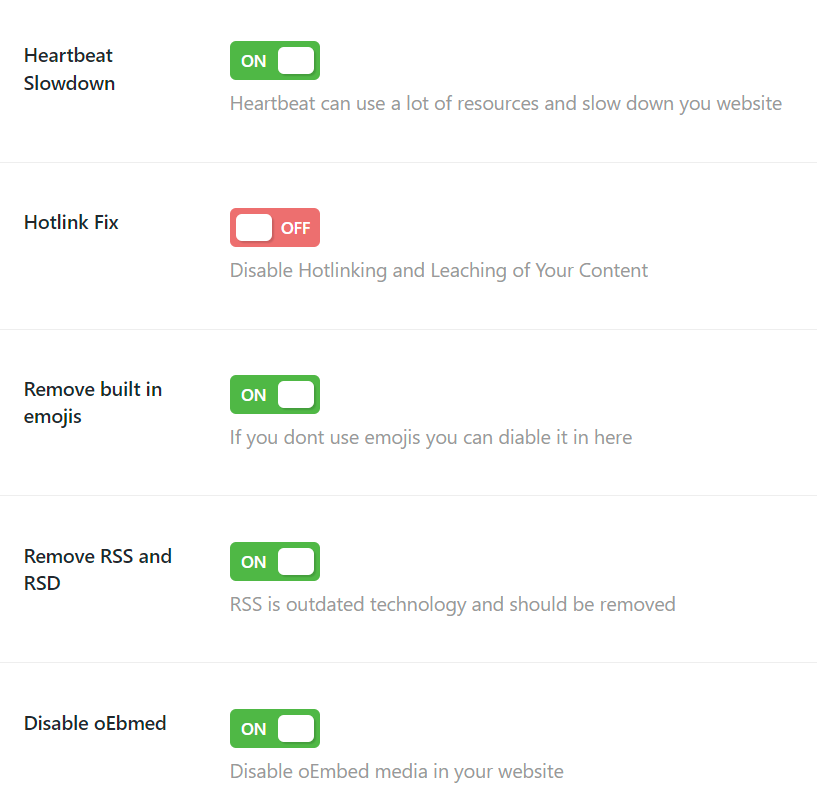
I want to show you the settings I’m using with the Loginizer and XML-RPC plugins so you can duplicate them. First click on the Brute Force link in the Loginizer Security menu.
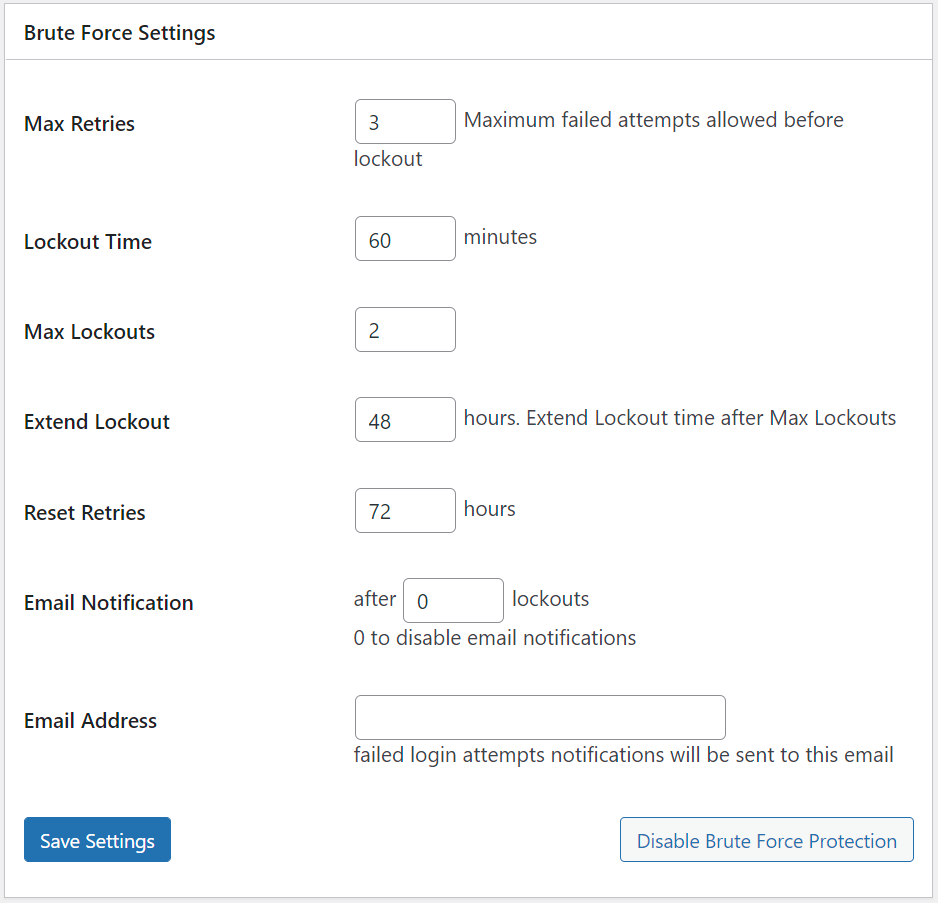
Here are the settings I’m using for brute force protection – this helps to stop people from making repeated login attempts. The most common way for hack a WP site is simply to guess the Admin password.
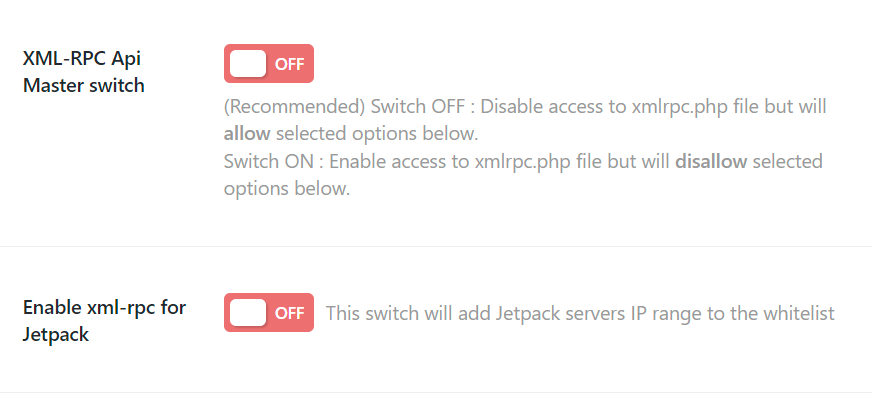
Now go to the XML-RPC Security plugin and click on the XML-RPC Settings link.

Make sure both of the settings here are switched off. This disables the XML-RPC system, which allows password guesses in huge numbers with minimal effort (the #1 way hackers get into sites).
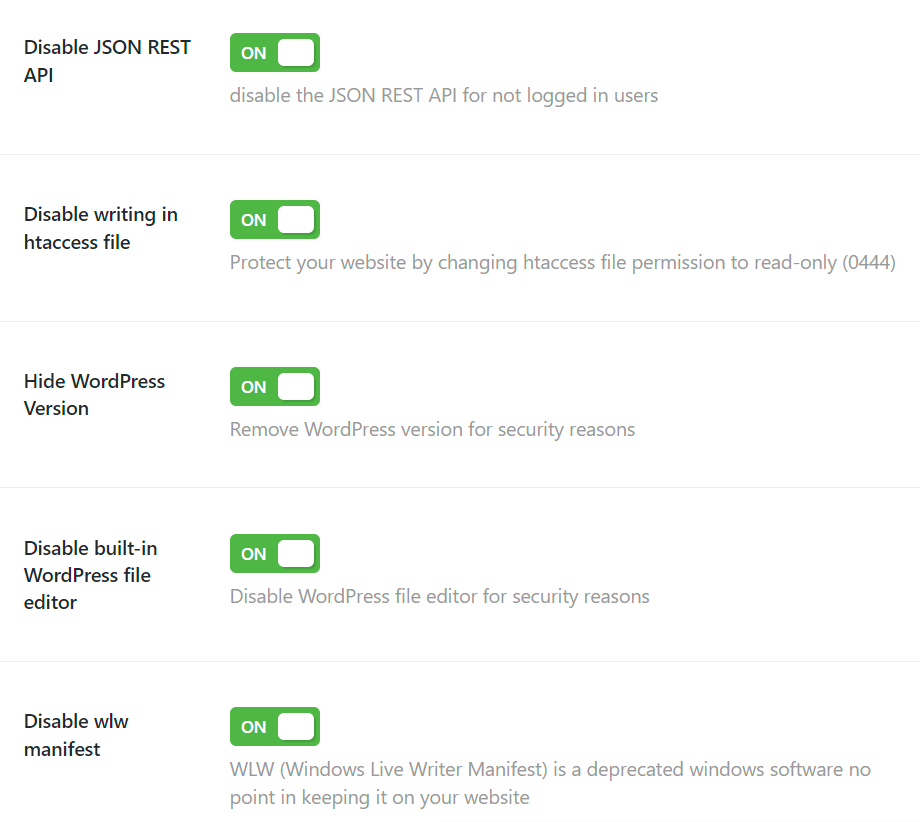
Now click on the Security Settings link. Turn on all 5 settings on this page. This removes other potential methods that hackers will use to gain access or find out information about your site, which could lead them to vulnerabilities.
Finally go to the Speed Up WordPress page. You can turn on all 5 settings on this page as well. I currently have Hotlink Fix disabled for some testing, but I may turn this back on in the future. These settings simply help the system run faster and don’t really have much to do with security.
Cache Plugin
If you’re using WPX Hosting and/or Cloudflare’s upgraded DNS service (the one that isn’t free), you do NOT need a cache plugin.
When you do not use either of those services, a caching plugin is essential. Unfortunately, this can be a more complicated subject since each site can be different. There isn’t a single plugin that is the fastest cache plugin. I’ve found some work better on one site, while the opposite might perform best on another site. For this reason, if you’re not going to use WPXHosting and need a cache plugin, try installing my three recommended caching options below and testing them one at a time.
Use Google PageSpeed Insights to test speed and page loading times.
Try these three cache plugins to see which is fastest for your website:
- Hummingbird (can actually work along with Cloudflare easily)
- WP Super Cache
- LightSpeed Cache – won’t work on all servers unless they have LightSpeed installed on the server itself
Using WordPress
If you’ve been following each step of this training course, your WordPress website should now be completely set up and ready to start construction of pages and content. Before you can do that, you need to know how to use WP. This section of the guide will teach you everything a beginner will need to know to get started.
First I will walk you through the key parts of WP that you’ll use to create your site, and then I’ll show you how to apply this knowledge to plan and actually build it. For now, just try each of these features on your own site and create a sample page and post. You can delete the tests when you’re done, but it can be useful to see it work before you take the time to create an entire page for the first time.
Pages vs Posts
The first thing that you need to understand about building a site with WordPress is that there are two different ways you can publish a new page: as a “Page” or as a “Post“.
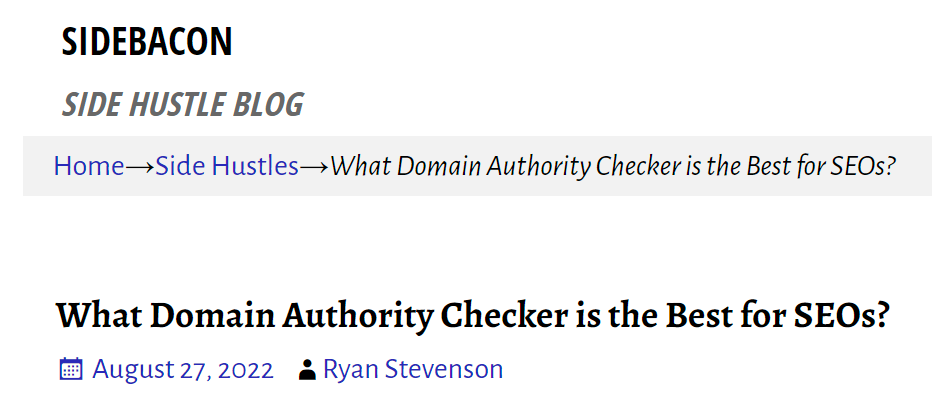
A WordPress Post will have a date, author, category and tags associated with it. They’re most commonly used for blogs to publish new content each day. Categories and tags organize the content so visitors can easily find the type of content they are interested in reading. Post dates let your content get displayed so visitors can find your most new content easily. It also gives them a way to tell if the information might be recent and up-to-date.
Here is a what the top of a Post looks like on my live website. A category in the breadcrumb links, a date, and an author name can all be seen here. They’re all clickable links too, so visitors can browse content using any of those factors to organize and filter it.
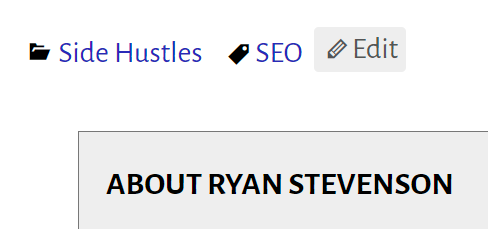
At the bottom of the Post, there are also links for the category and tags, as well as an author information box. None of this will show up on a Page.
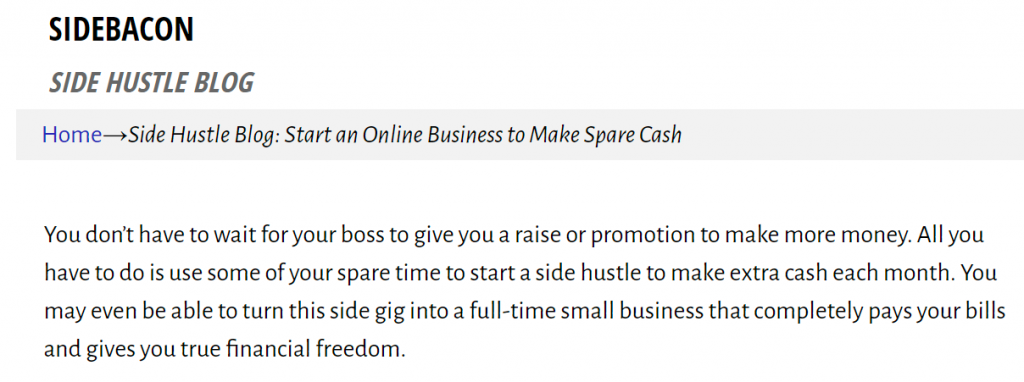
A WordPress Page doesn’t have any of those associations. It’s intended to be used to build the structure of your website including static, permanent pages. The homepage will usually be a WP Page. Landing pages, general information content about your company, or even a contact form on your site will almost always be built with Pages and not Posts.
Now take a look at the top of a Page to compare the two. I’ve used the Weaver Xtreme theme to hide the title on this particular page, but besides the missing title, you’ll also notice that everything else seen on a post is gone too – there’s no category, date or author link.
You need to know the difference between these two ways to create content so you can choose which one to use when you’re creating different areas of your website. An informational business / brand website would likely just want to use Pages to build pages that can be linked from a menu. A blog would use Pages to create the structure and main pages of the site, and then use Posts for the new blog content. You could even create a one-page landing page website just to collect email newsletter signups – that’s best done with a Page.
Categories & Tags
Posts are organized in two main ways – Categories and Tags. You get to create the Categories and Tags for your website. The Category association with a Post is the most important, while Tags are technically optional. WordPress will automatically create pages for each Category and Tag so your web traffic can easily browse organized content on those pages.
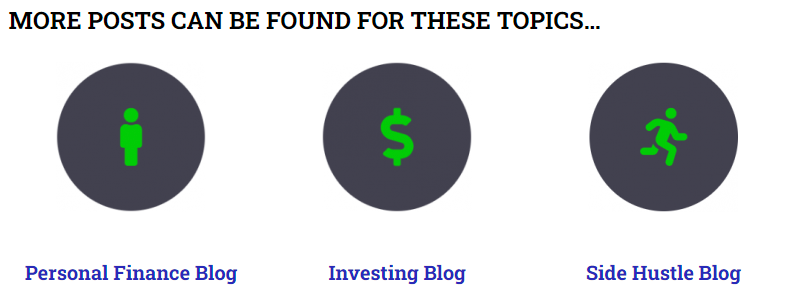
Think about the main topic or niche of your site. How can you break that topic down into a number of sub-topics so each new Post you create will fit into one of those sub-topics? SideBacon is about Money and I have content on three main topics: Personal Finance, Investing & Side Hustles. Those three main topics are the Categories that I’m using.
I’m going to show you how to create and manage Categories and Tags. However, it’s important to remember that this can also be done when you’re creating a new Post. For now, I’ll show you how this is done through the main WP Admin, but when I walk you through the creation of a Post later in this guide, I will point out how to do it there. I recommend creating your Categories before you build your site (using the method below), and then you can create Tags as needed when you’re writing new content (using the method I’ll show you in the Create a New Post section of this guide).
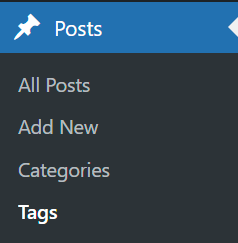
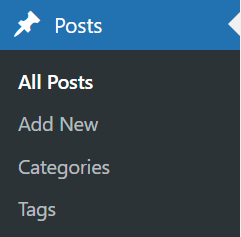
Let me show you how to create a Category in WP now. Look for the Categories link in the Posts menu.

On the left of the Categories page, you’ll see a short form that you can use to Add a New Category. Even though there are four different fields on this form, you really just need to fill out the first one – the Name. The Slug will get automatically created for you depending on what you provide for the Category Name. The Parent Category drop-down box is only needed if you plan on having a category structure and hierarchy. Unless you can build hundreds or even thousands of pages on a new site fairly quickly, it can be counterproductive to use too many Categories. You don’t want dozens of Categories that only contain one Post each – it would be better to create a few Categories and each have 10+ Posts.
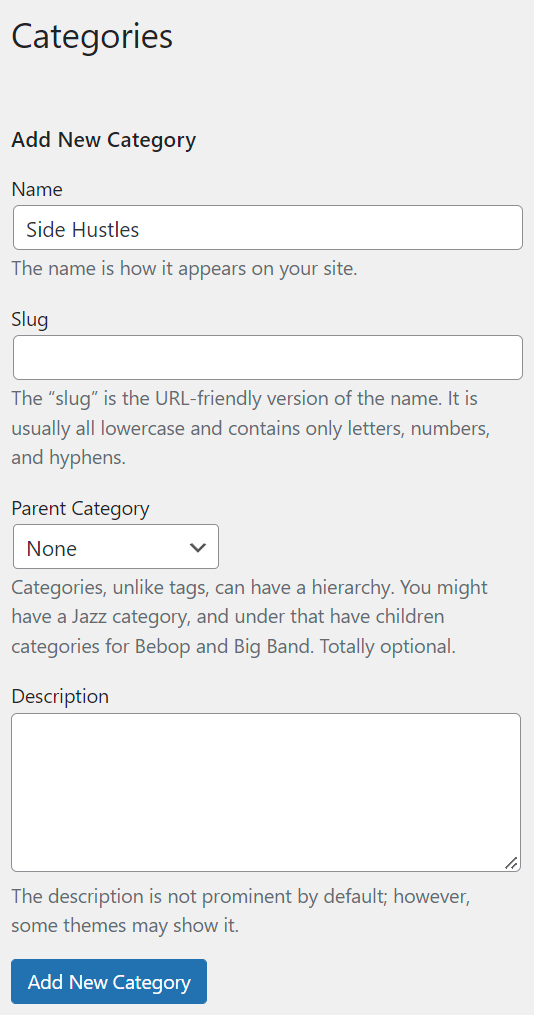
On the right side of this page, you’ll see a list of the existing Categories on the site. You can hover over any of these to edit, delete, or view the live Category page. All sites will have an “Uncategorized” Category by default, but it can be removed or simply not displayed on the live website.

In many ways, Tags work just like Categories. However, they’re really the secondary method of organization. They get their own page, just like a Category. However, the breadcrumb links for Posts will use a Category as the parent and not a Tag. In the Posts menu, there’s a link for Tags that you can use to create and manage them.
Creating a Tag works the same way. Simply provide the Name and then click the Add New Tag button at the bottom.

You can also manage existing tags the same way as categories. The list on the right shows you what you’ve created on your page. I’ve cut a small piece of my tags page below for you to see (I have 15 or so tags on my site currently).
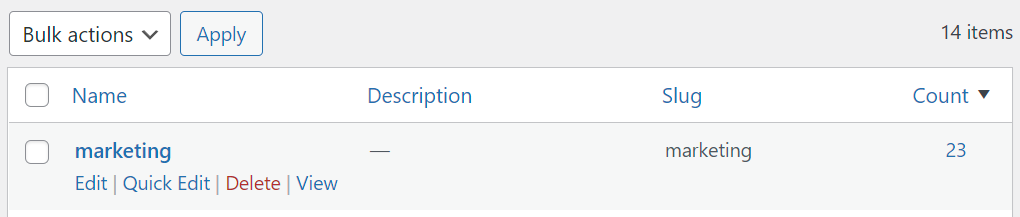
Again, I’ll often create Categories for my entire site first. Then I’ll proceed to create Pages and Posts. Before I publish a new Post, I’ll see if I need to create a new Tag. Don’t go overboard with your Tags. Use as few as possible and make them useful for your visitors. On SideBacon, my Side Hustles category can really contain a wide variety of information, so I’ll use Tags like SEO or WordPress or Marketing to give visitors a way to narrow down the Side Hustle content to learn about specific topics.
Create a New Page
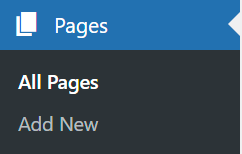
Now we can finally move on to learn how to build and publish content that will show up on the live website. I’m going to start by showing you how to create a Page and then I will move on to Posts. Look for the Pages menu and click on the Add New link to create and open a new, blank draft Page.
At the top there is a place to provide a Title. This is what visitors will see at the top of your page and also what is seen in search engine listings, so it’s really important to put thought into your Title. I have an entire training lesson that will teach you how to write page titles.

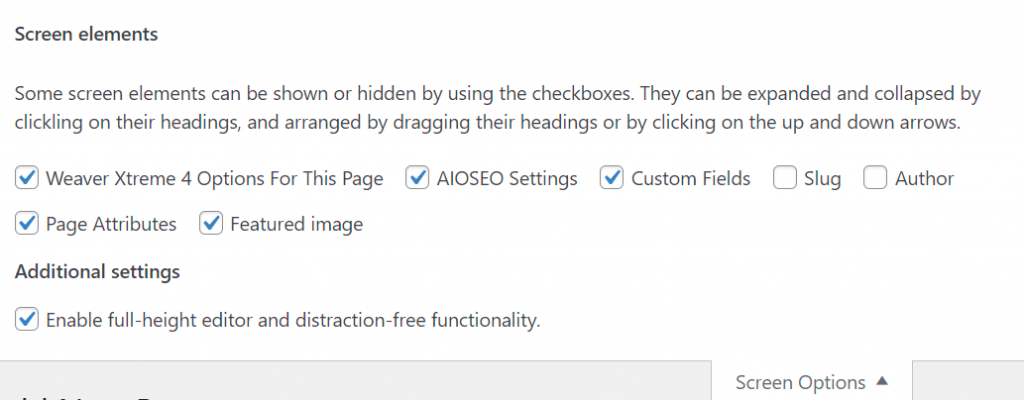
At the top-right of the screen, notice the drop-down tabs – Screen Options and Help. You can actually find these on a lot of different WordPress Admin pages. If you click on Screen Options, it will expand and show you a list of options that are included and hidden on the current page. This can be really helpful with the Page or Post Editor to remove the features that you don’t use.
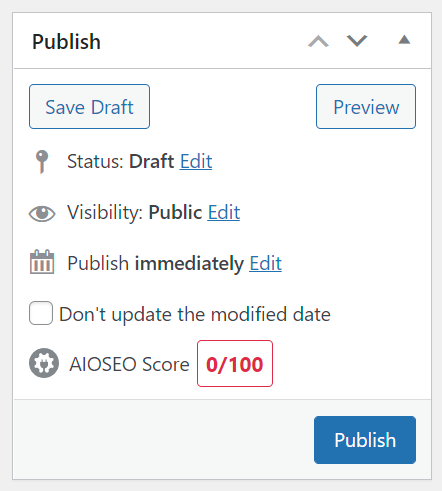
On the right side of the page you’ll find a box labeled “Publish” (this will be somewhere down the page on smaller screens and not on the right). Buttons in this box allow you to save it as a draft, preview how it will look on your website, and Publish your site. Until the blue Publish button is clicked, the Page that you’re building will not show up on your public website. Once you publish, it is replaced with an Update button so you can make changes to the live Page.
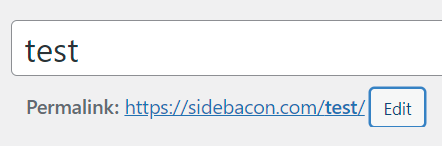
Once you use the Publish or Save Draft button, a Permalink will show up below the Title. The Permalink is the URL that is used to access the page on the internet with a browser. It will get automatically generated based on your Title. With longer titles, I will usually shorten the Permalink URL to something meaningful and to-the-point. For example, this training course page on my site is titled “How to Build a WordPress Website: Step-by-Step Training” but my Permalink URL is “build-wordpress-website”. If you’re going to Edit your Permalinks, you should use the Save Draft button, Edit the Permalink, and then Publish a new Page.
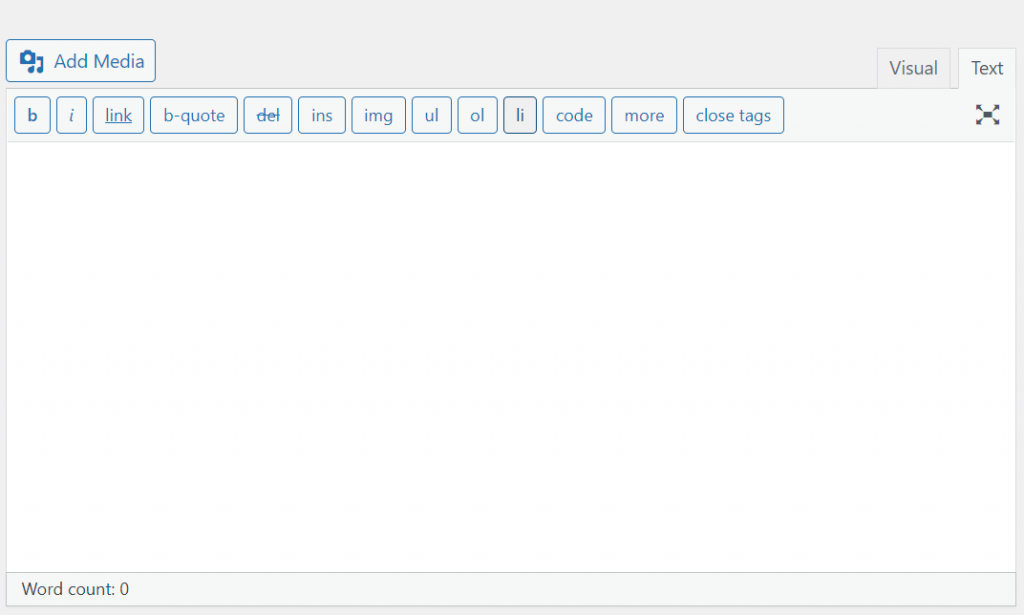
Below the Page Title is a large text box – this is the Editor Window. I should note that I really hate the changes WordPress made to this editor. I don’t do Block, Drag-and-Drop, or Visual editing. I prefer to use plain text and HTML code to build pages. It makes for clean, fast code and I find it much less frustrating than Visual Editors. I’m using a plugin called “Classic Editor” on my site and in the screenshot below to restore the older version of this editor. Feel free to try both. Notice the Visual and Text tabs on the right. I’m using the Text tab so I can enter HTML and even CSS code. If you do this on your own site, don’t switch back and forth between Visual and Text because it can wipe out some of your HTML code.
This box is where most of work goes to build a new Page. If you write an article for each Page and have images and/or videos to include, all of that goes in this box. Start out simple by writing plain text articles, and slowly add more features to your article content as you become more comfortable with the system.
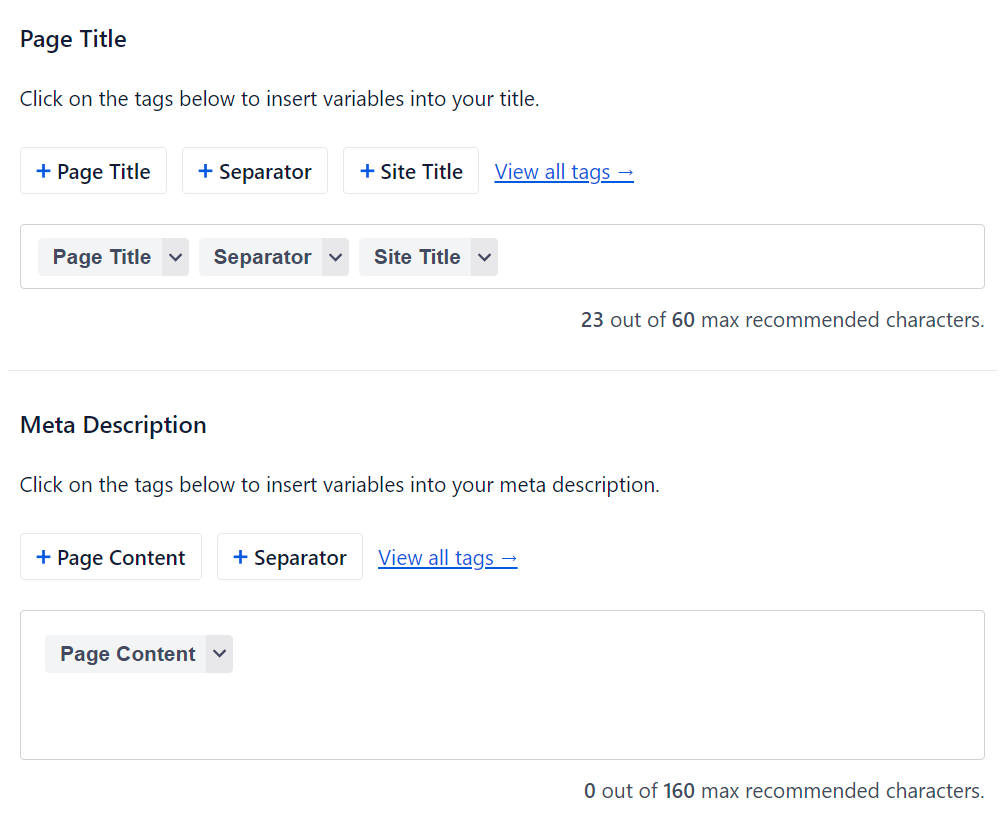
If you’re using the Allinone SEO plugin that I’ve recommended, you’ll have a section below your Editor Window that will let you provide a Page Title and Meta Description. Even though you’ve already done a Page Title, this one will get used by search engines. The Meta Description can also be used by search engines when this page is displayed in search results, so both of these sections are important. Even though AIOSEO says not to go over 60 characters, I personally find that it’s okay to go up to 70 and still show up in Google rankings. With longer titles, you may want to get rid of the Separator and Site Title additions here (they get added to the end of the Page Title by default).
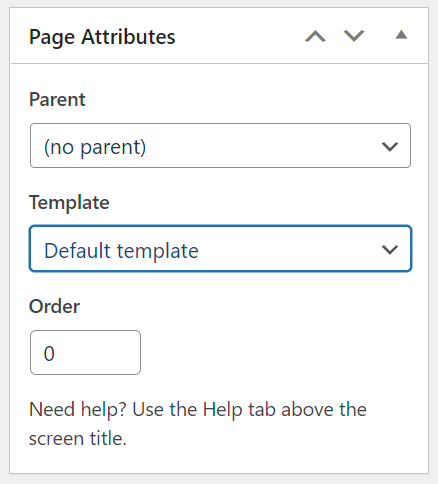
In most cases, I won’t use the settings in the Page Attributes box. However, the Parent and Template options can be useful in some situations. Pages can be built into a hierarchy structure, similar to Categories (which will show up on breadcrumb links). Setting a Parent Page here allows you to build that hierarchy in the WP system. You don’t need to use that feature though. Some themes will have different Templates that can be used to give you multiple page design possibilities. You can experiment with the Template option to see what will work best for your website.
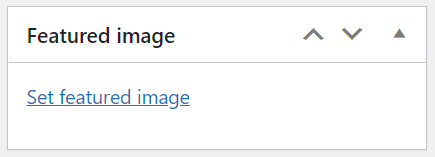
You should set a Featured image on all Pages and Posts. This is usually what will be used as an image preview if someone shares the URL on social media, so carefully selecting this image can sometimes be useful to drive more traffic. To start, click on the Set featured image link.
You will see a screen with two tabs – one to Upload files and another to view existing images already uploaded to the Media Library. Use the Upload files tab to upload an image and then select it on the Media Library tab.
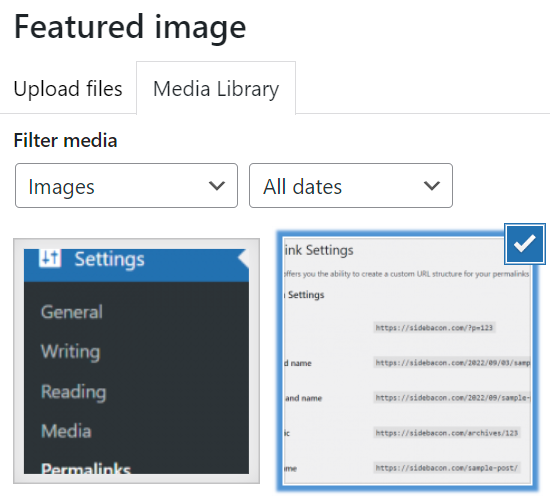
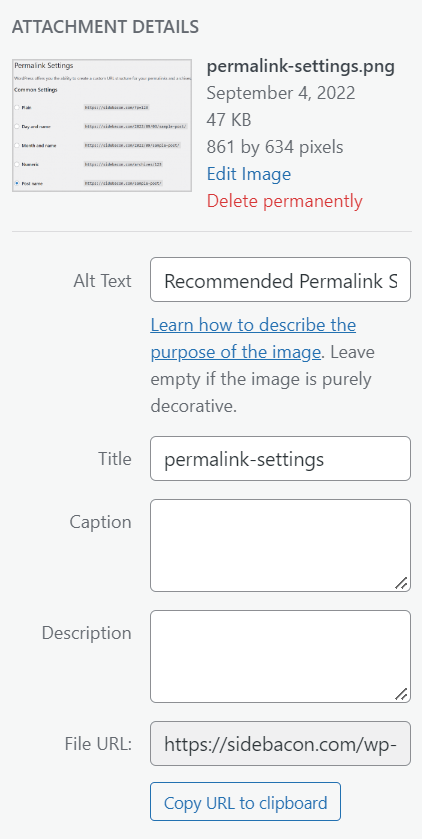
With an image selected in the Media Library tab, look for the Attachment Details on the right. At the very least, I highly recommend providing Alt Text for each image you use. If you need to alter your image, you can use the Edit Image link to do some basic editing like cropping, resizing or flipping the picture.
Once you’re finished on this screen, be sure to click on the blue Set featured image button to apply the image to the Page.
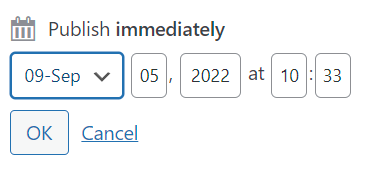
That covers all of the essential parts of the screen to add a new WP page. There are some situations when you don’t want to immediately Publish when you’re done creating. You can Schedule a Page or Post to get automatically published in the future. In the Publish box, look for the line that says “Publish immediately” – click on the Edit link to the right of that line. That opens a date and time input like you see below. Set when you want it to get published and click the OK button.
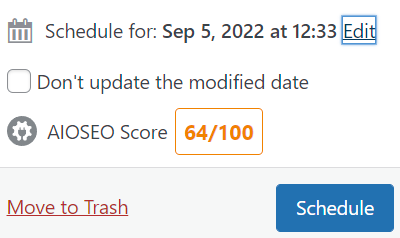
Once a scheduled time is set, the blue Publish button changes to a Schedule button. Clicking it does Publish the Page but it will get delayed until the scheduled time before it can be seen on the website.
It should be noted that scheduling won’t work if your site doesn’t have any traffic or use a cron job to ensure these automated tasks run when they should do so. On a default WordPress site with zero traffic, the scheduled Page won’t actually publish until you visit the site again.
To recap.. for each new Page that you create, these are the basic steps to follow:
- Set Page Title
- Save Page Draft
- Edit Permalink URL
- Enter Content in Editor Window
- Provide Page Title & Meta Description
- Set Featured Image
- Publish or Schedule to Publish New Page
Create a New Post
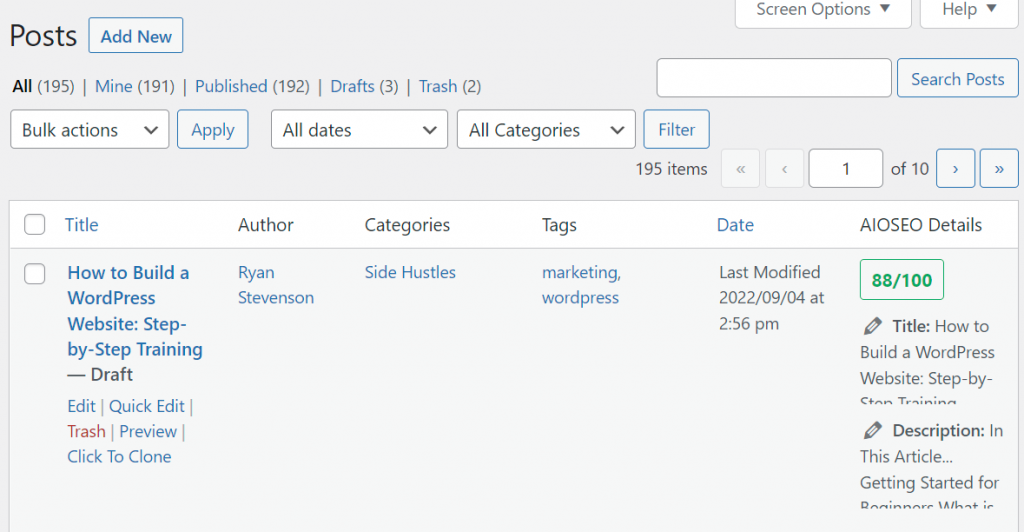
In most ways, creating a Post works the same way – you still provide a Title, URL, content in the Editor Window, Meta Title & Description, and Publish / Schedule the same way. I won’t be repeating those parts here for Posts. Instead, I’m going to show you the features that are different when you create a Post vs creating a Page. Look for the Posts menu in WP. You can click on the Add New link to start creating a new Post, but I’m going to go to the All Posts page first this time just to show you something different.
This page lists all of the Posts that you’ve created on the site (you can find a similar one for Pages). You can quickly see what is Published or still in Draft status here. It’s also easy to sort, filter, or search through the posts to find specific entries. When you hover over one of the posts, a menu will show up that allows you to Edit it, Trash it, and more. My site shows an option “Click to Clone“. That’s not a default feature in WordPress. You’ll need the “WP Post Page Clone” plugin for that to show up. You can also start creating a new Post from this list with the Add New button in the top-left.
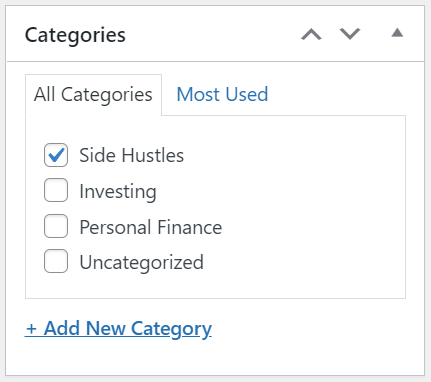
When you’re creating a new Post, all of the important parts work just like they did to create a Page except for two things: Categories and Tags. Look for the Categories box below the Publish box. You should select a Category for each Post you create. The Add New Category link here can also be used to create them directly from this page if you haven’t set them up previously.
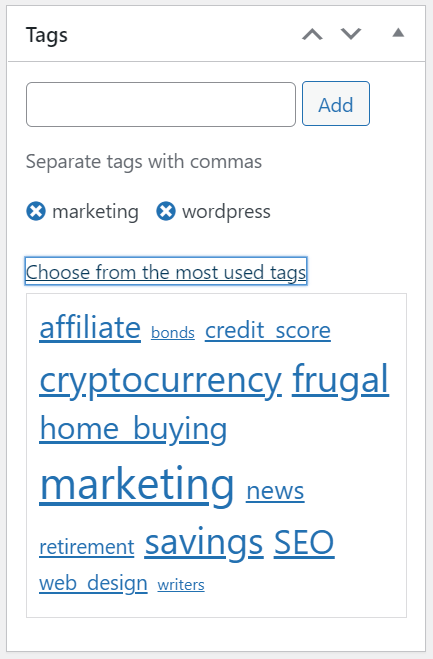
Below that is another box for Tags. Typing in a word or phrase into the box and then clicking the Add button will create a new Tag if it doesn’t already exist or select that Tag if it has been created previously. You can also click on the Choose from the most used tags link to see a cloud view of your site tags (larger, bolder text indicates more Posts use that particular Tag). Click on any Tags in the cloud view to add them.
You should have an understanding of how to create Pages and Posts now. There are just two more key features to learn how to use, and then you’ll be ready to start building.
Menus
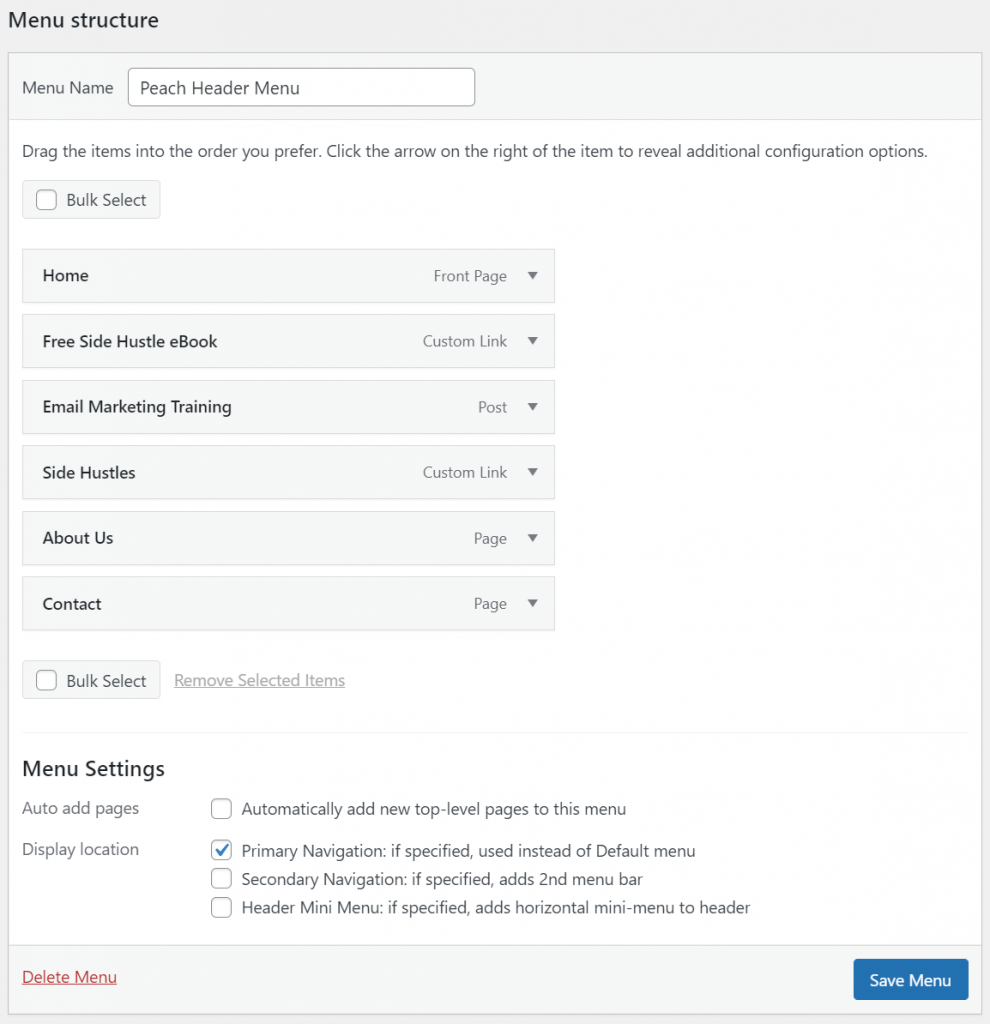
Think about other websites you’ve seen. Every page has links, usually at the top and bottom, that allow you to navigate through the main areas easily. You’ll need to figure out what pages of your site will be best served with a menu link at the top and/or bottom of your pages. The home page is almost always included. Category pages and even some custom Pages, such as a Contact page, that you build could be linked there as well. To make and add these menus to WordPress, look for the Menus link in the Appearance menu.
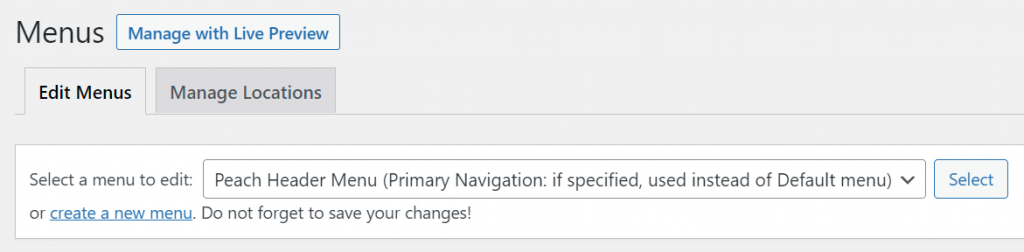
Each WP Theme chooses where menus can potentially show up – these are called Menu Locations. There are two tabs on the Menus page – one to Edit Menus and another to Manage Locations. The Edit Menus tab will be selected by default and the Primary Navigation menu will usually be selected already (if one exists). If not, there is a text link here to create a new menu.
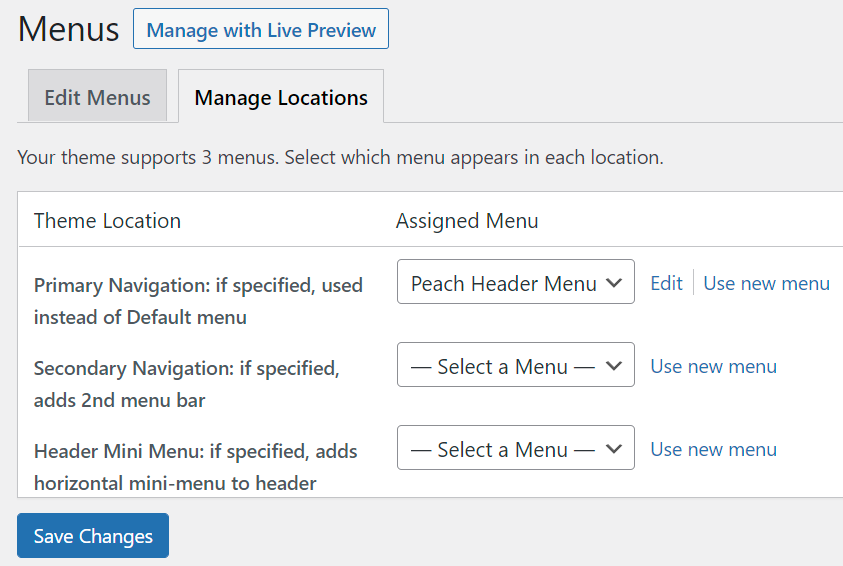
On the Manage Locations tab, you can see how many menu locations your theme supports and which menus are assigned to each. You do NOT have to use all menu locations. I actually just use one on my site – the Primary Navigation.
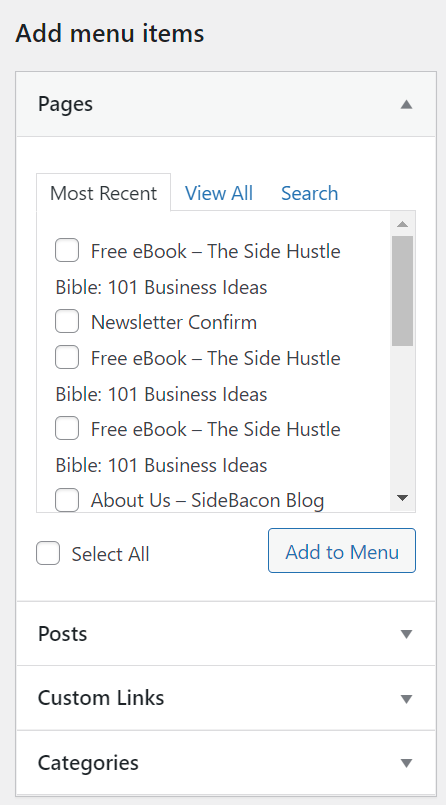
When you are editing a menu on the Edit Menus tab, you’ll see a list of ways to Add menu items on the left. Here you can easily select specific Pages, Posts, Categories, or even Custom Links to be used in the menu you’re editing. Select an item and click the Add to Menu link to add it.
Any links that have been added to the menu will show up on the right. At the bottom of that window, there’s a section titled Menu Settings. You can easily see the Menu Location from the checkboxes here. If you create Pages and they automatically show up in the menu at the top of your site but don’t know why, the Auto add pages checkbox is selected for your Primary Navigation menu – I’m not a fan of using that setting. You’ll need to click the Save Menu button in the bottom-right to publish changes to the menu.
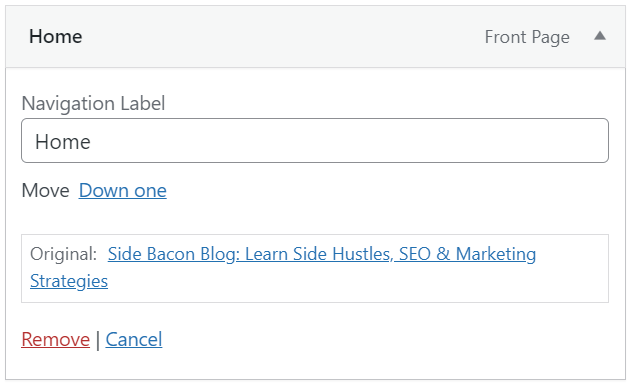
In the list of menu links, you can click on one of them to expand it. This allows you to edit it or even delete it with the Remove link.
To change the order of menu items, click on one and drag-and-drop it into a new position.
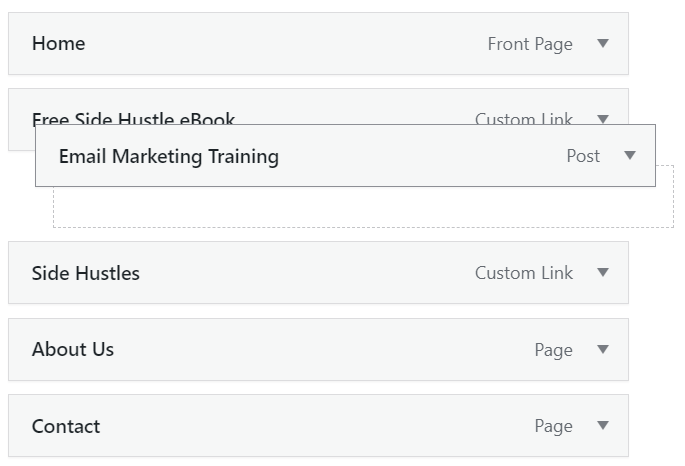
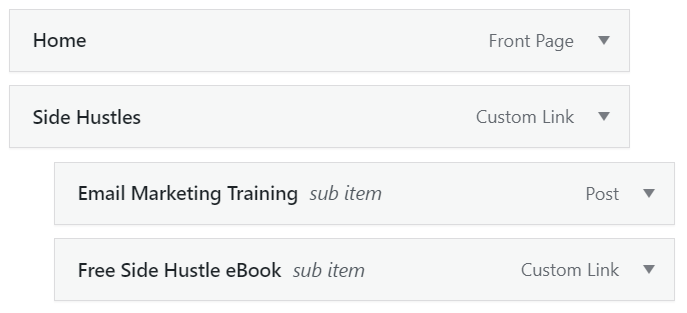
You can also create sub-menus with drag-and-drop. These sub item menu links allow you to have more links in less space. Visitors will need to hover their mouse over the parent link to see the sub items.
Since you likely haven’t created all of the initial pages for your website, you’ll need to revisit this menu system later to build easy navigation links for your visitors. For now, think about the Pages you’ll need to create for these main links on your site.
Widgets
Each WordPress theme has a wide variety of Widget locations, such as in the sidebar. These elements will usually show up on all pages of your website, so it’s content outside of the main content of each page. A Widget could be custom HTML code, a menu, images, advertisements, email newsletter signup forms, and more. I want to show you how this system works so you can use it on your own site. First start by clicking on the Widgets link in the Appearance menu.
On the Widgets page, everything is shown visually and grouped by Widget locations. For example, my theme shows the Primary Sidebar widget location at the top. This is what shows up in the right-hand column of most pages on my site (at least on desktop browsers). This Widget location actually has numerous being used – a search bar and 3 different menus.
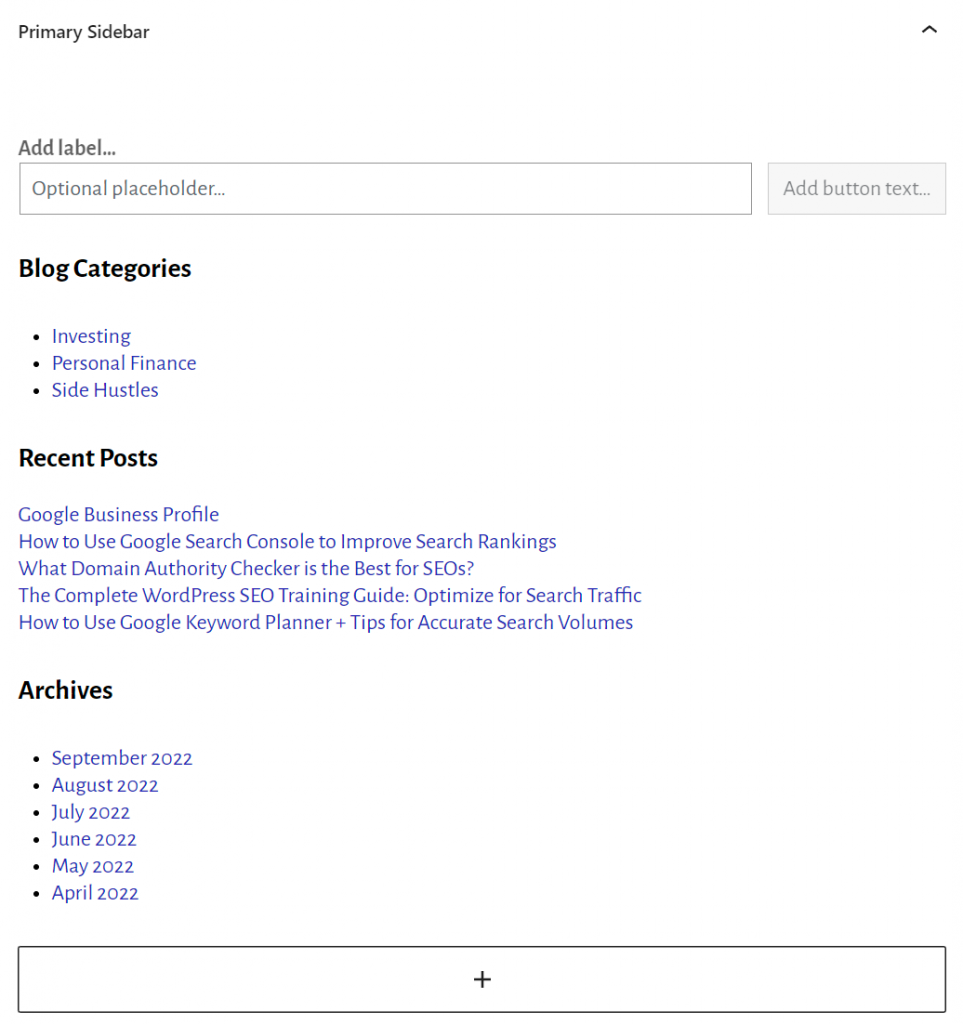
Note the large box with a plus inside of it at the bottom of each widget location. This is the Add block button, which lets you add a new Widget to that location.

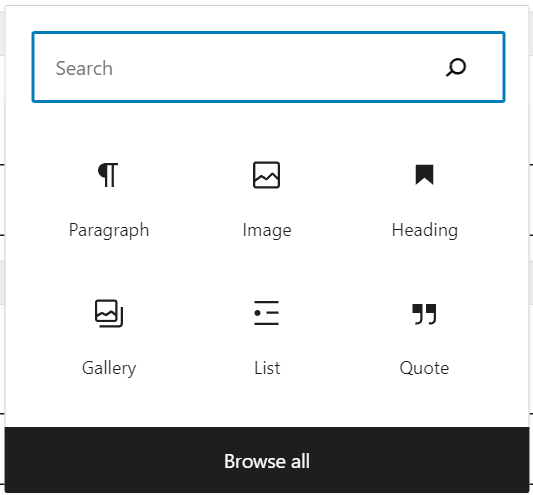
The initial list of Widgets to add is rather short, but you can click on the Browse all button to see many more choices.
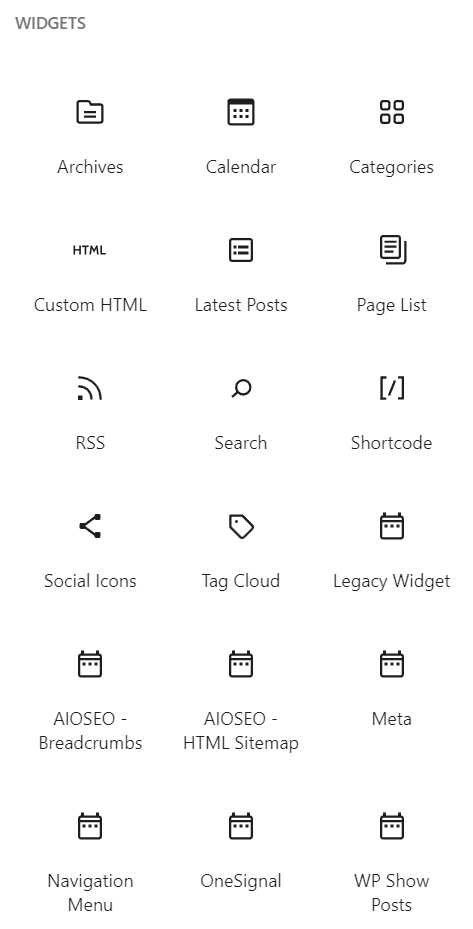
This list of possible Widgets still doesn’t show all of the possibilities, but it does contain many of the more useful options. For example, the “Categories” widget will show links to your site categories, “Latest Posts” will show the most recently published Posts on the site (great for a blog), and “Custom HTML” can be used for almost any purpose including email signup forms, Google PPC Ads, or affiliate advertisements.
Besides the Sidebar location, I’ll often use the Footer Widget Area on most of my websites. On this site I have used a Custom HTML Widget so I can use my own code to show some links and possibly a few images too.
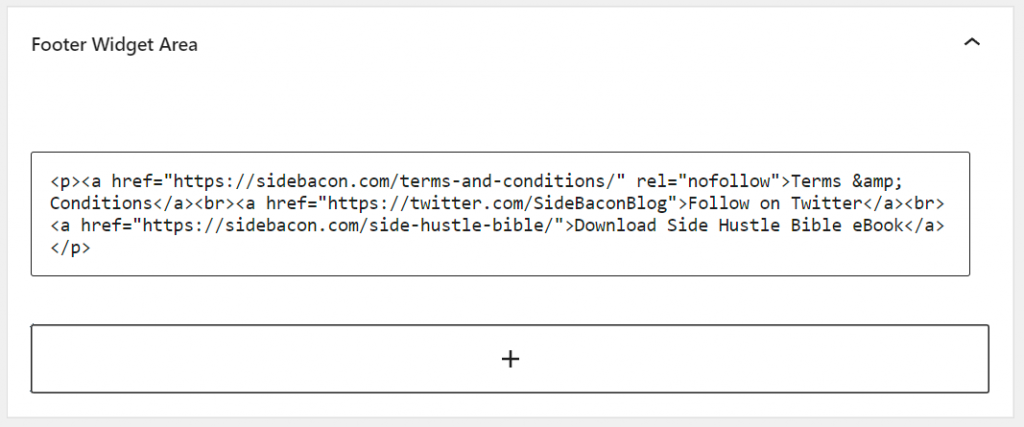
If you make any changes to Widgets, you need to click on the blue Update button to save the changes and publish them to the live site.

For your site, think about what you would like to see in different areas of the page, and try to accomplish that using Widgets. If you need to build some new pages before you can create links for them in a Widget, you may need to revisit this area later during your site construction.
Website Planning
At this point in the training, you should have a pretty strong understanding of how the WordPress content management system works and how to use it to create a website. Now you need to plan your pages and start building!
Site Structure Planning
The best performing websites have user-friendly navigation that makes it easy for visitors to find the information and pages they seek. This navigation provides structure and organization, not just for your web traffic but also for search engines like Google.
Think about the content you want to have on your site, both short-term and long-term. How could that content be organized in a way that makes sense and makes it easier to find specific topics?
The Side Bacon Blog contains three categories that are the main organization of the site:
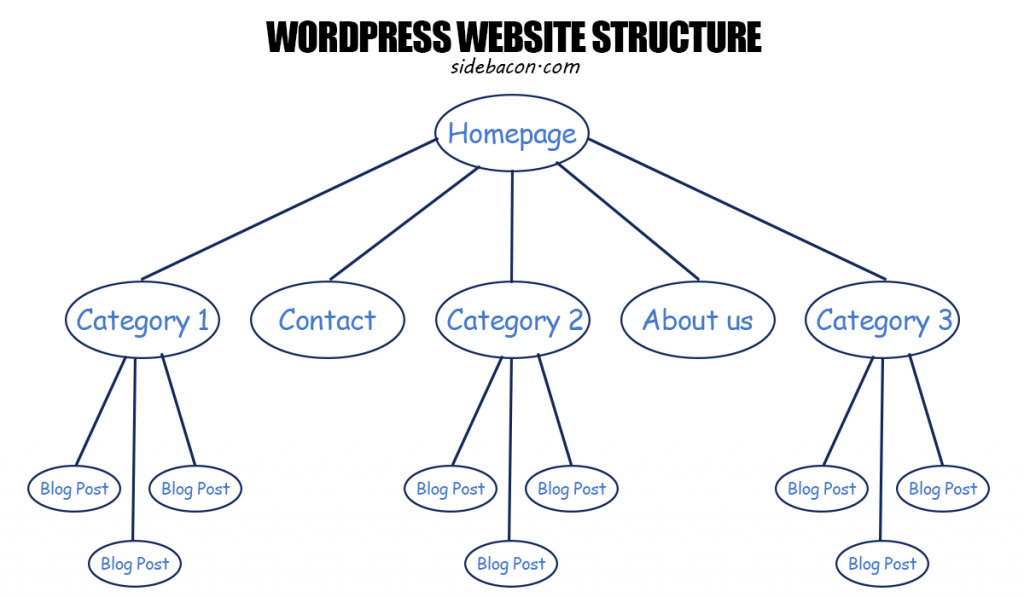
I’ve created a picture for you below to show you a fairly simple site structure layout. The homepage is the primary page. It links to your Category pages, which then link to your blog posts. You need to arrange your site in a similar manner so your pages have some kind of hierarchy structure – this will help site traffic navigate your content and it will help search rankings.
Essential Site Pages
When you’re first getting started, you probably won’t know the topics for all of the pages you want to create. That’s okay since most of that content will be added to the site gradually over time. Initially, you mainly need to worry about the basic, essential pages that will form the overall site structure.
In general, these are the essential pages that I recommend for most websites:
- Home
- Category Pages
- Contact
- About Us
- Privacy Policy
- Terms & Conditions
Open a Notepad file on your computer or pull out a sheet of paper. List each of the main pages that your website will need. You can even draw a hierarchy web like my example in the previous section if it helps you to visualize it this way. You’re going to need to create each of these pages in the initial phase of your construction work. Once those pages are complete and connected on the live site, you could then proceed to create new content on a regular basis, such as blog posts. With a properly set up WordPress site, you won’t need to make any changes when you publish a new blog post because they will get automatically displayed. Read through the next couple of sections in this training before you start building pages though.
Custom Category Pages
When you create a Category in the WordPress system, it will automatically create a page for you that shows posts from that category. The URL of that page will usually look something like this: sidebacon.com/category/side-hustles/
The main problem that I have with automatically generated Categories is that you can’t edit them or add extra content. I like to have control over those pages, so I create custom Category pages to override the defaults. Take a look at my Side Hustle Blog Category – this page has a custom title and extra content to go along with the listing of recent blog posts. I’ve also customized the way posts are displayed there.
If you want to have custom Category pages too, follow these steps. You’re going to need two plugins on your site to accomplish this goal. The first plugin is called “WP Show Posts“.

The second plugin you’ll need is called “301 Redirects“. Both of these plugins can be found and installed for free through the WP Admin (Plugins -> Add New and then search for those names). Be sure to Install and Activate both plugins.
Look for the new menu for WP Show Posts and click on the Add List link.

In WP Show Posts, there are a lot of different options you can use to customize each list of posts to change how they are displayed and the information shown with each post. Feel free to play around with those options to achieve the look you want for your website.
You’ll need to create a list here for each of the custom Category pages. The most important settings can be found on this main page – select the relevant Category checkbox listed under Terms and also adjust the Posts per page (10 get displayed by default but I usually like to show 20).
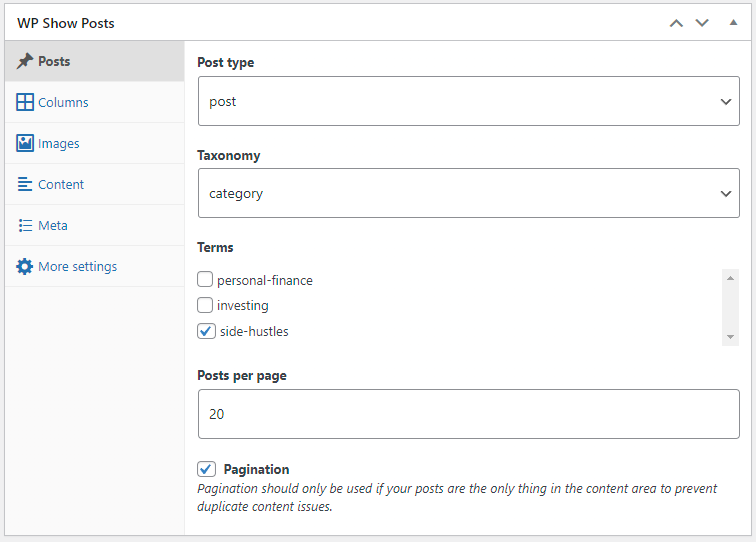
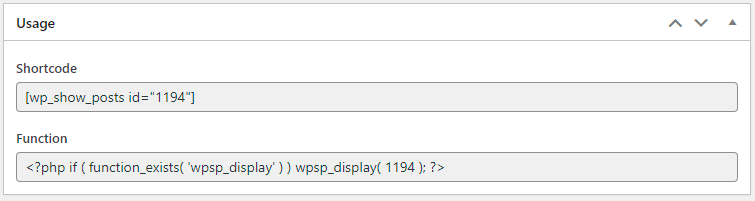
On the same page, you’ll see a box labeled Usage. You need to copy everything in the Shortcode text box – this goes in the content of your custom Category page.
Go to Pages -> Add New in the WP Admin menu to create a new page. Give it a title and change it’s URL to make it short and meaningful. I’ll usually make the URL the same as the Category name, just to keep things simple. You can see below what I’ve done for my “Side Hustles” category.
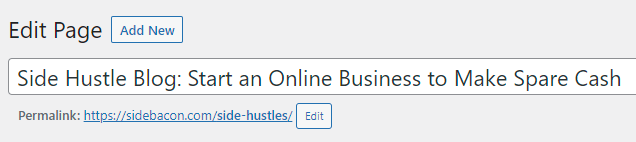
In the Editor Window, paste the shortcode for the Post List. Publish the page when you’re done. Here’s what mine looks like:

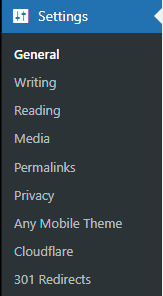
At this point, the custom category page is created. However, links on your website will still send visitors to the standard Category page and not your custom page. All you need to do is set up a 301 redirect to ensure nobody visits the old pages anymore. First click on the 301 Redirects link in the Settings menu.
On this page, you need to take three steps to set up the 301 redirect:
- Redirect From – Enter the URL of the old category page without your domain name. For my site I entered: category/side-hustles/
- Redirect To – Enter the full URL, including the domain, to the new custom category page. For my site I entered: https://sidebacon.com/side-hustles/
- Click the Save button
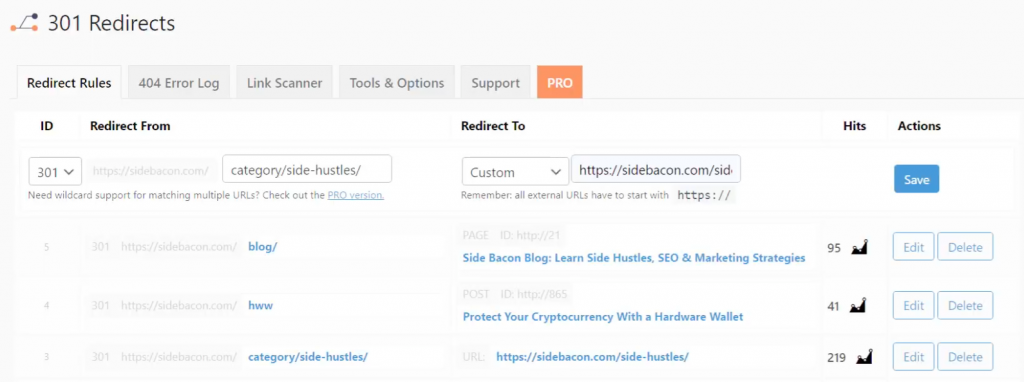
The picture above shows this process both before and after you’ve created the redirect. The Redirect From / To text boxes show what I’ve entered to create the redirect, but at the bottom of the picture you can see how the same redirect looks after it has been saved.
With a successful 301 Redirect set up, you should be able to visit the old category page URL in a browser and end up on your custom page instead. Blog posts for that category will still use the old link, but with the 301 redirect in place, that’s okay.
Linking Content
Category pages will be one of the main ways that visitors find your content, but it shouldn’t be the only way. As long as they are done in a meaningful way, more links on your site to your other pages should be beneficial.
Consider using links in a variety of locations on your website:
- Header Menu
- Sidebar Menu
- Footer Menu
- In-Page Text Links
- In-Page Image Links
Earlier in this lesson I showed you a picture from the homepage of my site that links to the three category pages:
Here’s the HTML and CSS code I’ve used to create the link layout above – you’ll need to set your own images and page URLs to use this code on your own site.
Start Building Your WordPress Website!
Your WordPress training is now complete! I sincerely hope you have found this tutorial helpful in teaching you how to build your first site. If you know anyone else that could benefit from this knowledge, please share this page with them.
Now that you know how to use WP, it’s time to start building the pages on your site. Start with the list of essential pages that you recently created, which might include a few custom category pages. Once you have those pages finished and published, add menus, widgets and other links to your site so that everything is connected and easy to find for your traffic.
When the basic structure is completed, you can then proceed with normal content creation – what this looks like really depends on the type of site you’re building though. For a blog, you would be able to start writing posts to publish them for readers and to grow an audience.
Want More Training or Personal Help?
- Contact Me – Want private coaching, SEO services, or other personal help with your WordPress site?
- The Complete WordPress SEO Training Guide
- How to Use Google Keyword Planner
- How to Use Google Search Console
WordPress FAQs

Why WordPress is the Best CMS?
In one word: versatility. Most content management systems are designed for a specific purpose, but the themes and plugins available for WP allow it to be used to create almost any kind of website you can imagine. This can sometimes make it overwhelming for beginners, but more experienced and expert marketers love these features and exclusively use this CMS as a result.
Which WordPress Theme is the Most Customizable?
My vote is for Weaver Xtreme. This training guide features the usage of this theme because it is the one that I personally use on almost every site I’ve built for the last decade. I like it so much because of the extreme amount of customization options that are available. With this theme I can adjust the site design for almost any purpose.
Are WordPress Sites Slow?
They can be slow, but they can be blazing fast too. You’ll need a good hosting account so the server doesn’t become a bottleneck. It’s also important to be careful about the theme and plugins your site is using. Using too many plugins or ones that are poorly coded can be the most common reason why some sites will run slow. This guide teaches other tactics such as page caching that can help improve page loading times.
Are WordPress Websites Free?
Yes and no. The software is free, but to correctly use it, you’ll need to pay for a domain name and web hosting account. Those expenses are fairly minimal though, and they are the only required costs to run a WP website.
Can WordPress Be Used For eCommerce?
Absolutely. I personally use it with the WooCommerce plugin to run an eCommerce site that makes six-figures in annual profits. I’ve tried building this type of site using other systems and find WP to be the best choice. It is also recommended for beginners since the software makes it easy to connect payment systems, set up product pages, manage your shopping cart system, and more.
What side hustles can I do with WordPress?
Almost any kind of online business that requires a website can successfully use WP. If you need ideas for types of businesses to create, you can join my newsletter and get a free ebook that will teach you about 101 side hustles. You can join this list and download the ebook here: The Side Hustle Bible